The Zing Data platform supports the following single sign on providers. Please reach out to us at hello@getzingdata.com to get support for an SSO provider that is not yet listed, and we’d be happy to assist.
1 - Microsoft Entra ID / Active Directory
Microsoft Entra ID (formerly Azure Active Directory) is a comprehensive identity and access management (IAM) solution providing:
- Single sign-on (SSO): Access multiple applications with one set of credentials.
- Multi-factor authentication (MFA): Add an extra layer of security.
- Conditional access: Grant access based on specific conditions.
- Directory synchronization: Easily manage user identities across systems.
Integration Setup
- Go to the Azure Portal
- Navigate to Microsoft Entra or Azure Active Directory.
- Click on App Registrations.
- Then click on New Registration.
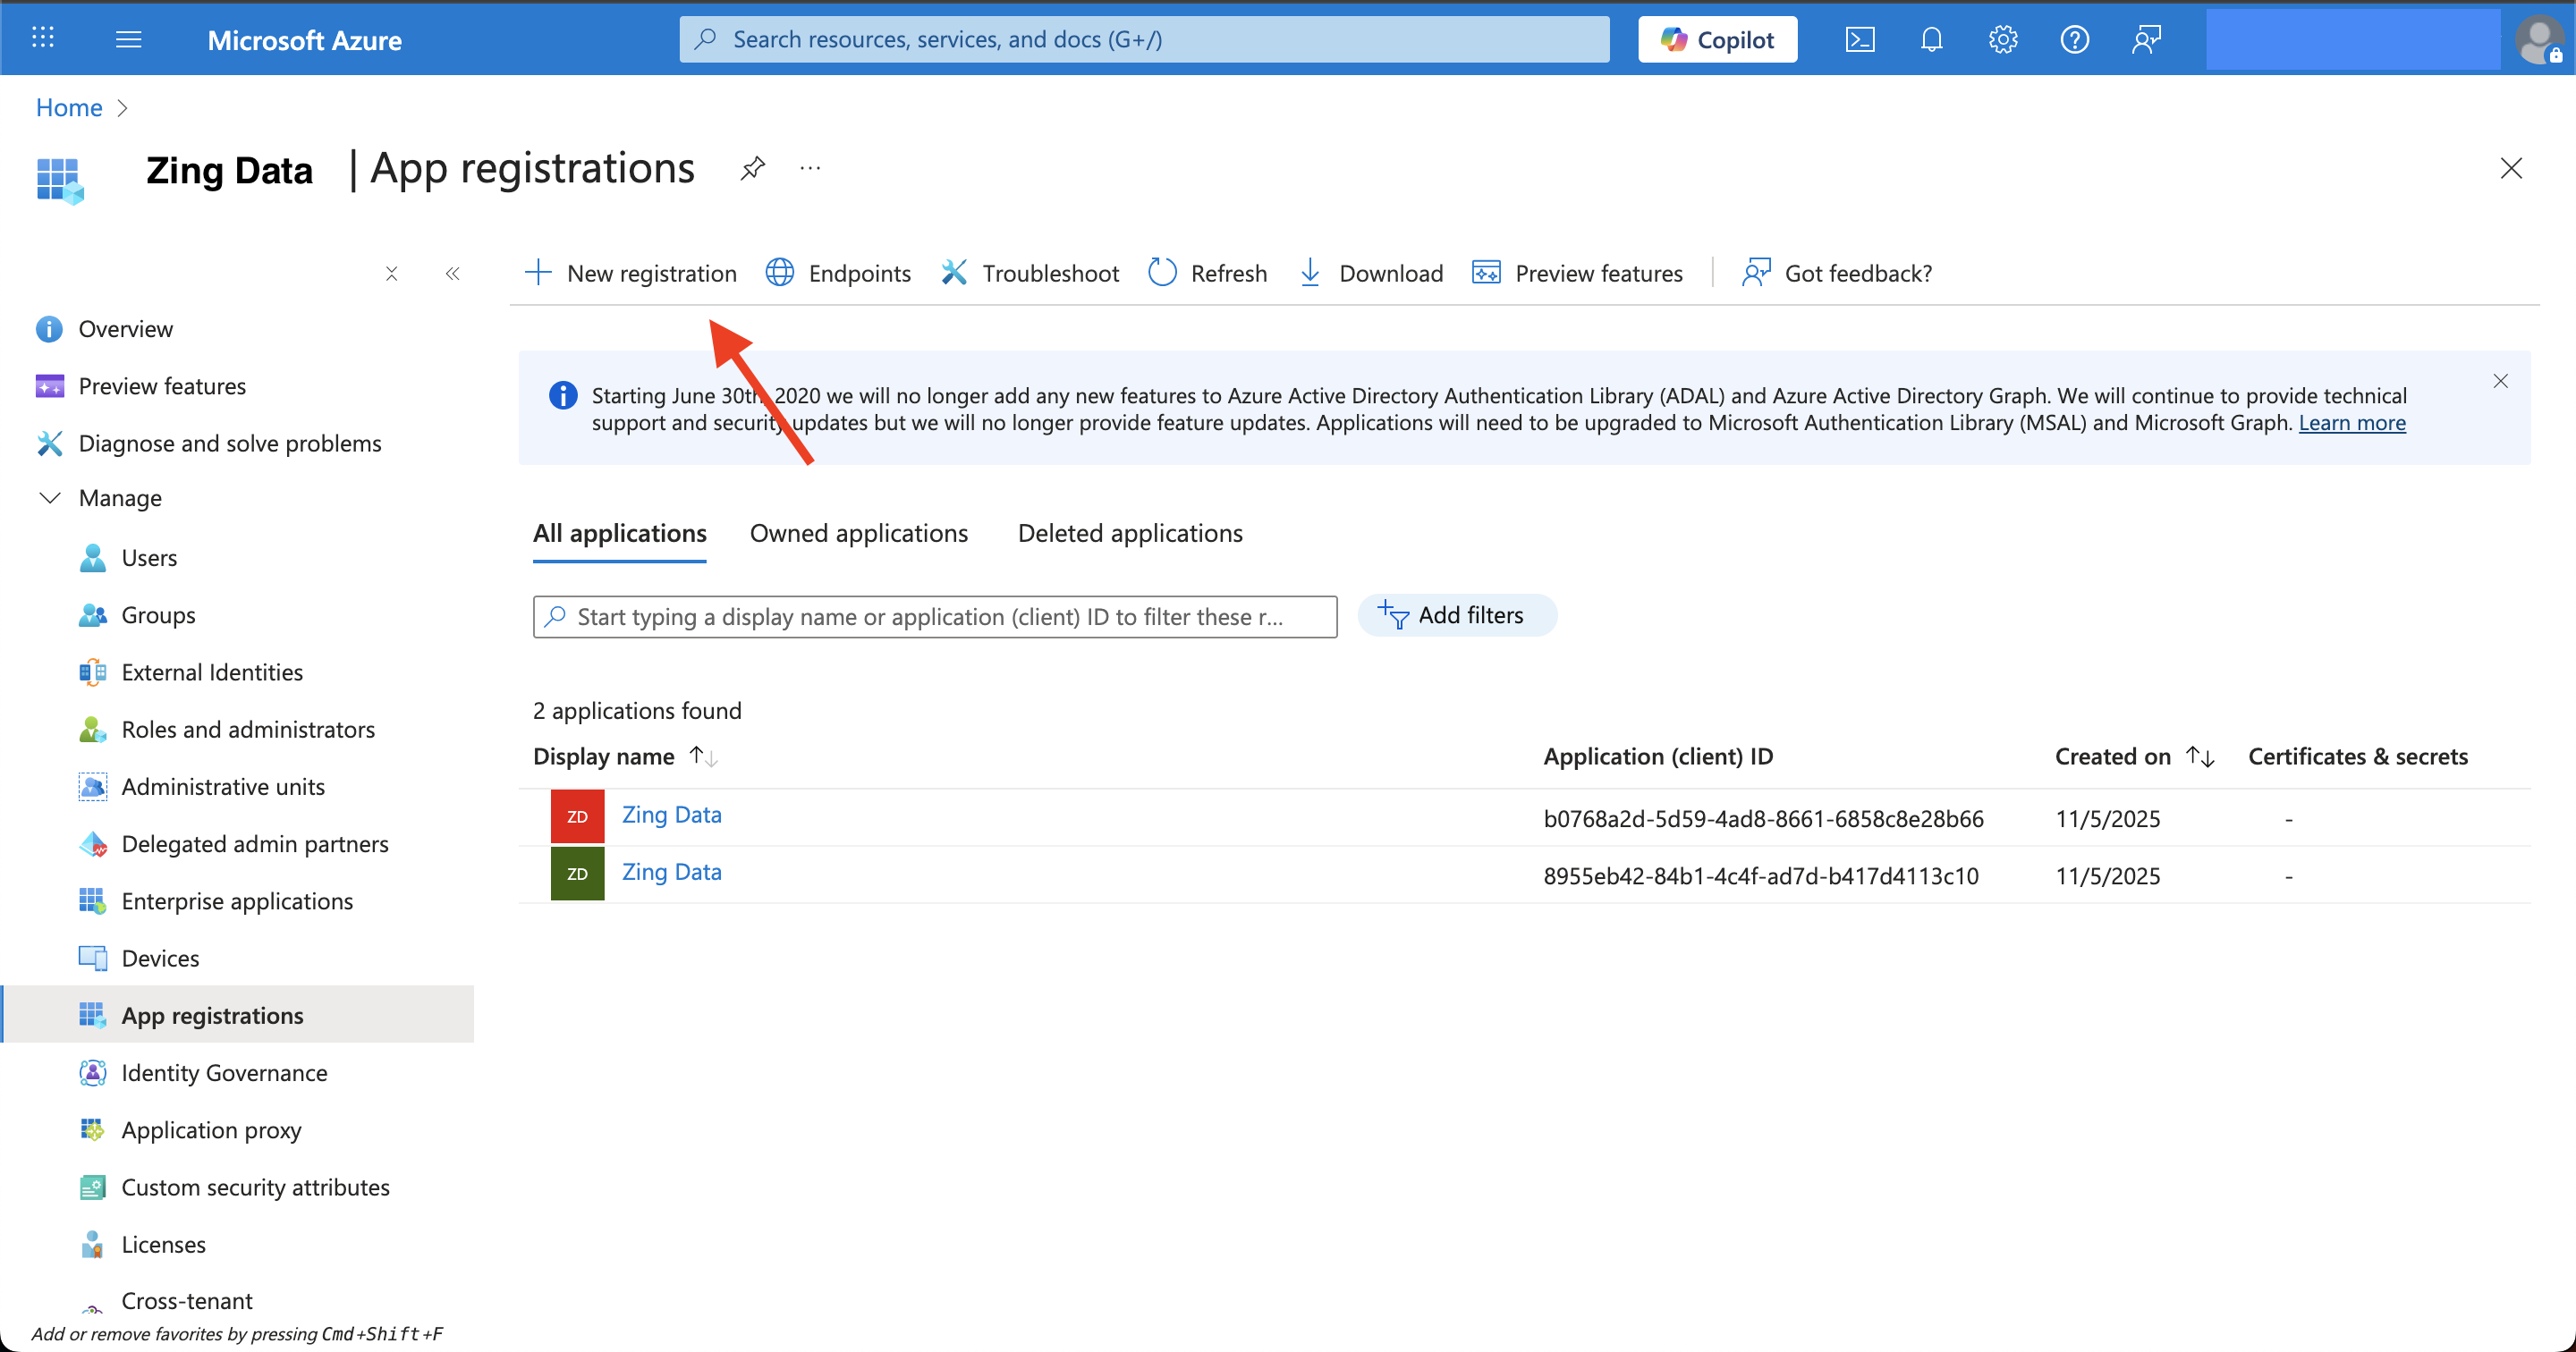
- Fill the details like the example below.
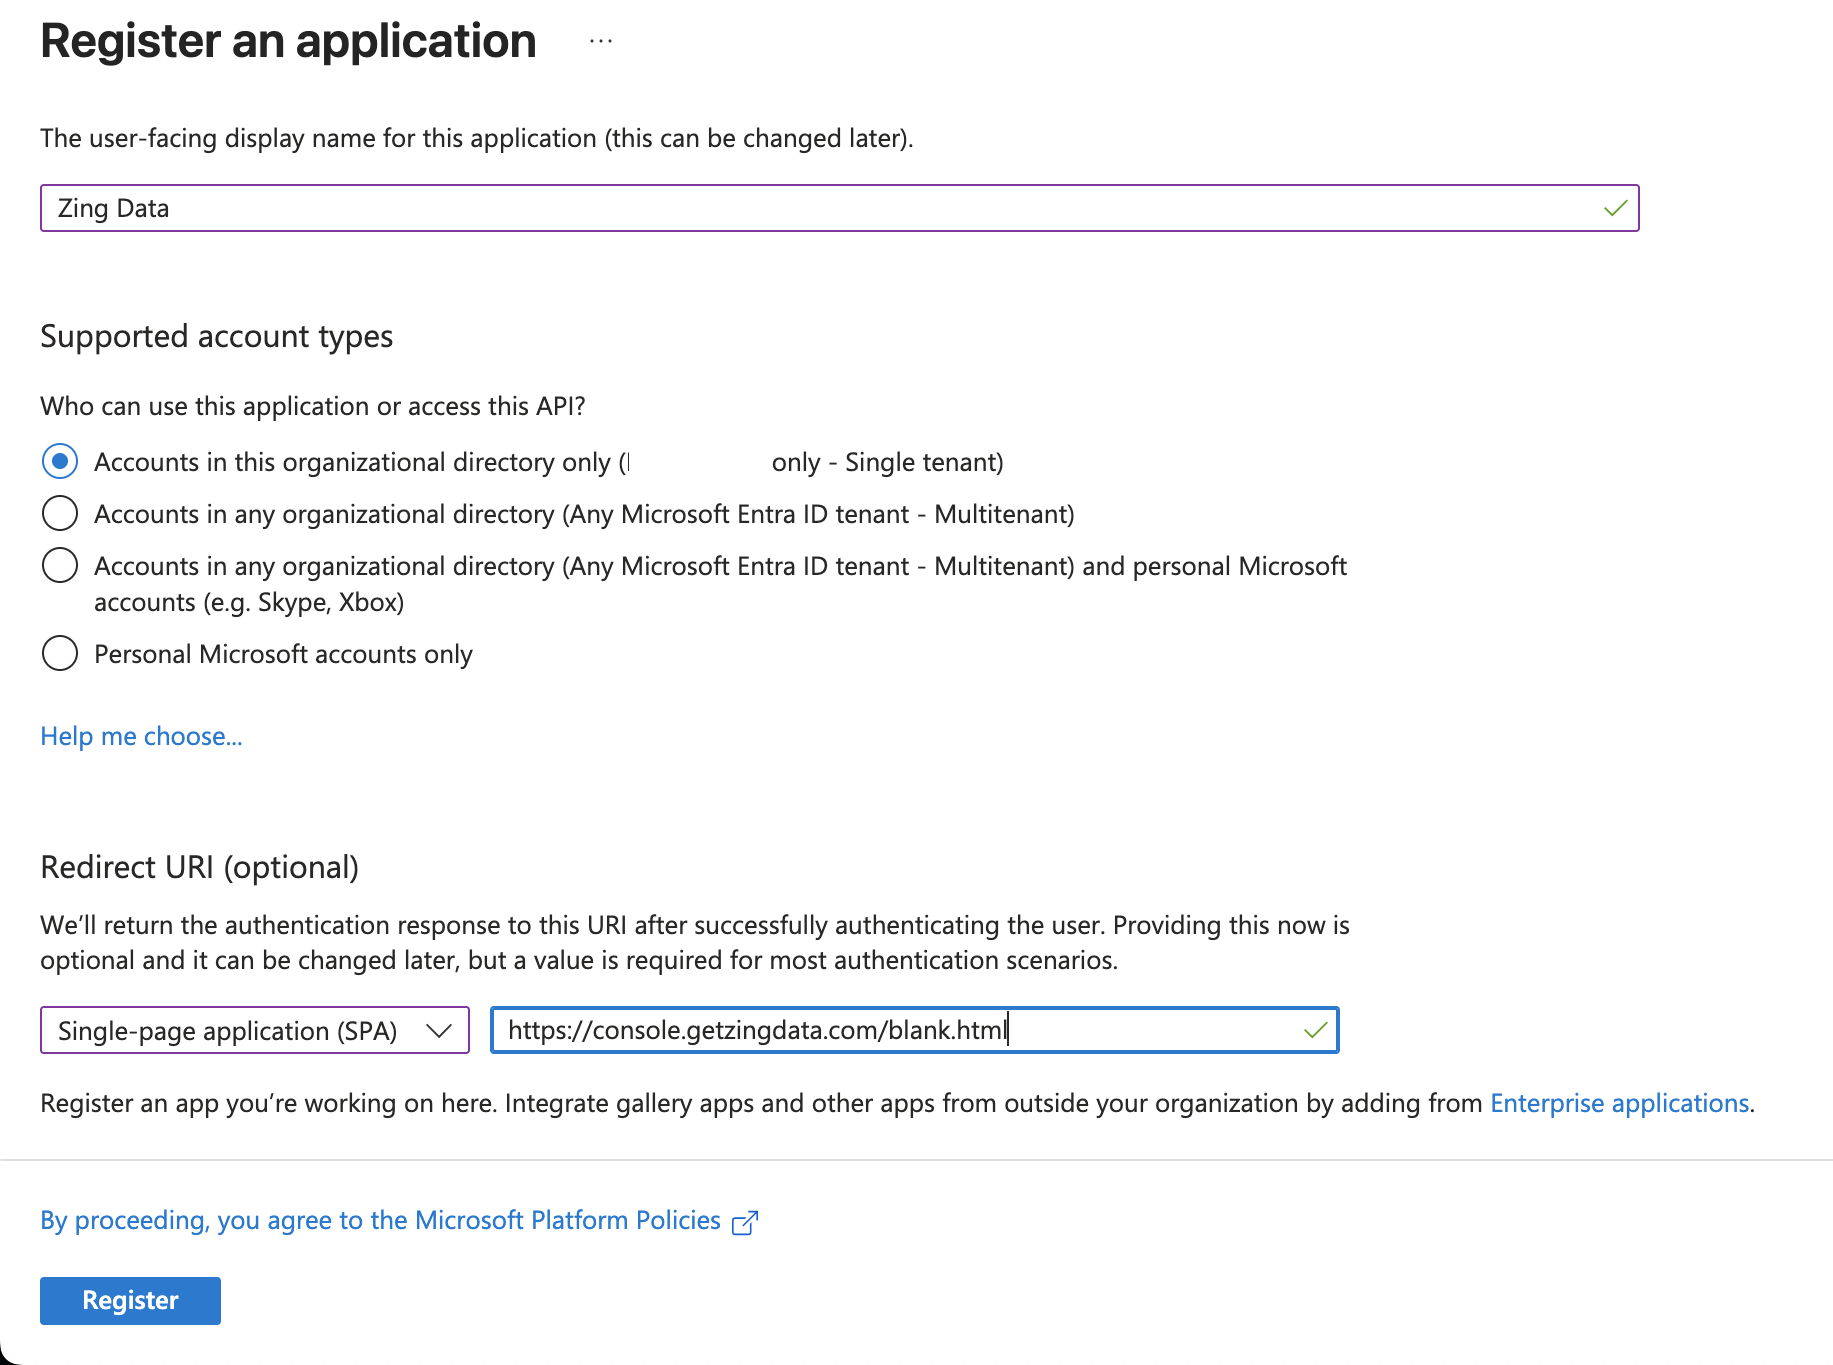
- Click Register

- Once the app is registered, we need to go to Expose an API on the left side menu.
- Click on Add a scope.
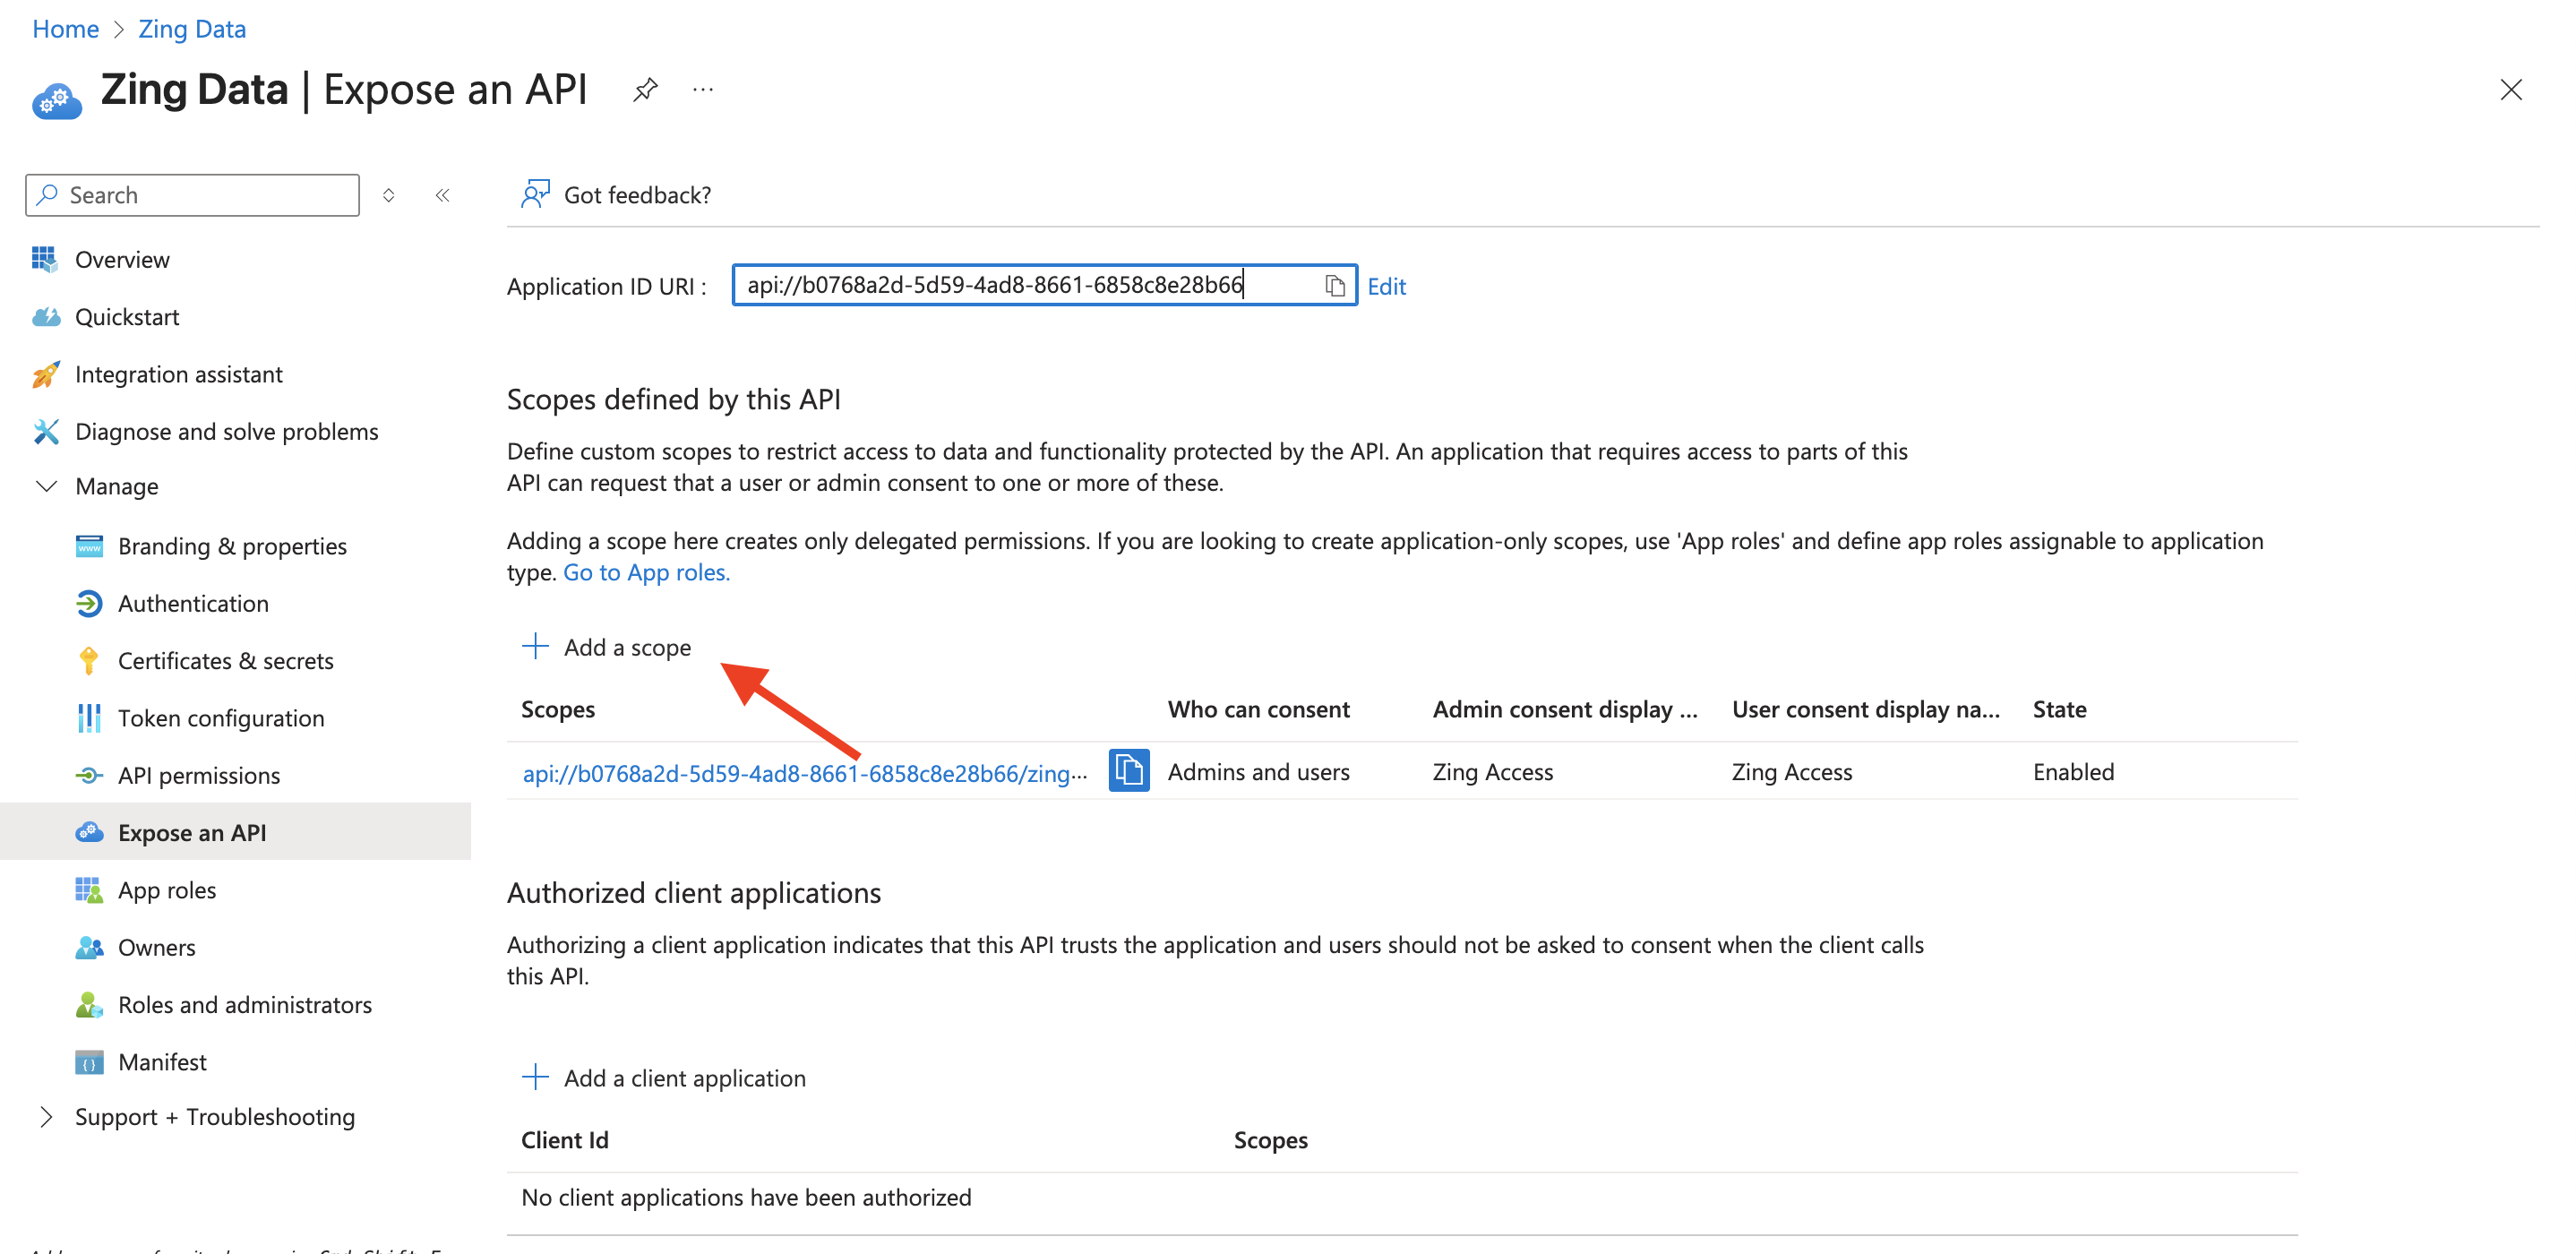
- Fill the details like the example below. (Make sure to use Admins and users for the options “Who can consent?”.
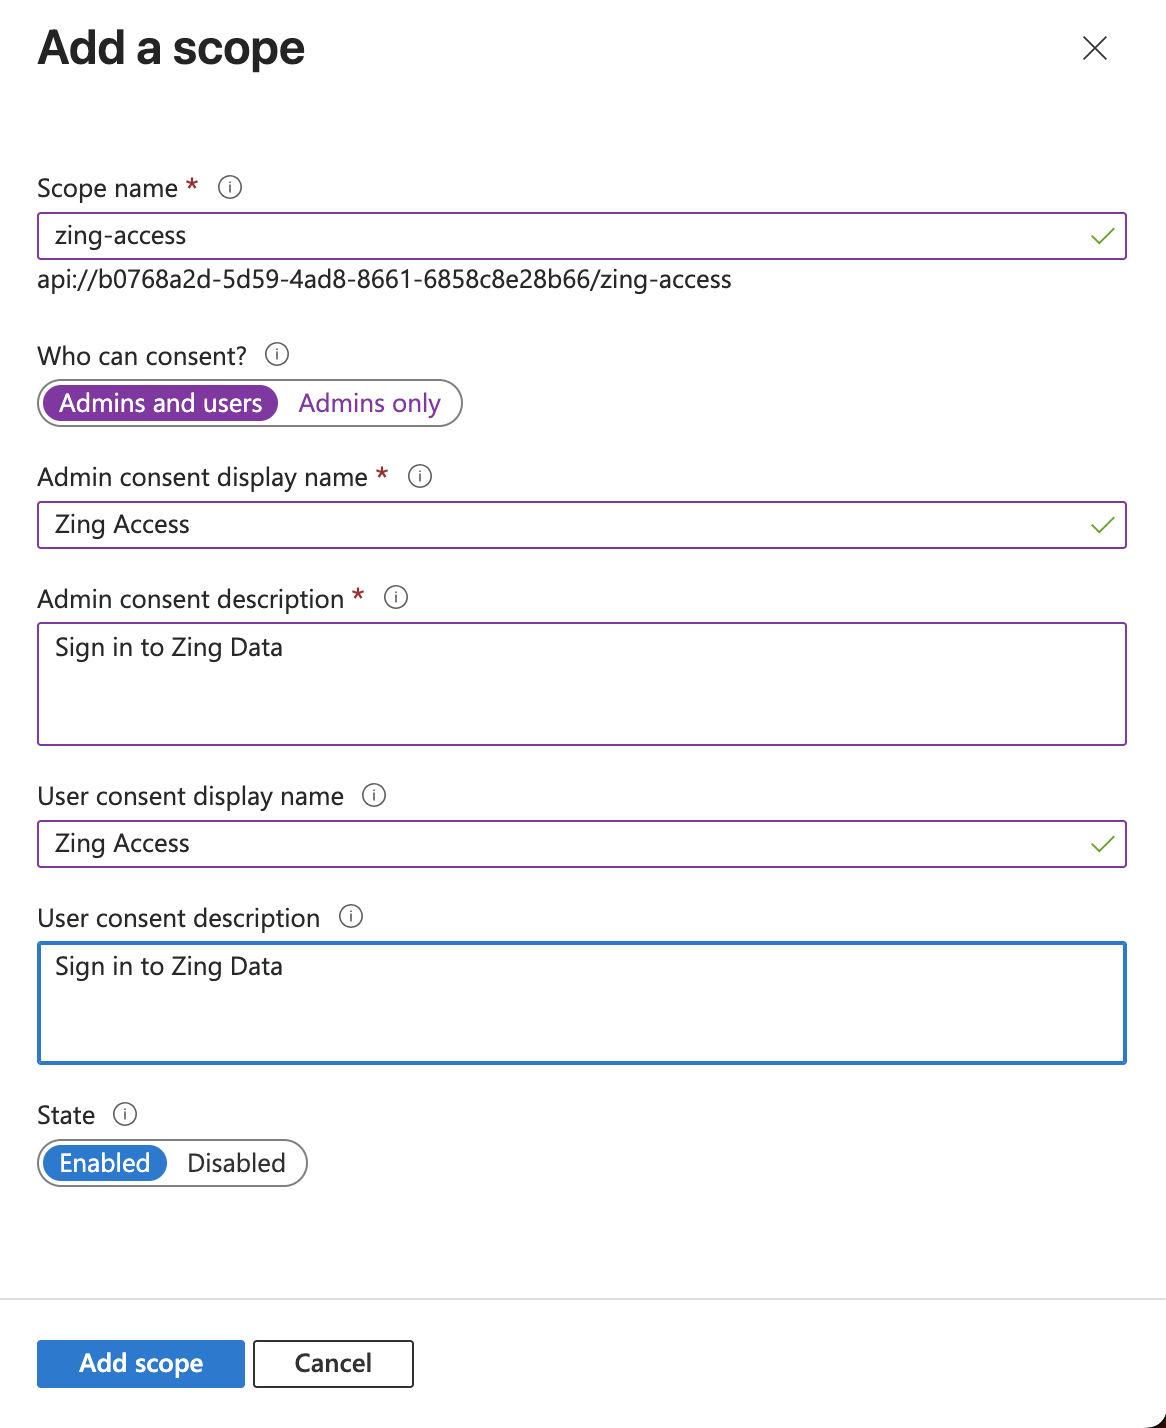
- Once you click in Add scope in the bottom, On the left side menu, click on API permissions.
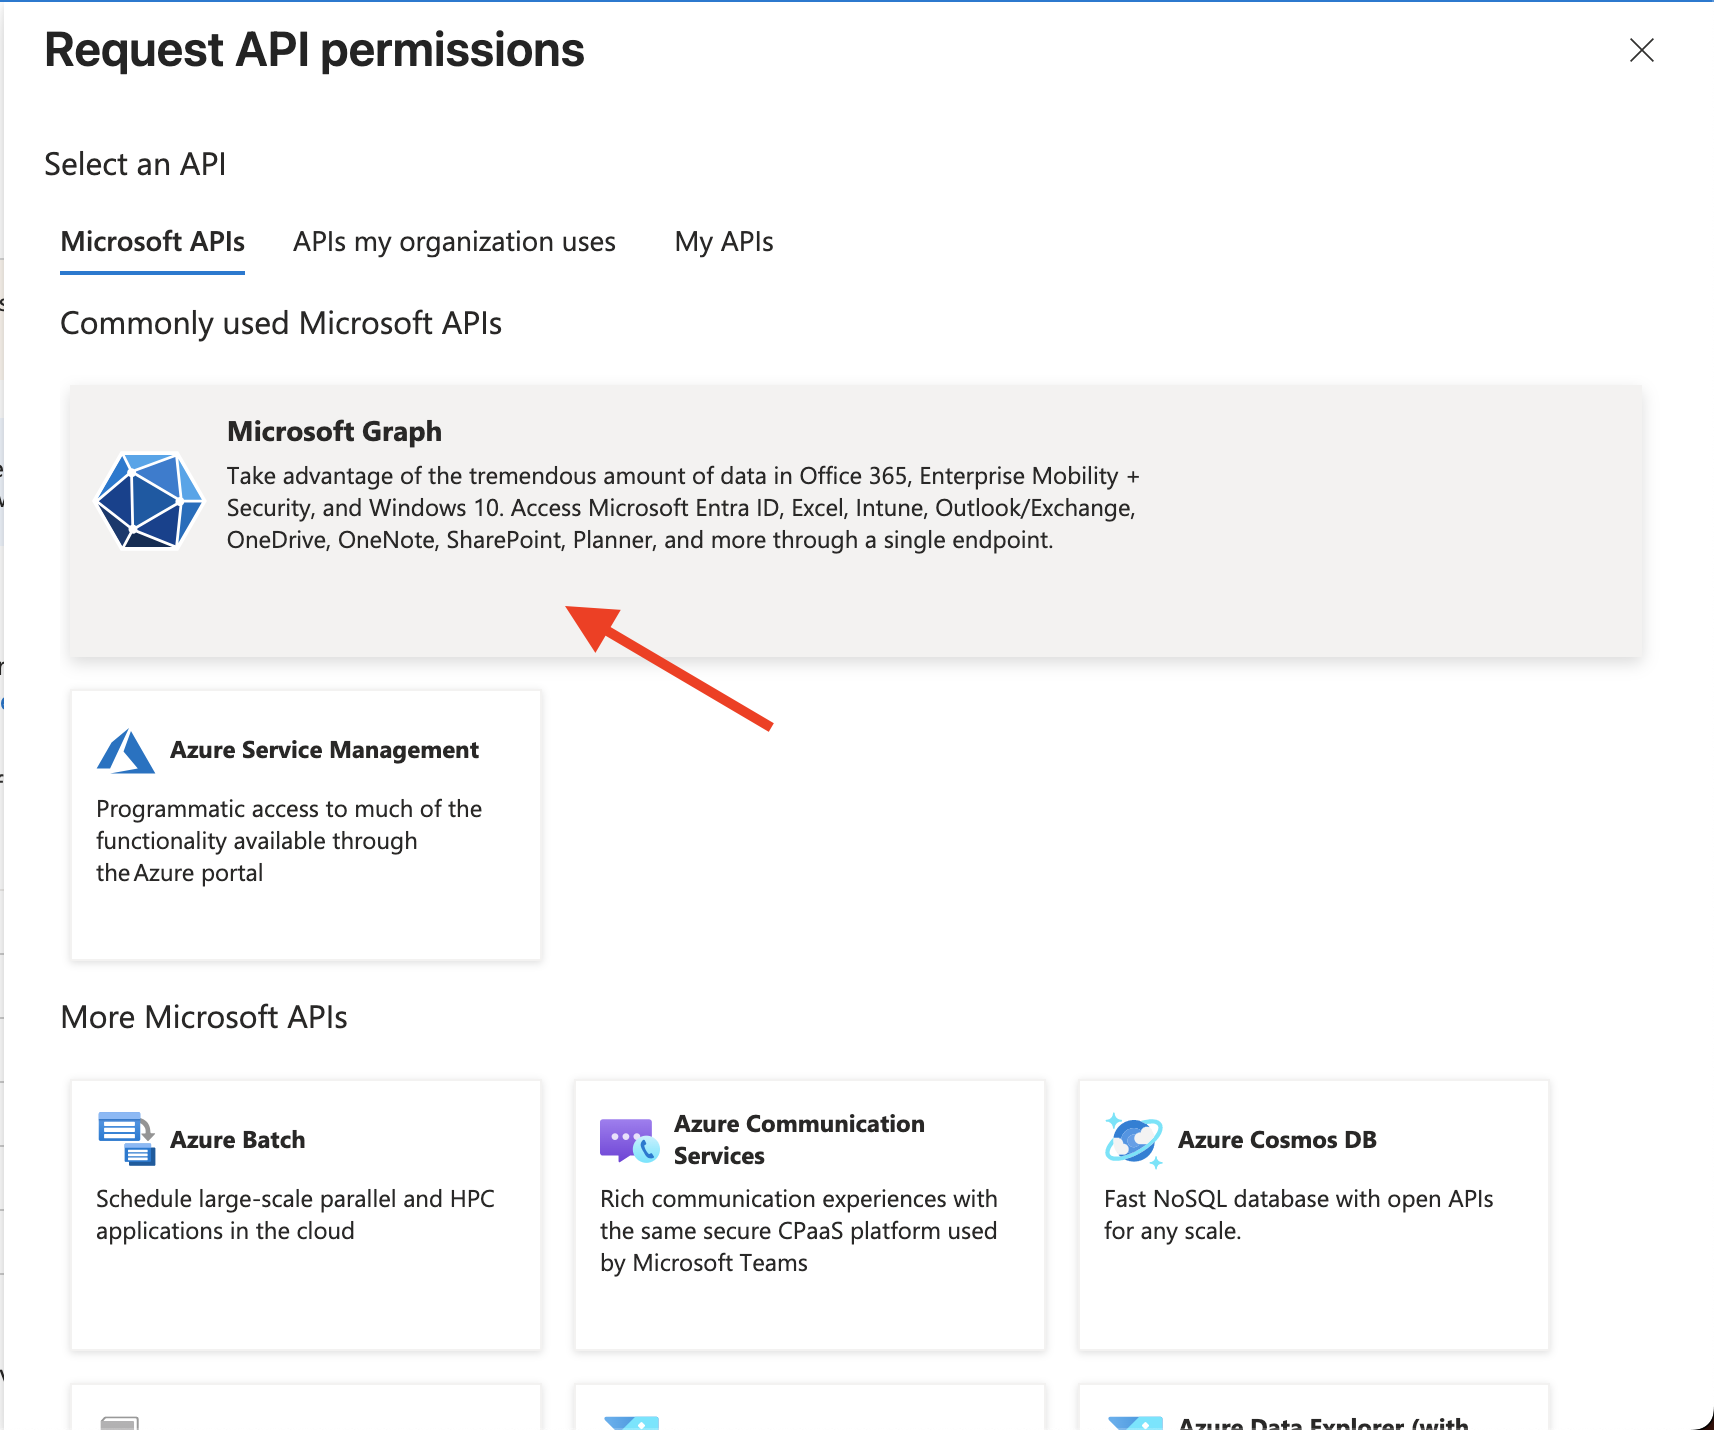
- Click on Add a permission.
- Click on Microsoft Graph.
- Click on Delegated permissions and then select
emailandprofilelike the example below and click Add Permission.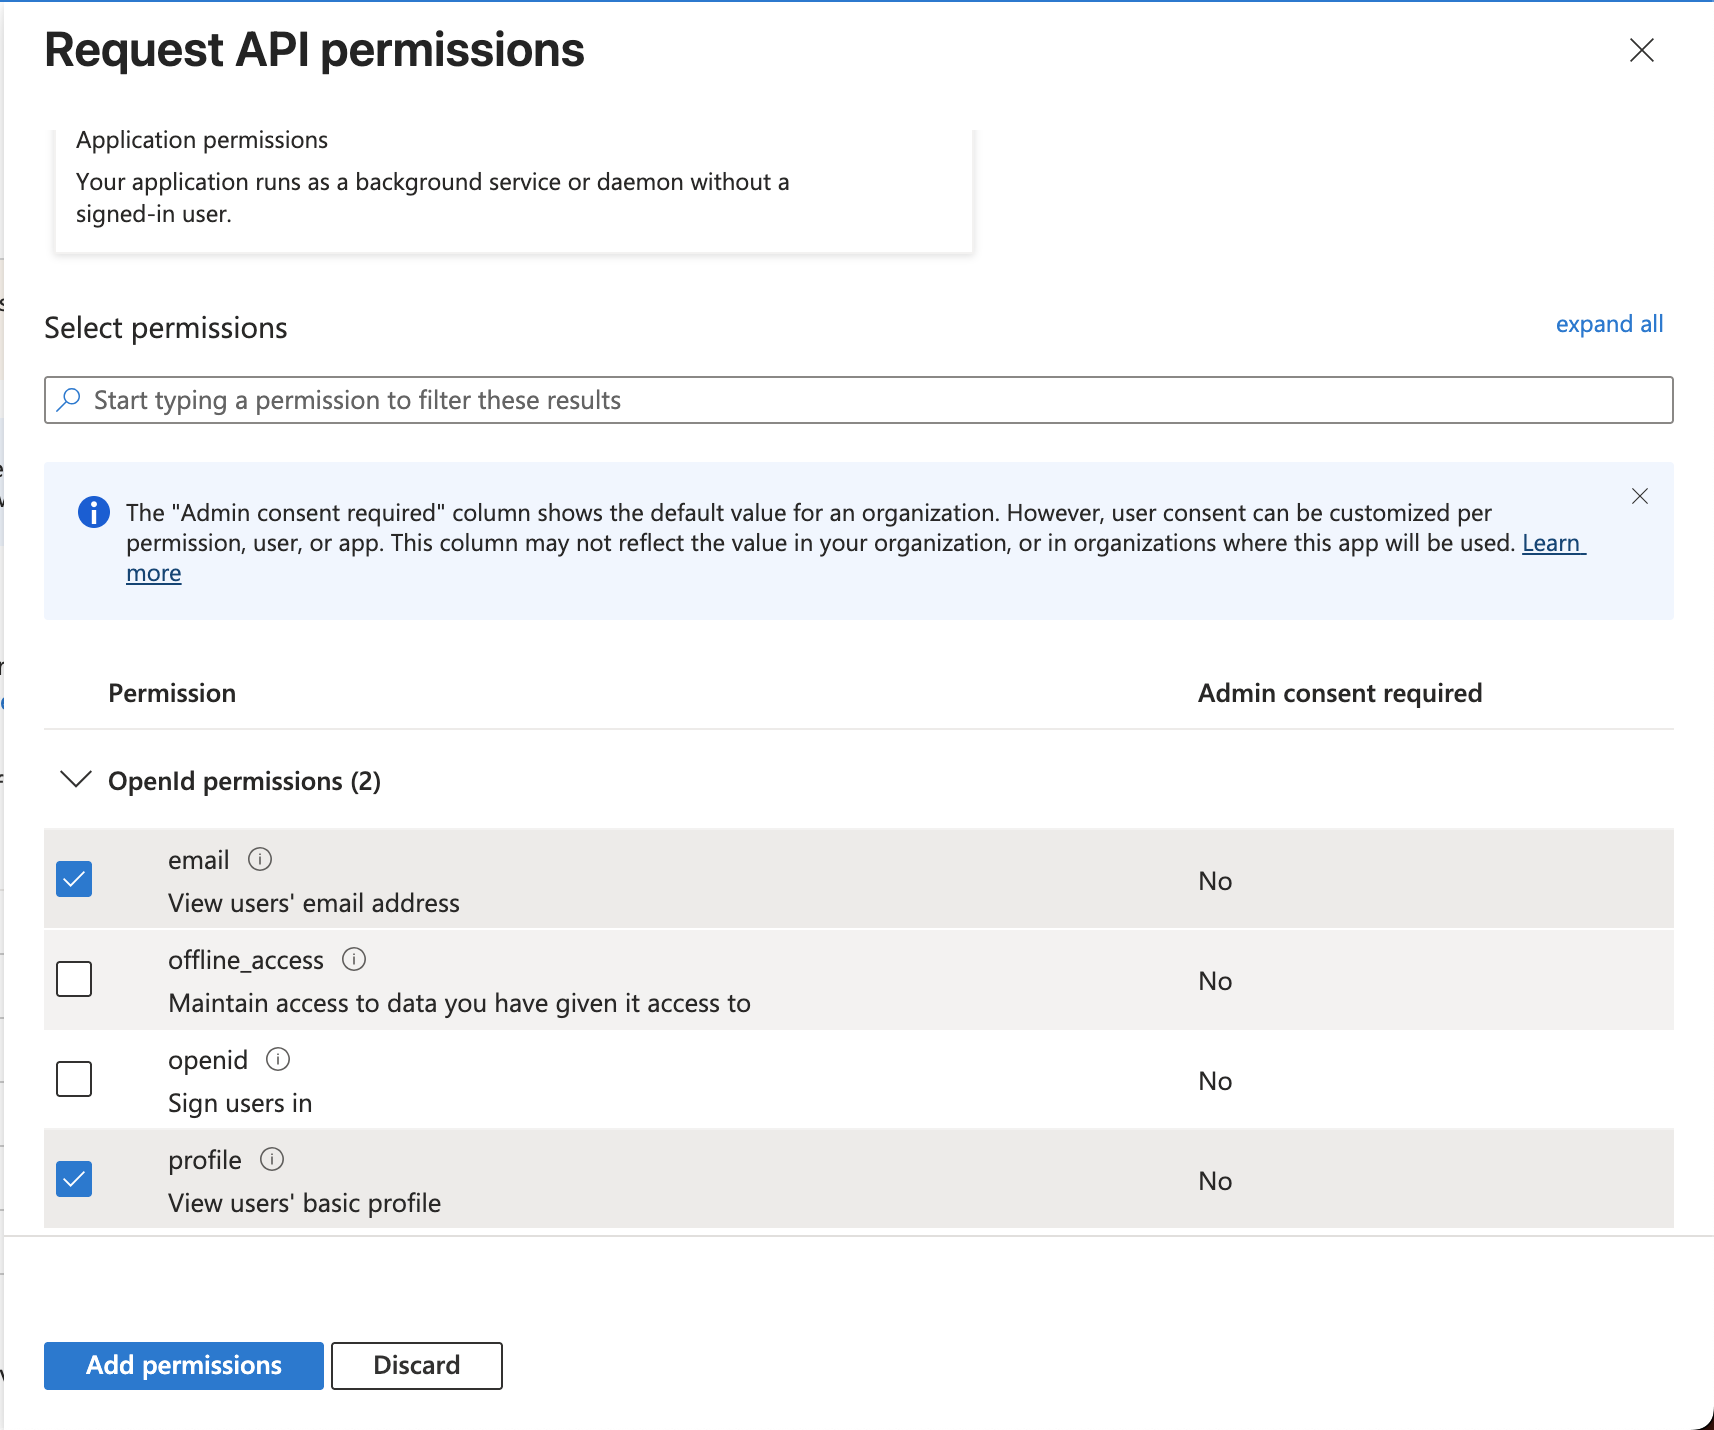
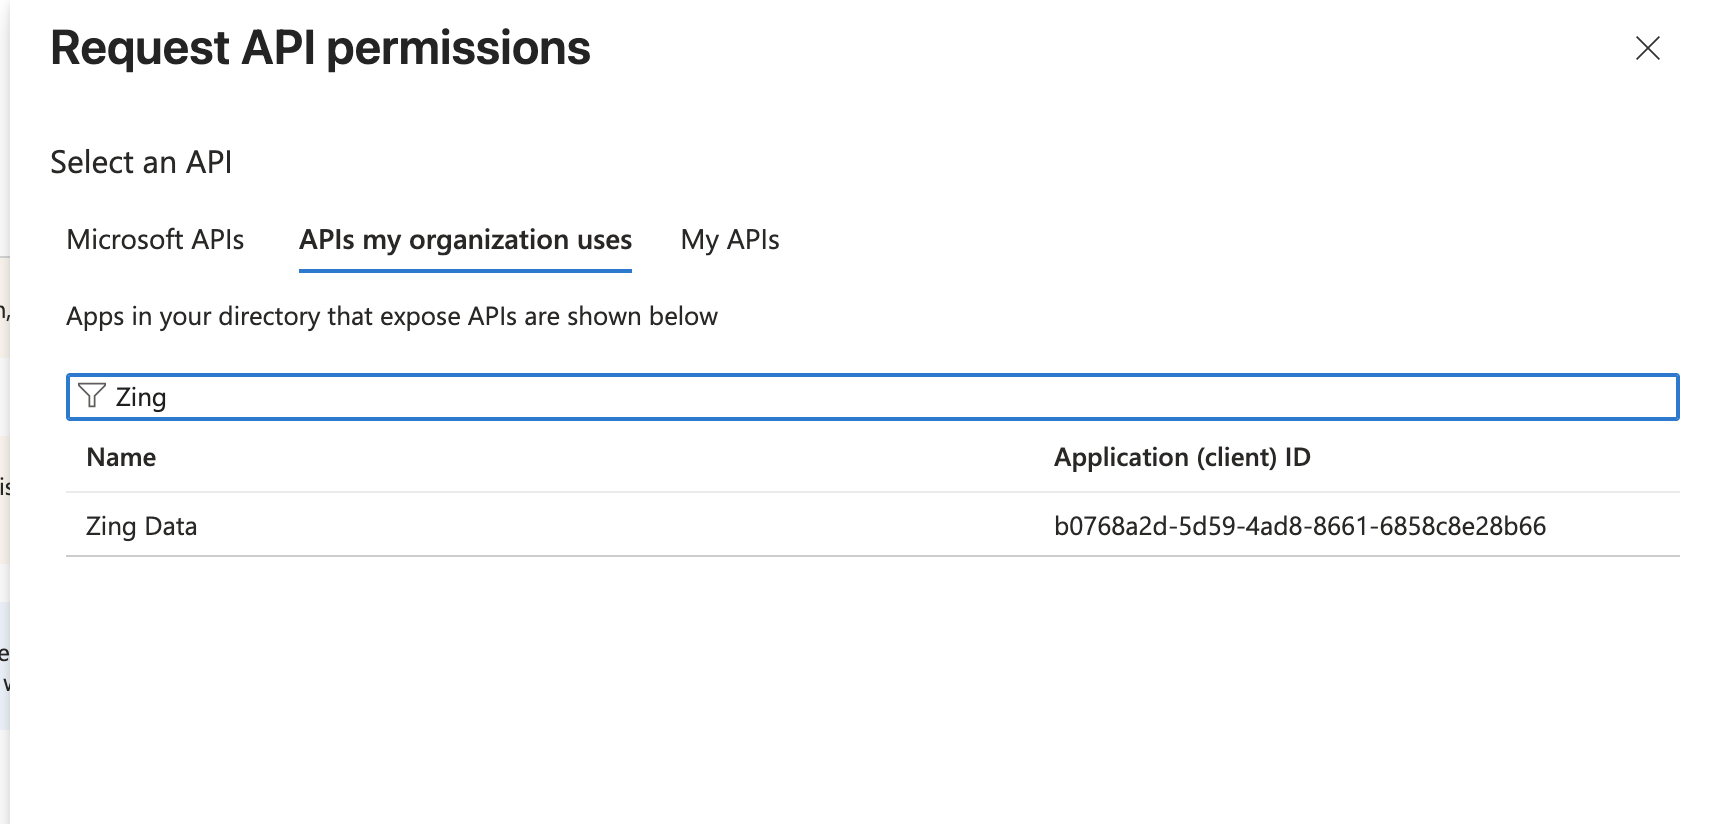
- Click on Add a permission again, but this time switch to the second tab on top APIs my organization uses and find the Zing Data API previously created.
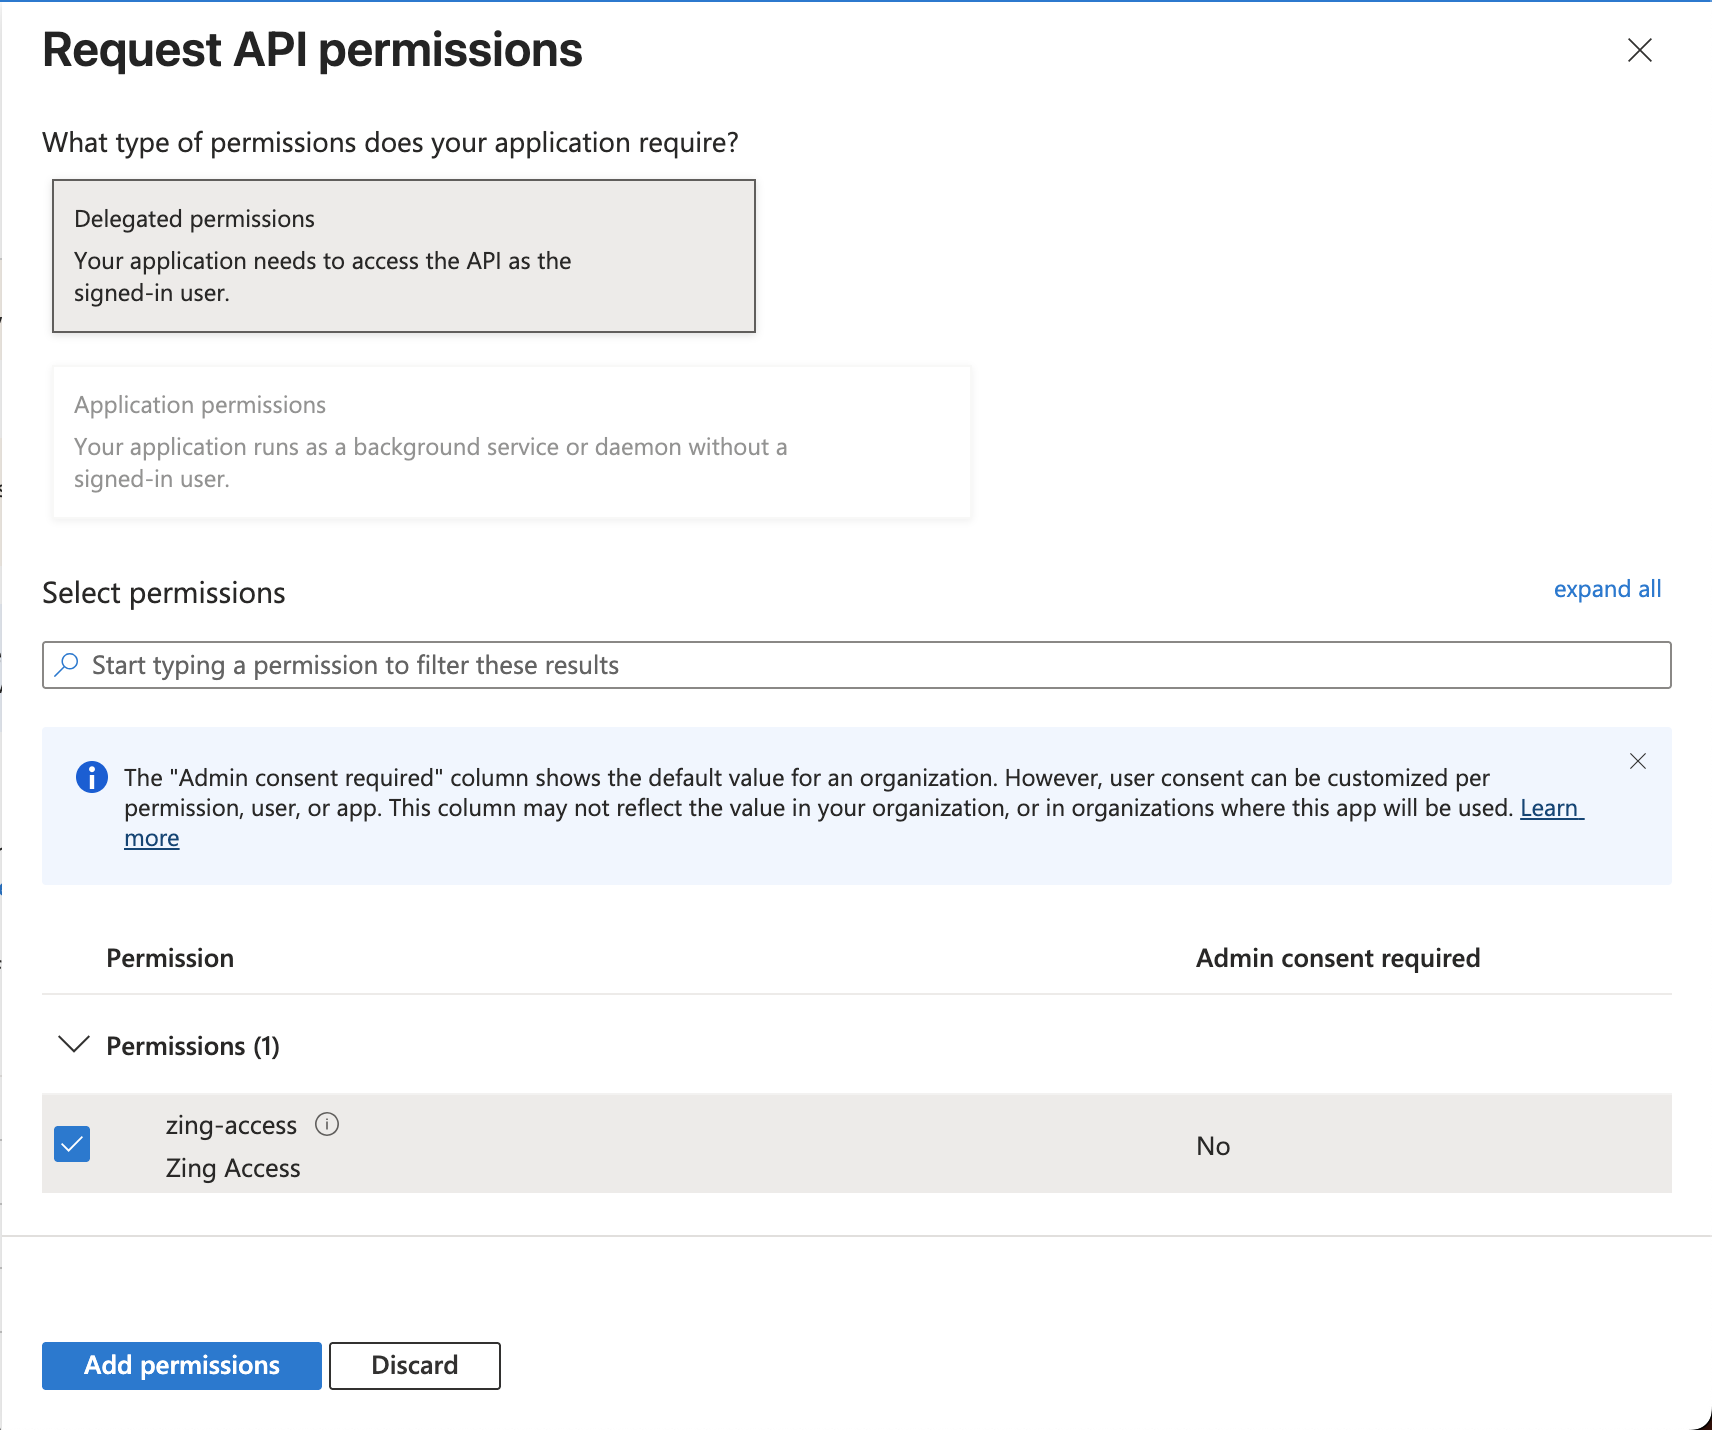
- Click again in Delegated permissions and select the Zing Access permission and then click Add permissions.
- On the left side menu, click on Token configuration and then click Add optional claim. You must choose Token Type: Access and then select
emailfamily_nameandgiven_nameclaims, then click Add on the bottom.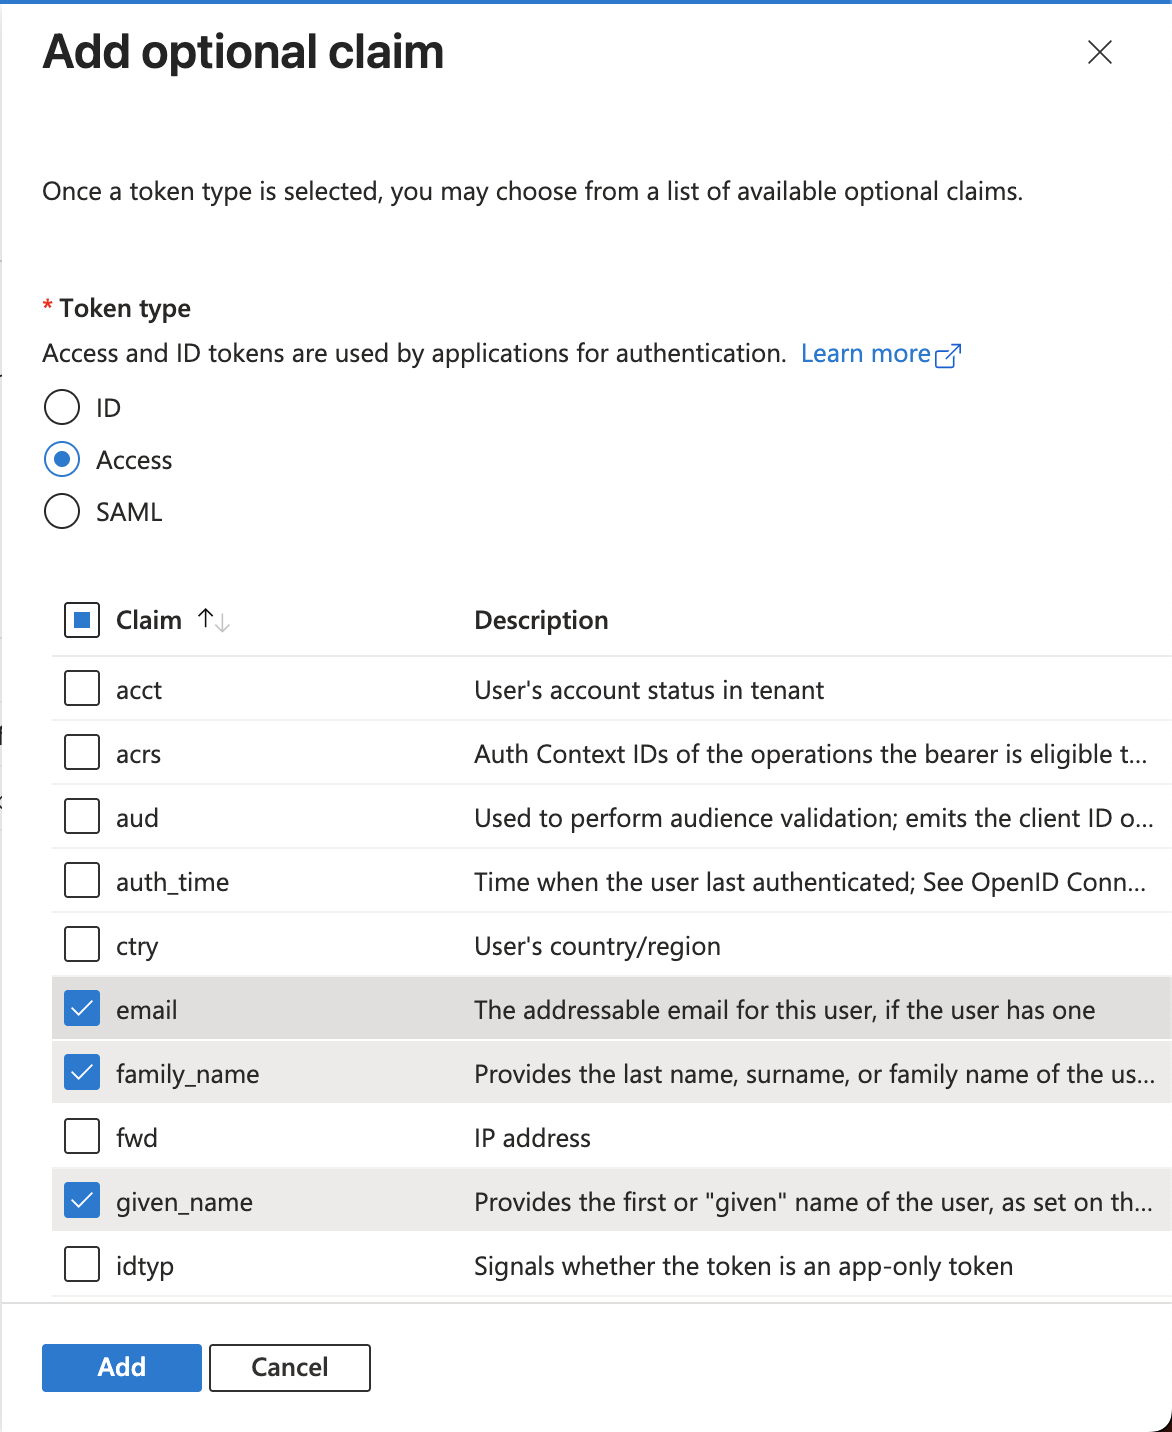
- Click on Manifest on the left side menu and click on tab AAD Graph App Manifest, then change the variable
accessTokenAcceptedVersionto 2 as in example below.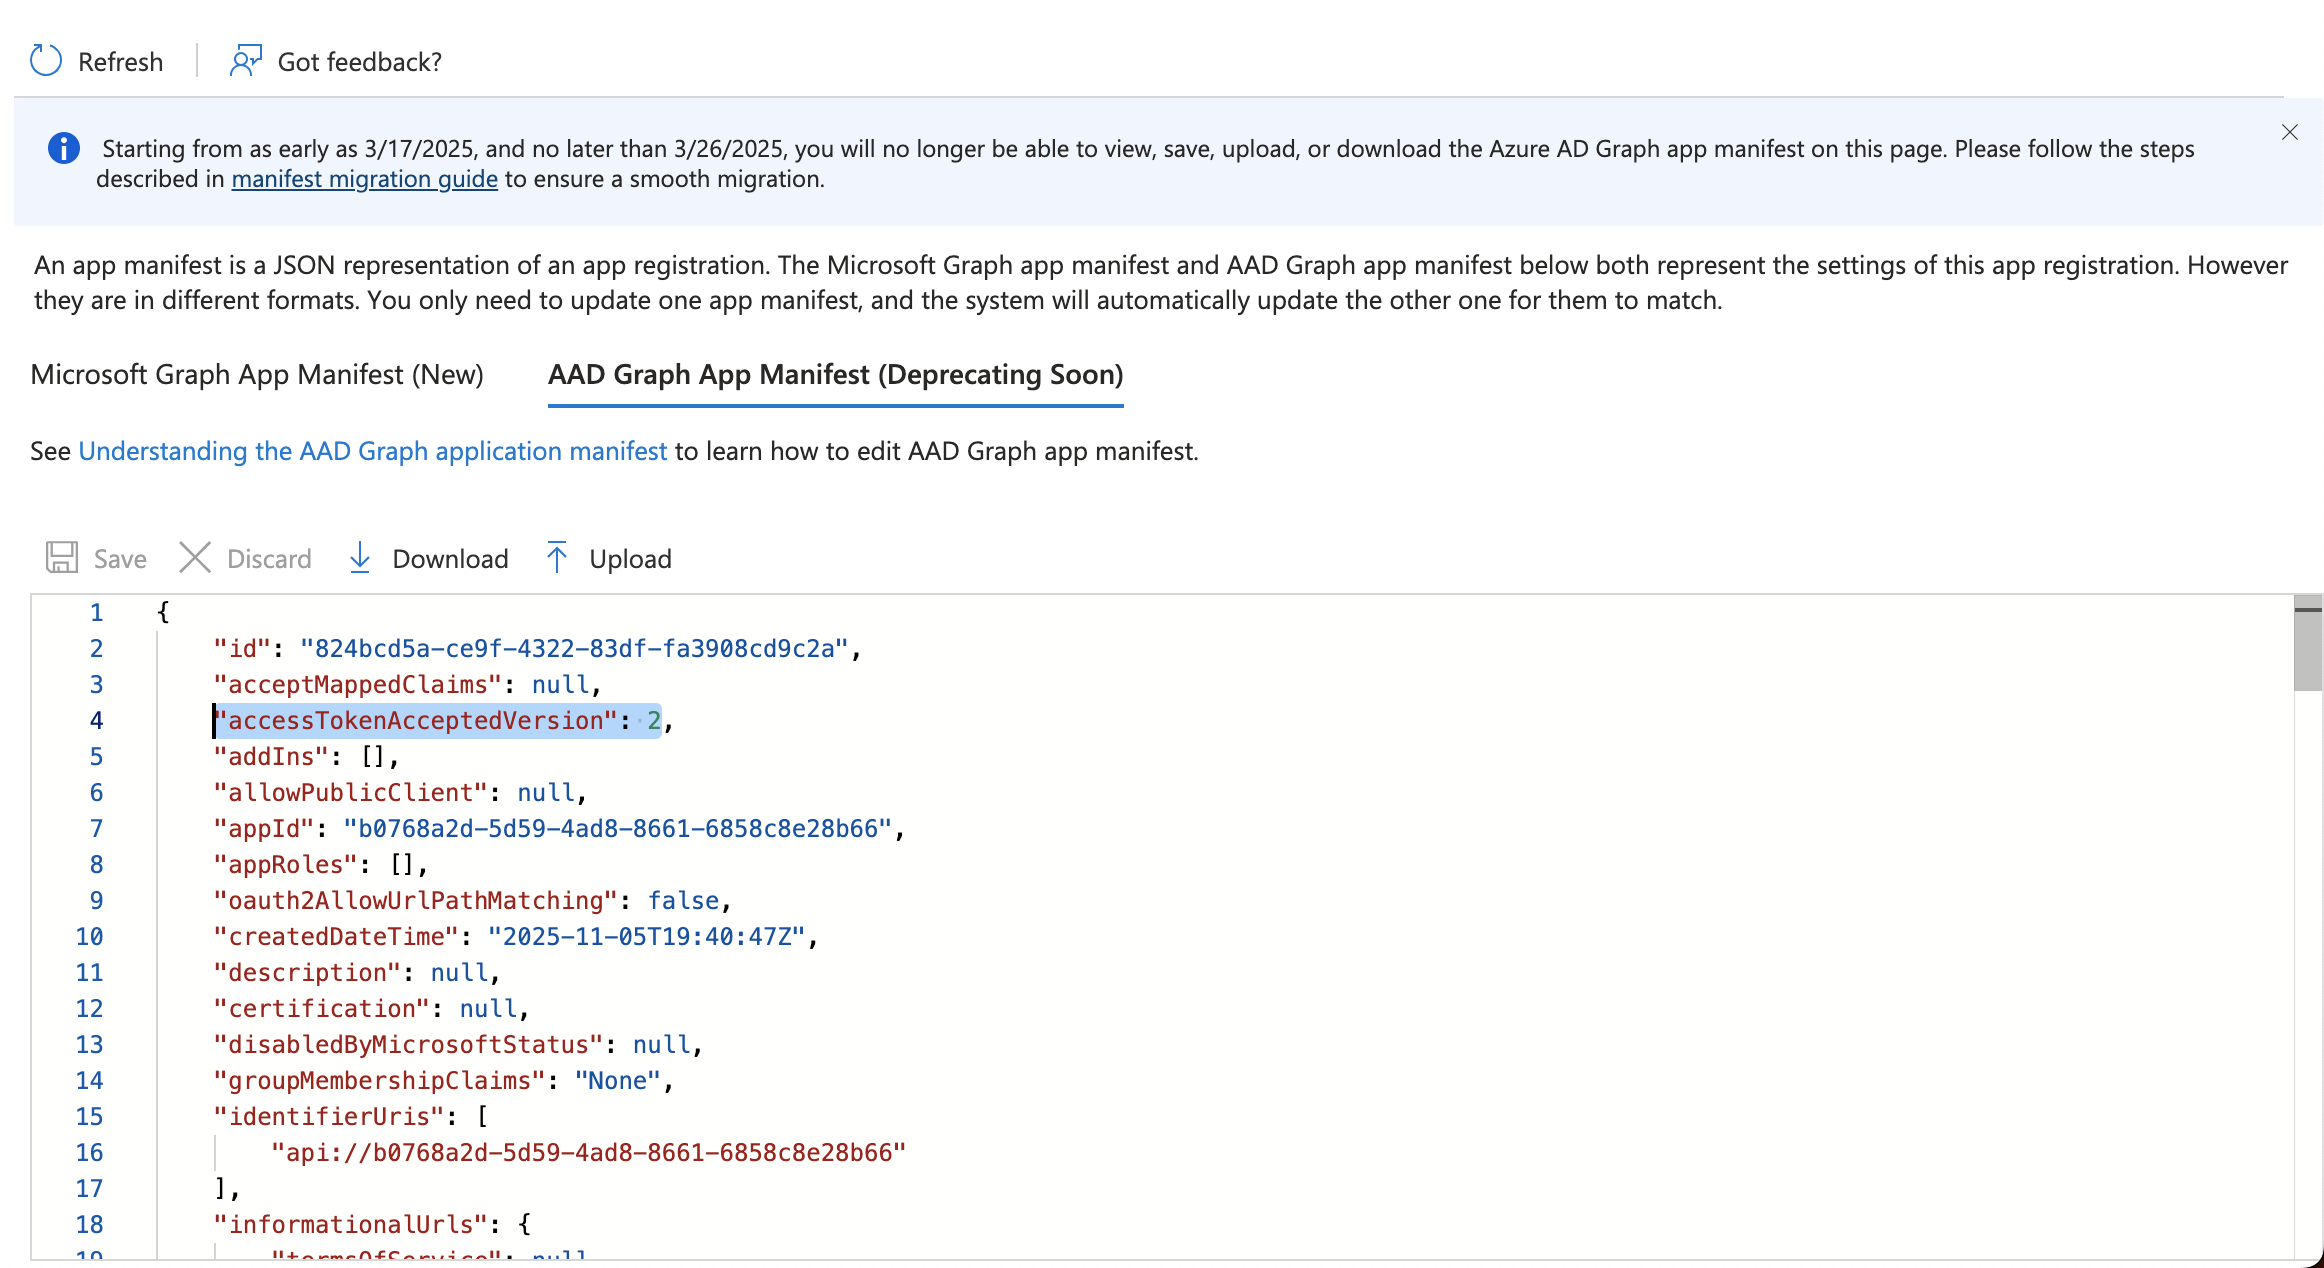
- Last step is to configure access to mobile applications. Click on Authentication on the left side menu and click on Add a platform (Single-page application with Redirect URIs should be already configured).
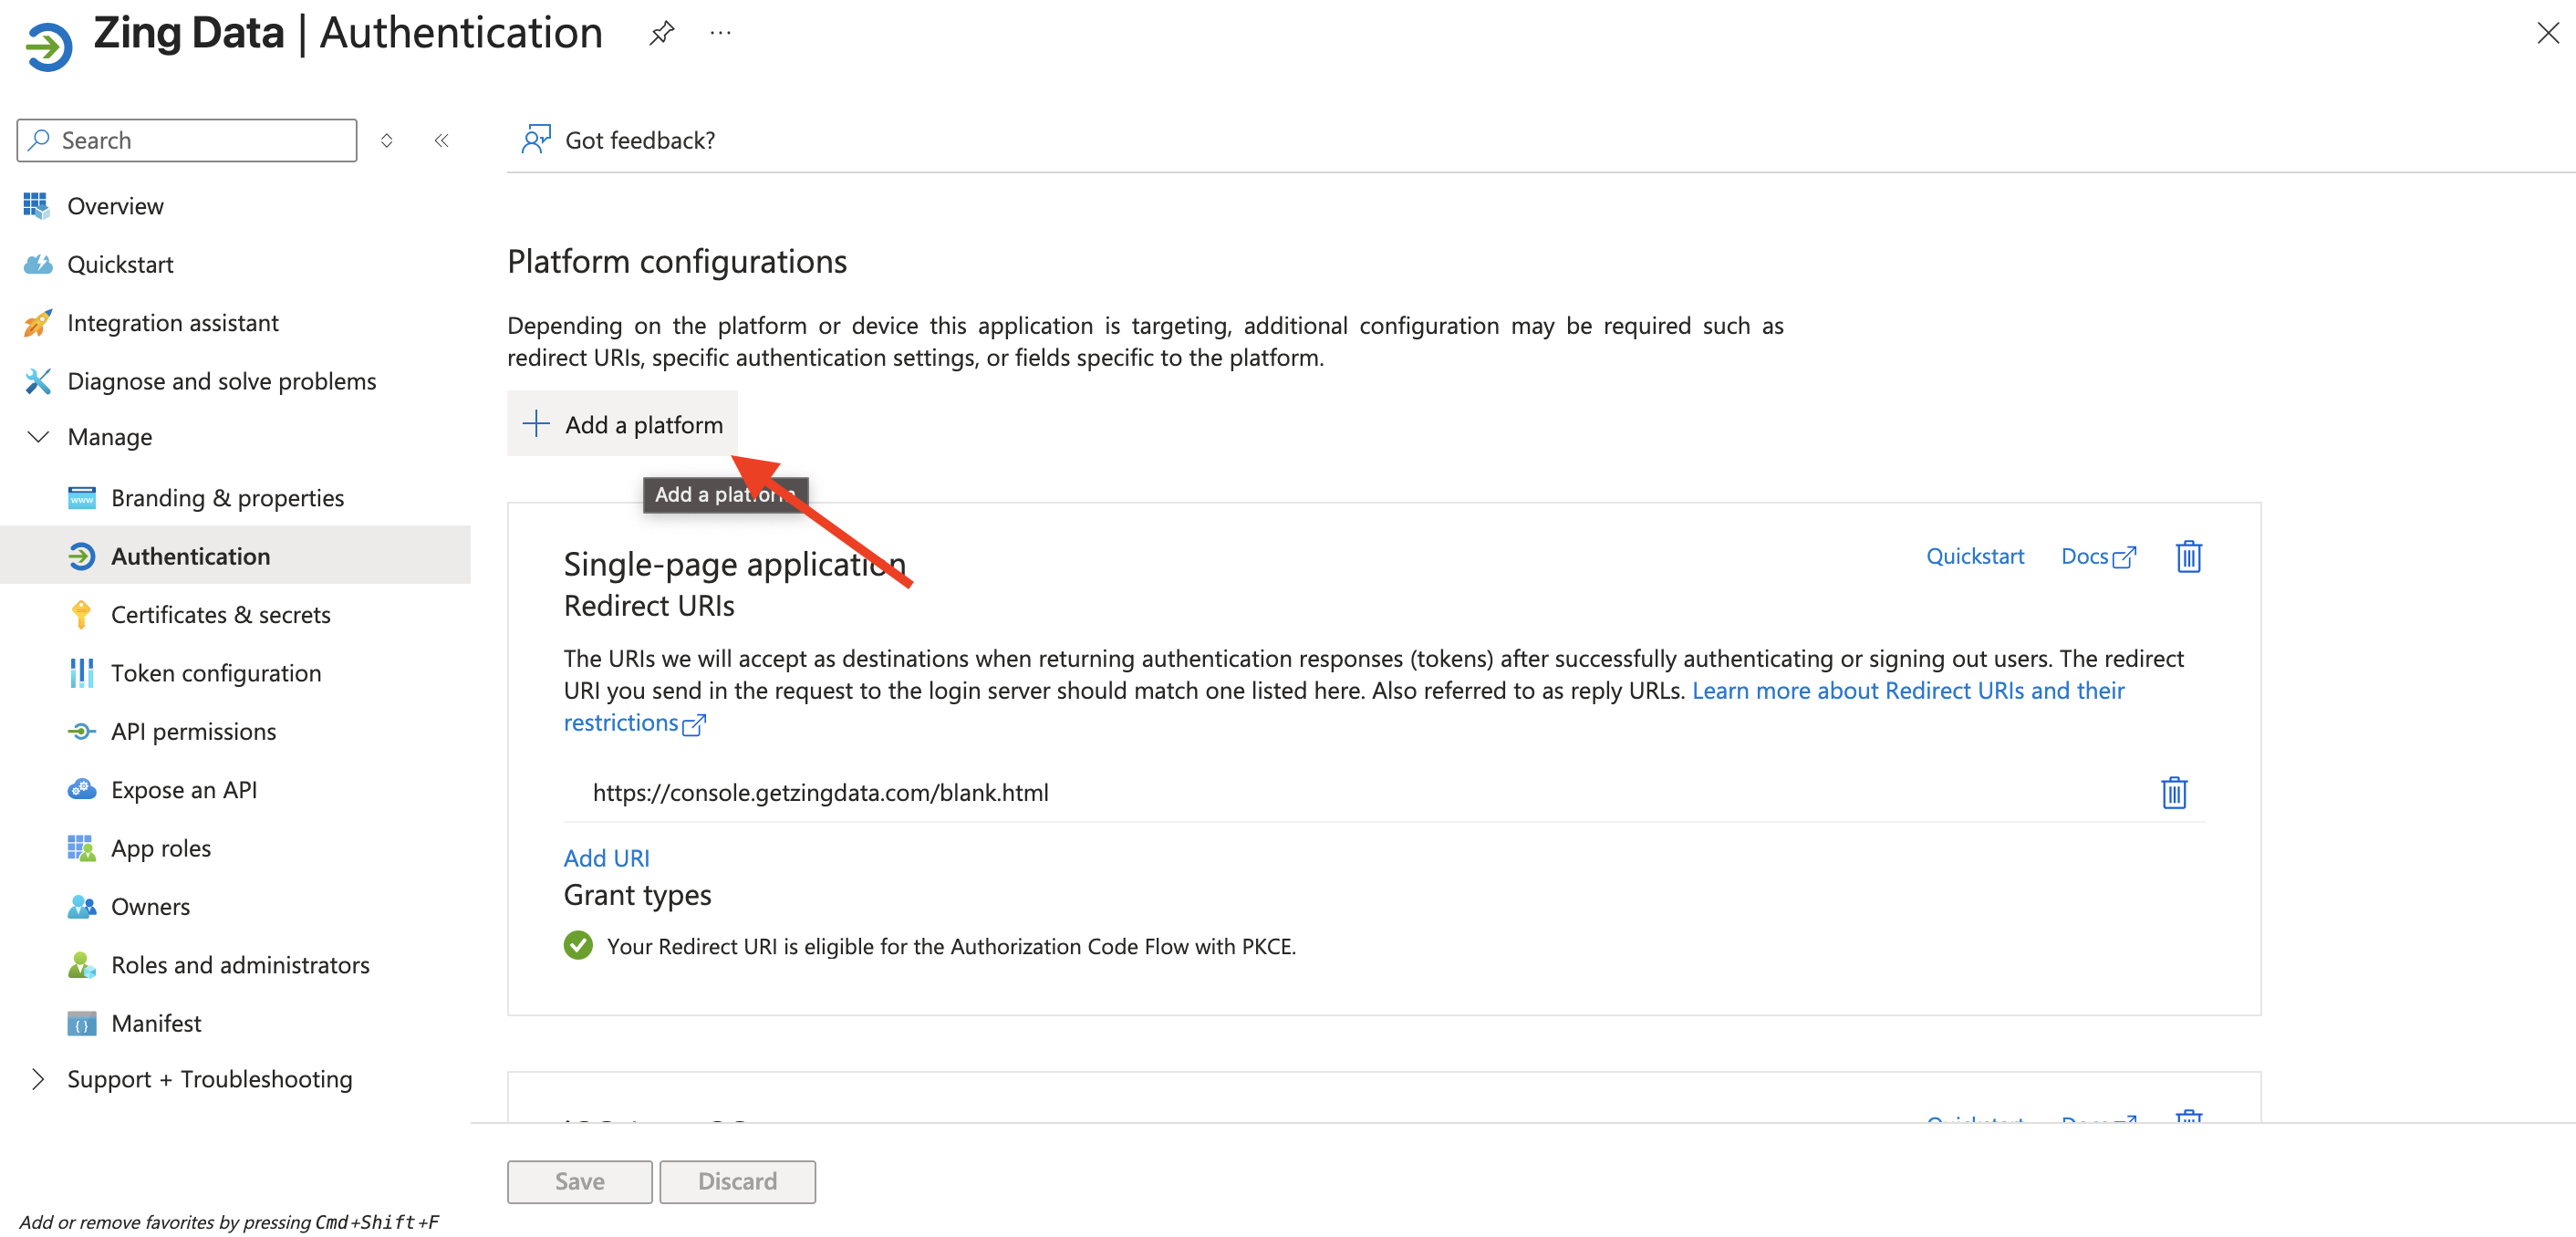
- Then fill it with the appropriate information for Android and iOS apps:
iOS:
Bundle ID: com.getzingdata.app
Android:
Package name: com.getzingdata.android
Signature hash: cnsx6OCEI/rJQqehq6baXX93c6w=
With all the steps above completed, everything should be in place for your SSO configuration in Microsoft Azure.
As a last step, please click on Overview in the left side menu and copy the Application (client) ID and Directory (tenant) ID values and send these values to the Zing Data enterprise support team to complete the integration.
2 - Okta SSO
Okta is a comprehensive identity and access management (IAM) solution providing:
Overview
This guide will help you configure Single Sign-On (SSO) between Okta and Zing Data, allowing your team members to securely access Zing Data using their Okta credentials.
Prerequisites
- Admin access to your Okta Access Gateway
- Admin access to your Zing Data account
- A valid Zing Data Enterprise subscription
Configuration Steps
Step 1: Add Zing Data in Okta
The Okta Access Gateway is a separate product from Okta. You can find it in the Okta Admin Console.
- Log in to your Okta Access Gateway Admin Console
- Navigate to Applications > Applications
- Click Add Application
- Click Create New App
- Select:
- Platform: Web
- Sign-on method: SAML 2.0
- Click Create
Step 2: Configure SAML Settings
In the SAML Settings section, enter the following:
General Settings:
- App name: Zing Data
- App logo (optional): [Download Zing Data logo]
SAML Settings:
- Single Sign-On URL:
https://console.getzingdata.com/login-sso - Audience URI (SP Entity ID):
https://console.getzingdata.com - Name ID format: EmailAddress
- Application username: Email
Attribute Statements (optional):
- email: user.email
- firstName: user.firstName
- lastName: user.lastName
Step 3: Assign Users
In Okta:
- Navigate to your Zing Data application
- Go to the Assignments tab
- Click Assign > Assign to People
- Select users or groups to grant access
- Click Save
Step 4: Zing Data Configuration
Email us at support@getzingdata.com with the above details to get your Zing Data SSO configuration completed.
Testing the Integration
- Log out of Zing Data
- Access your Okta dashboard
- Click on the Zing Data tile
- You should be automatically signed in to Zing Data
Troubleshooting
If you encounter any issues:
- Verify all URLs and certificates are correctly copied
- Ensure users are properly assigned in Okta
- Check that the email addresses match between Okta and Zing Data
- Contact Zing Data support at [support email] for additional assistance