Microsoft Entra ID (formerly Azure Active Directory) is a comprehensive identity and access management (IAM) solution providing:
- Single sign-on (SSO): Access multiple applications with one set of credentials.
- Multi-factor authentication (MFA): Add an extra layer of security.
- Conditional access: Grant access based on specific conditions.
- Directory synchronization: Easily manage user identities across systems.
Integration Setup
- Go to the Azure Portal
- Navigate to Microsoft Entra or Azure Active Directory.
- Click on App Registrations.
- Then click on New Registration.
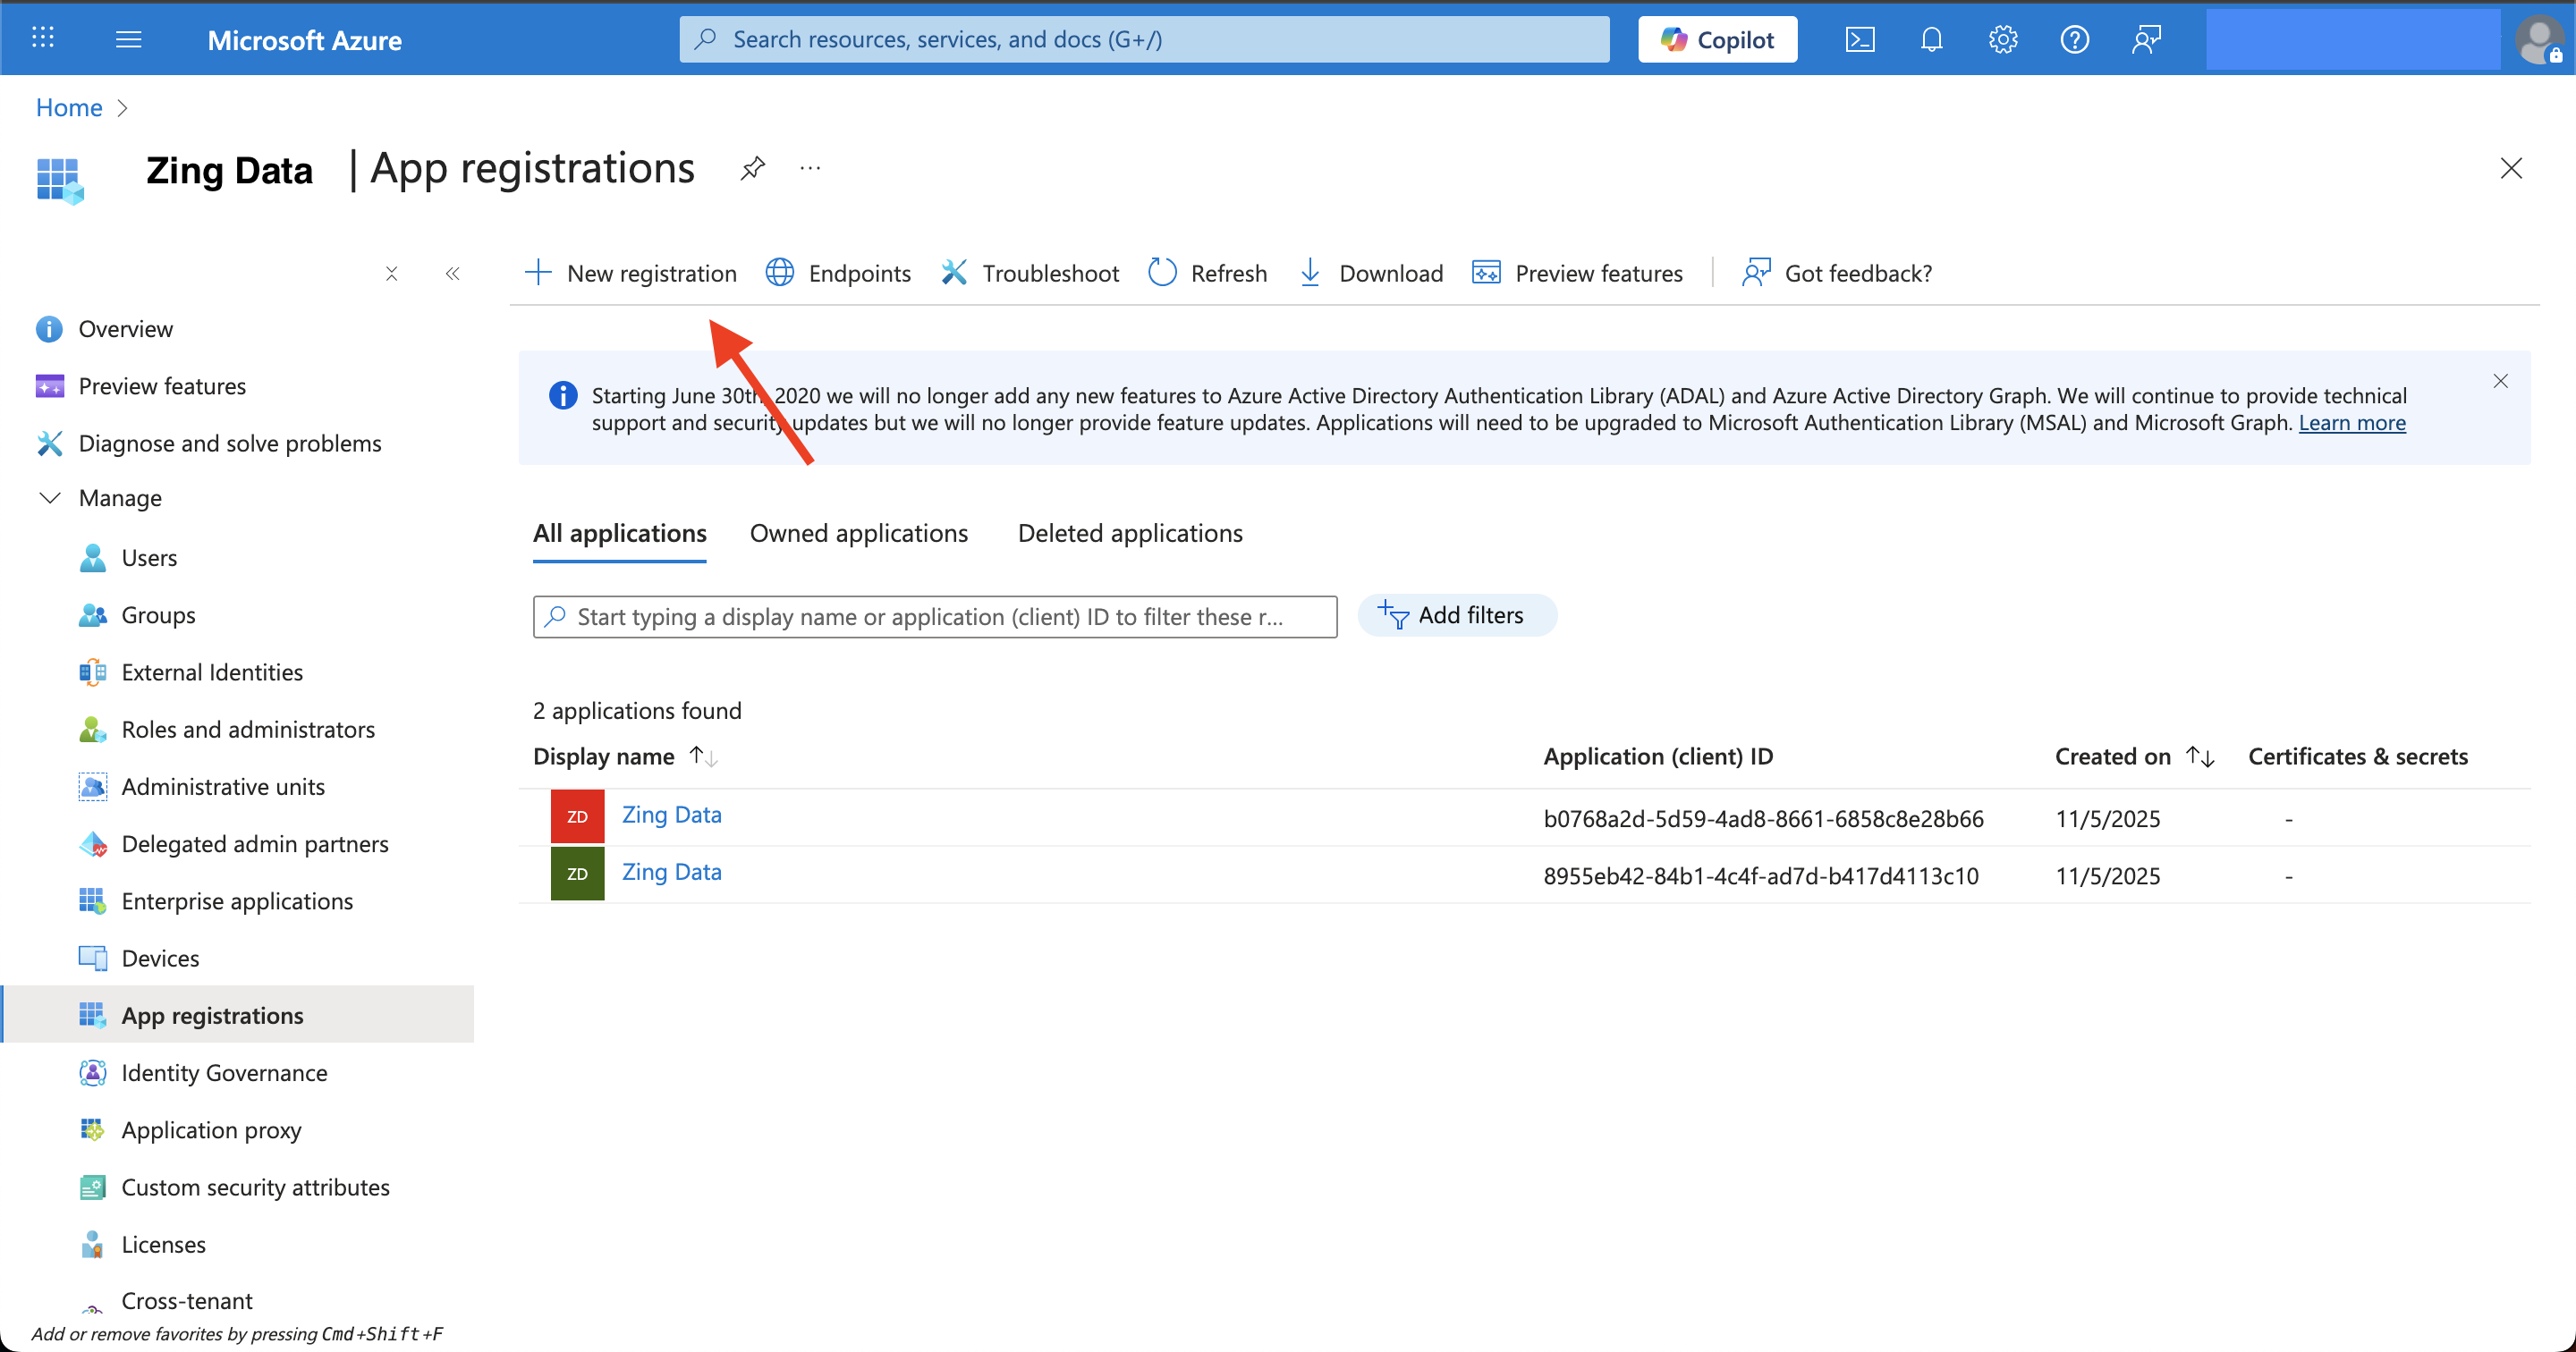
- Fill the details like the example below.
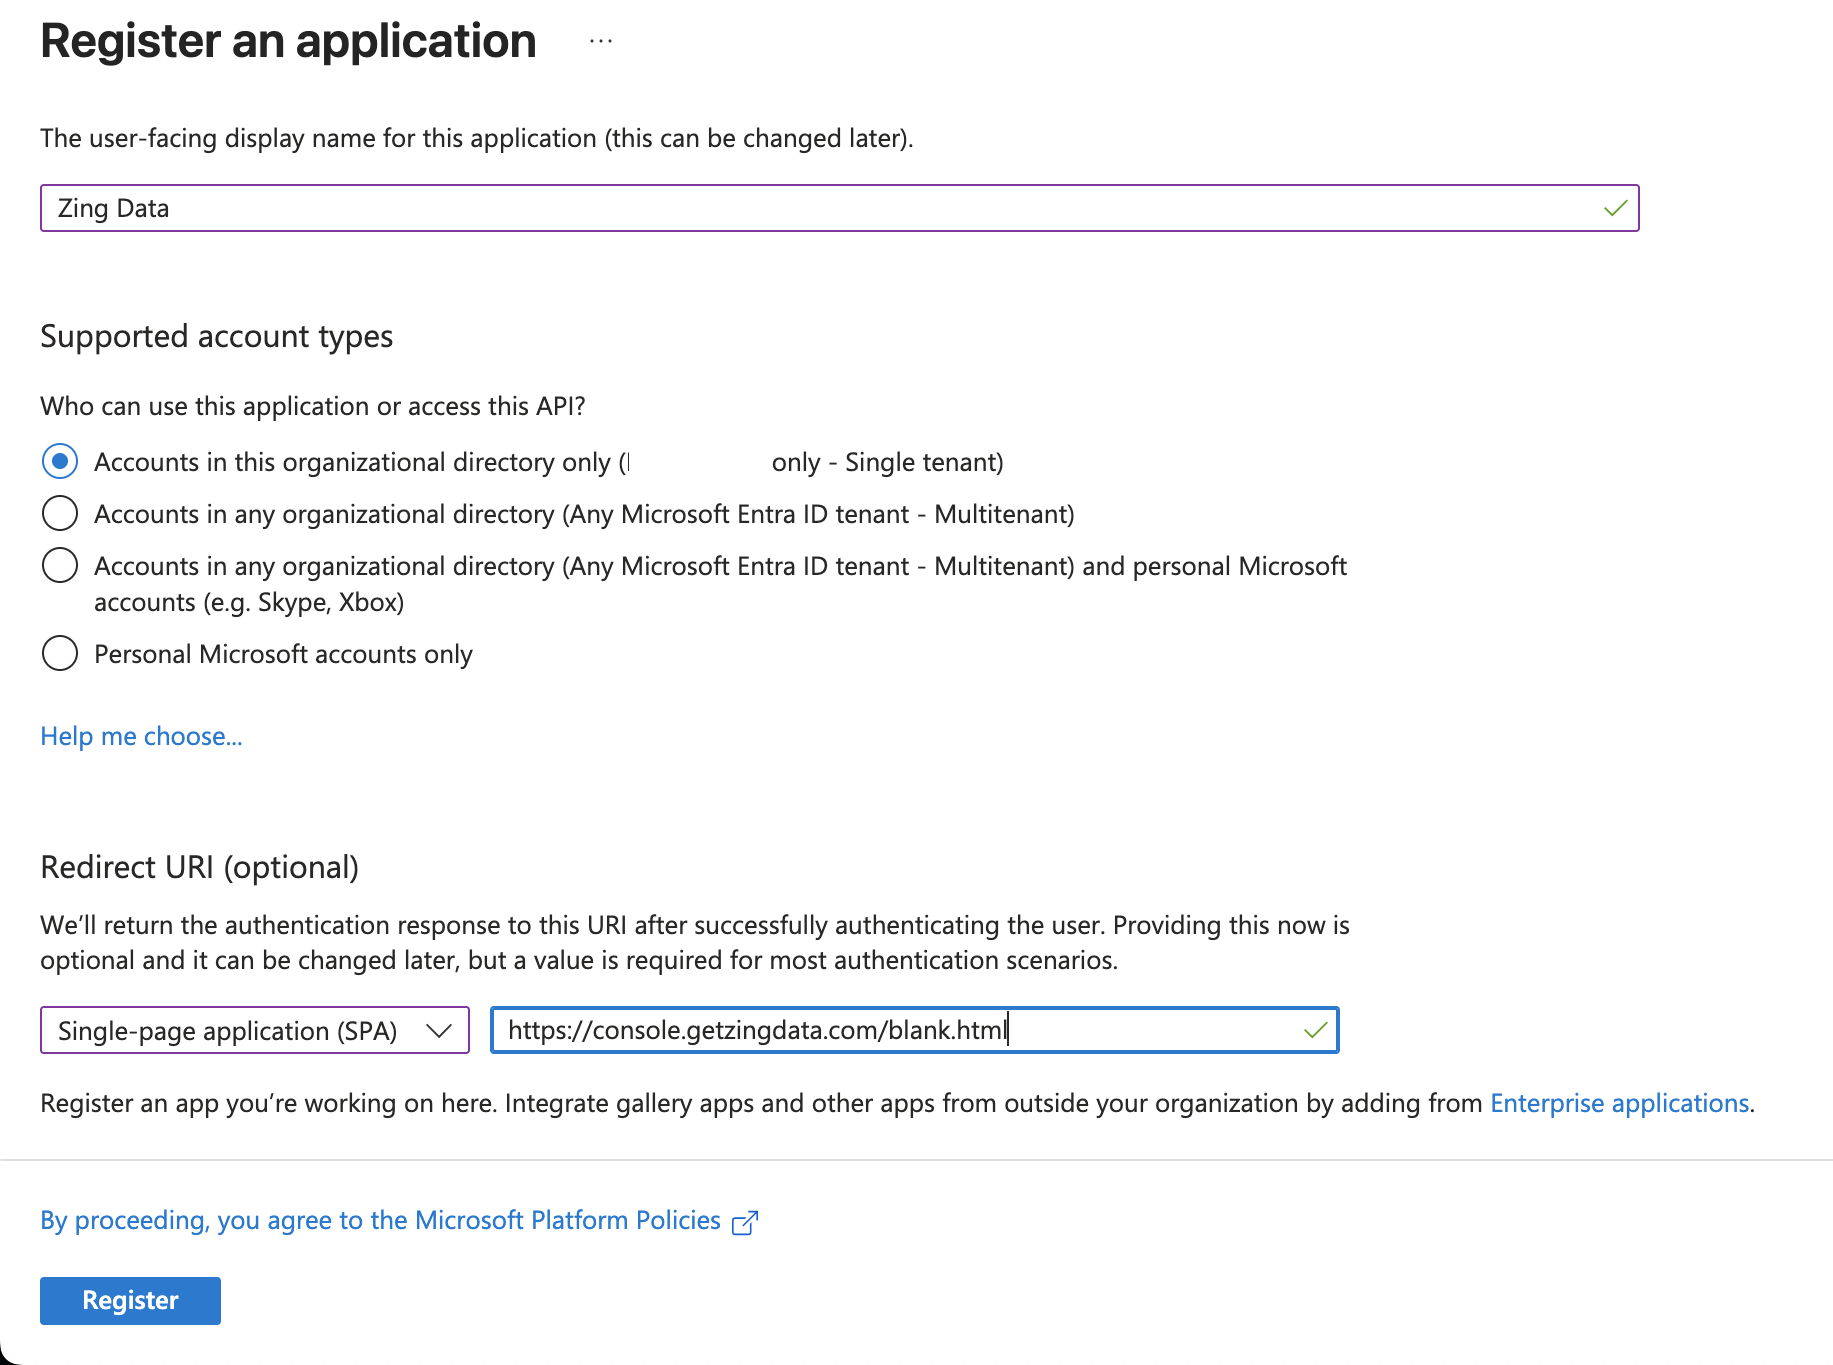
- Click Register

- Once the app is registered, we need to go to Expose an API on the left side menu.
- Click on Add a scope.
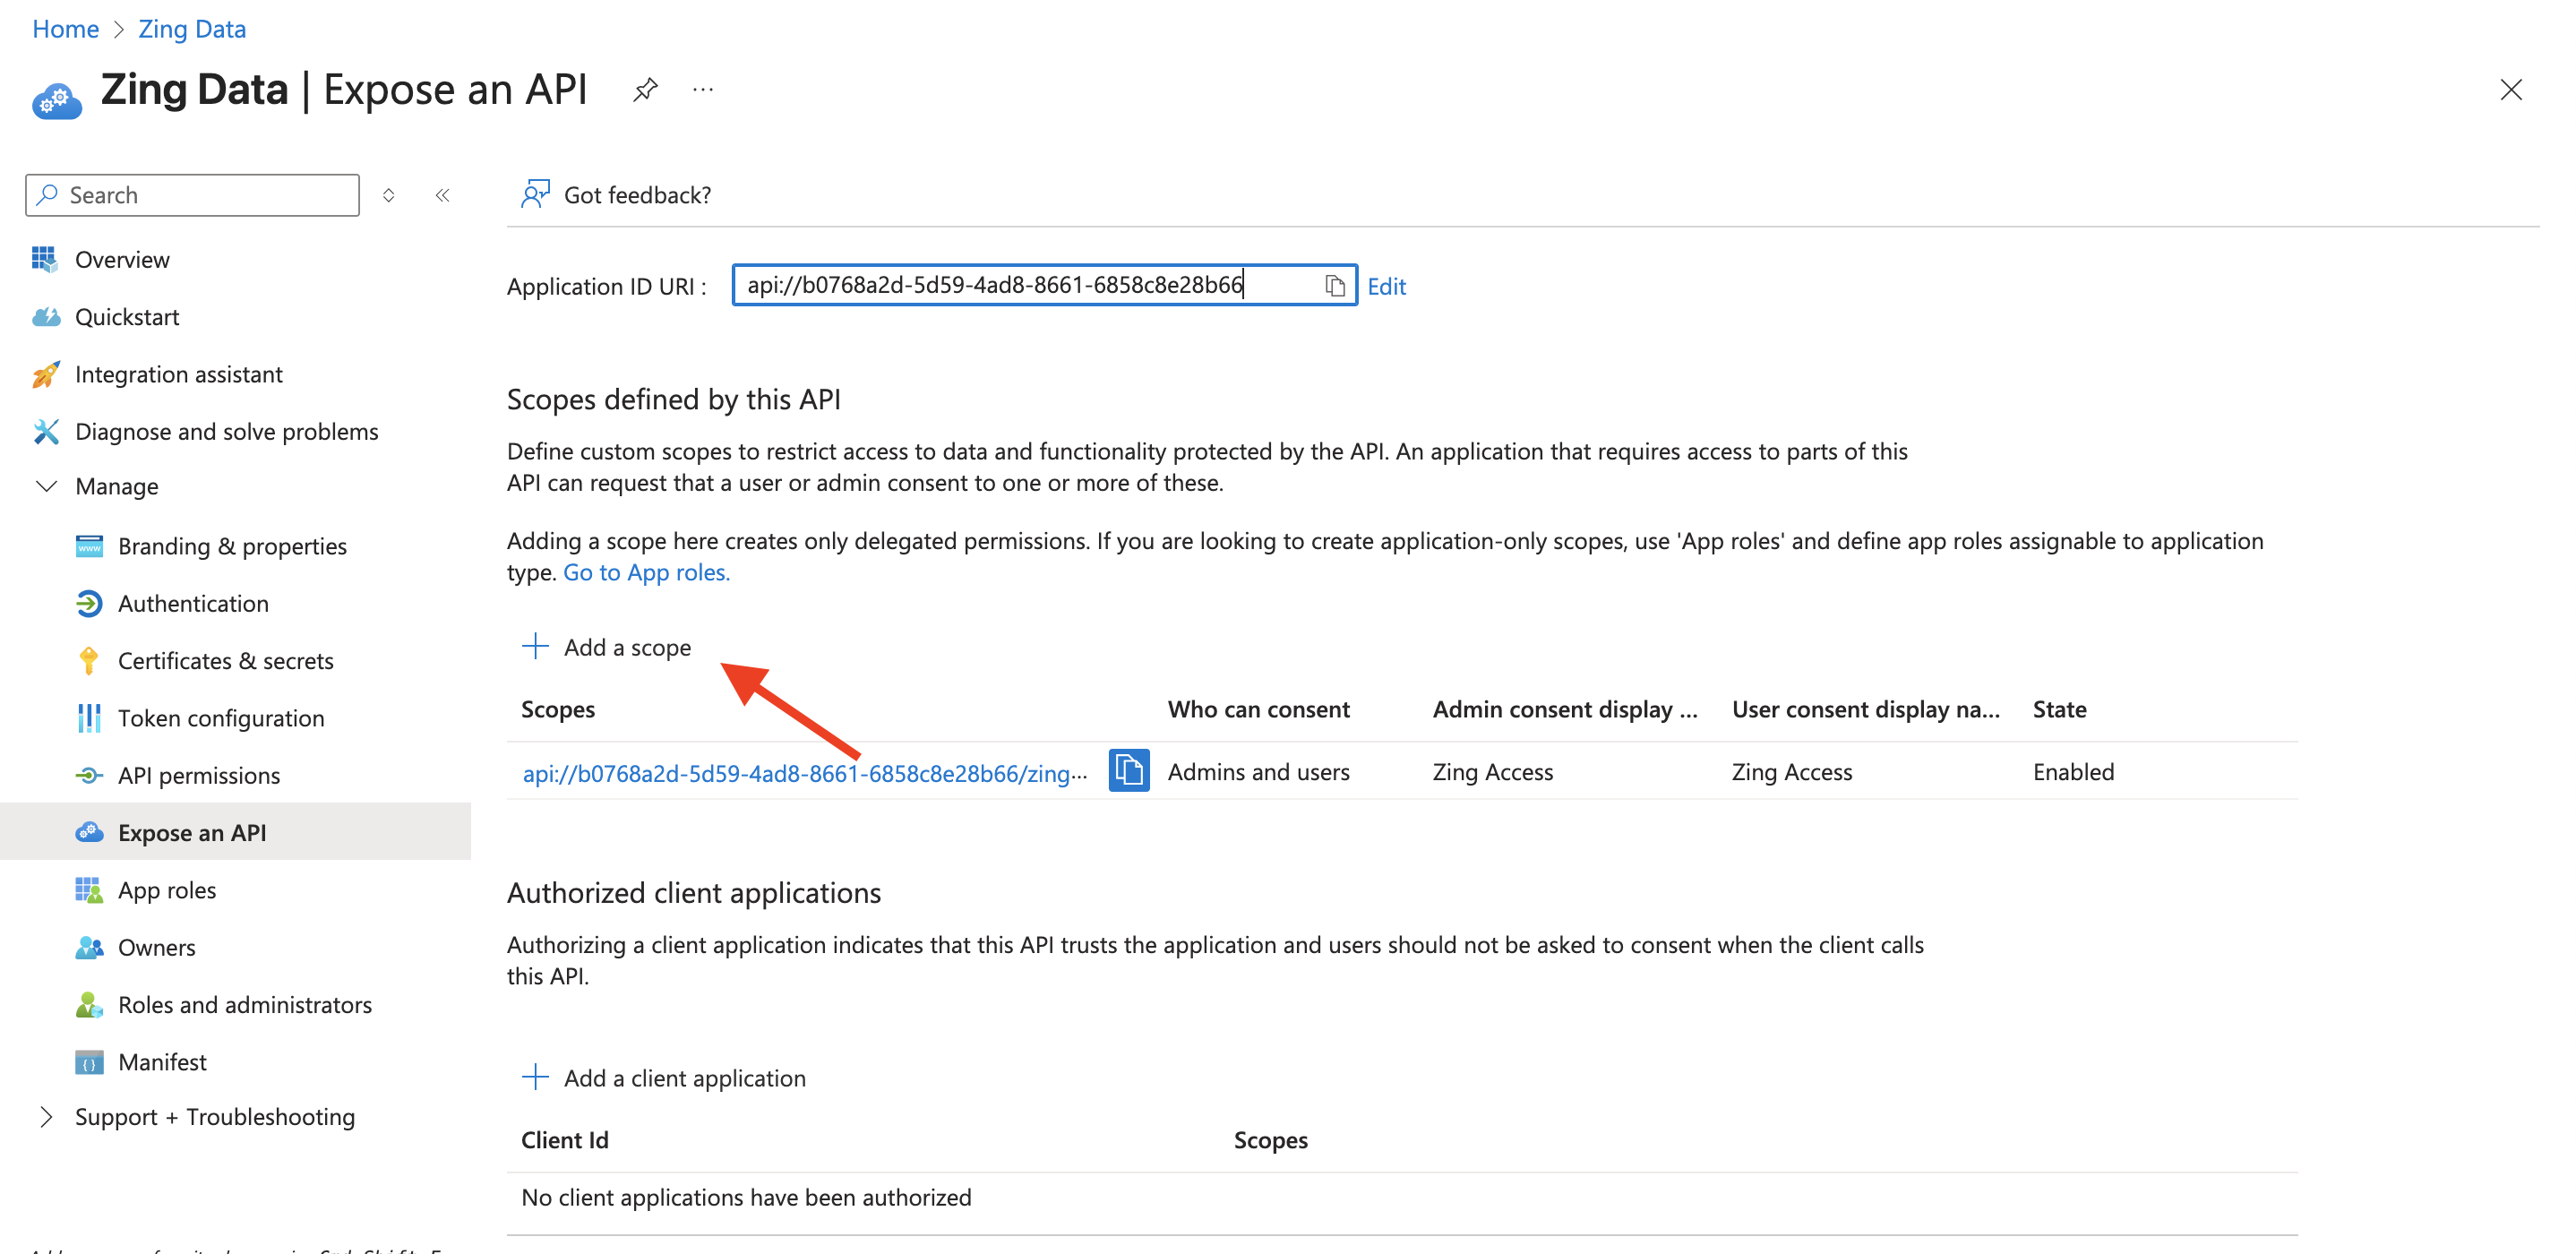
- Fill the details like the example below. (Make sure to use Admins and users for the options “Who can consent?”.
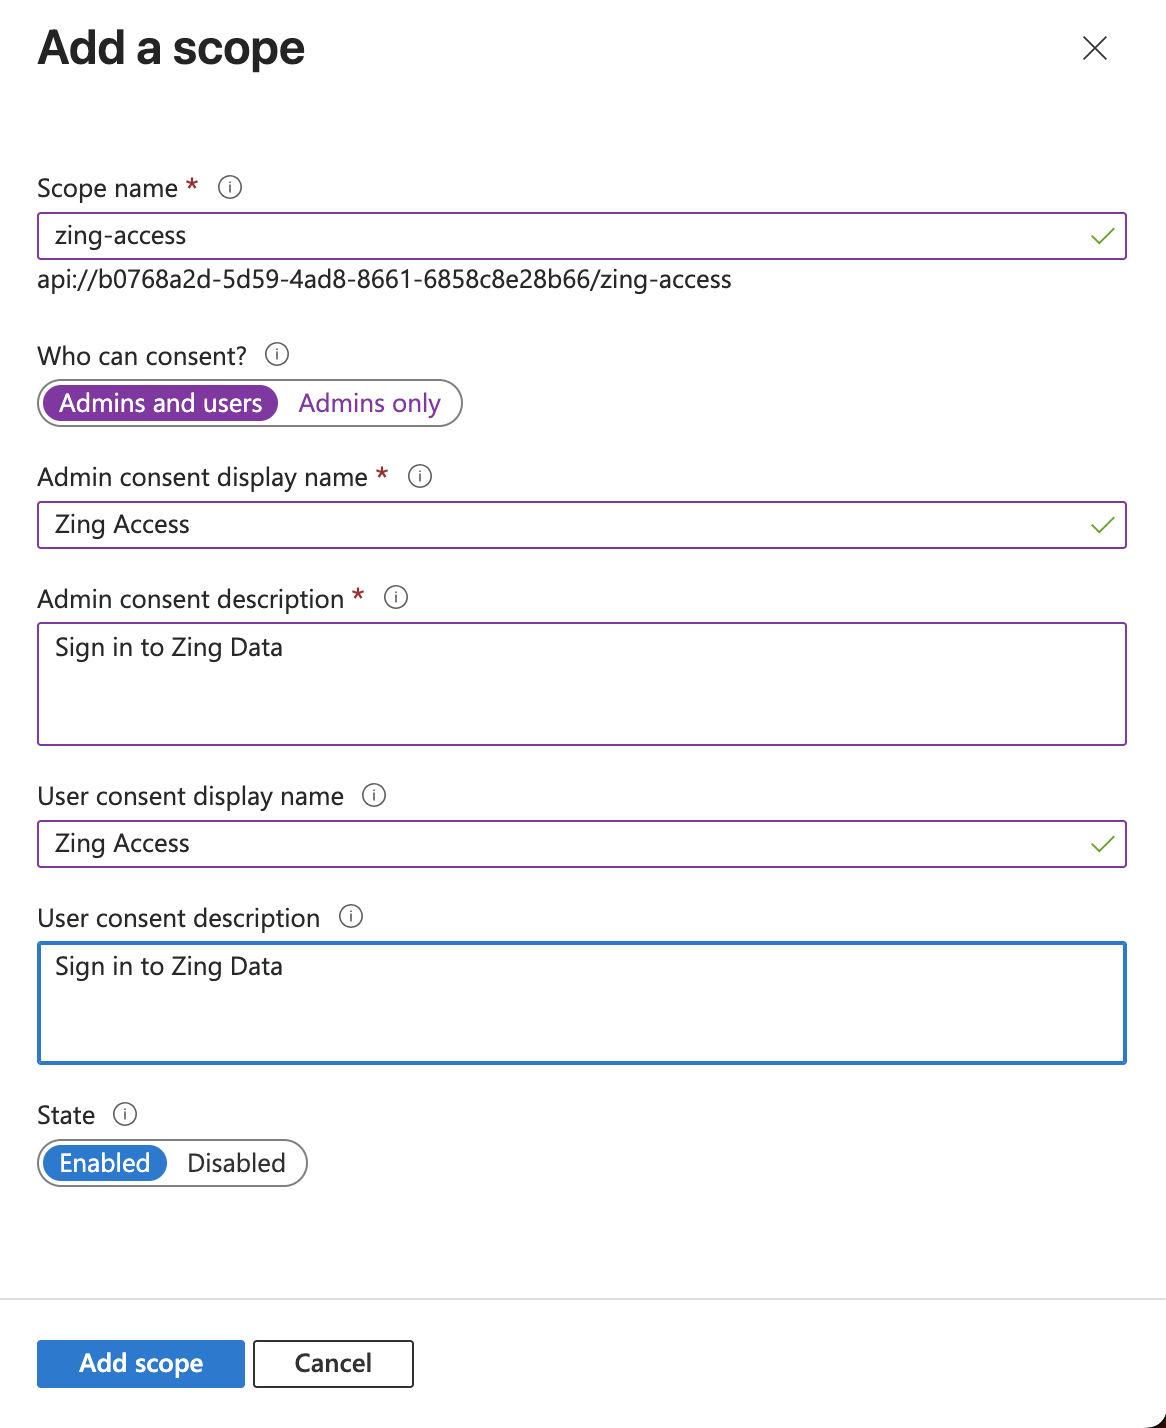
- Once you click in Add scope in the bottom, On the left side menu, click on API permissions.
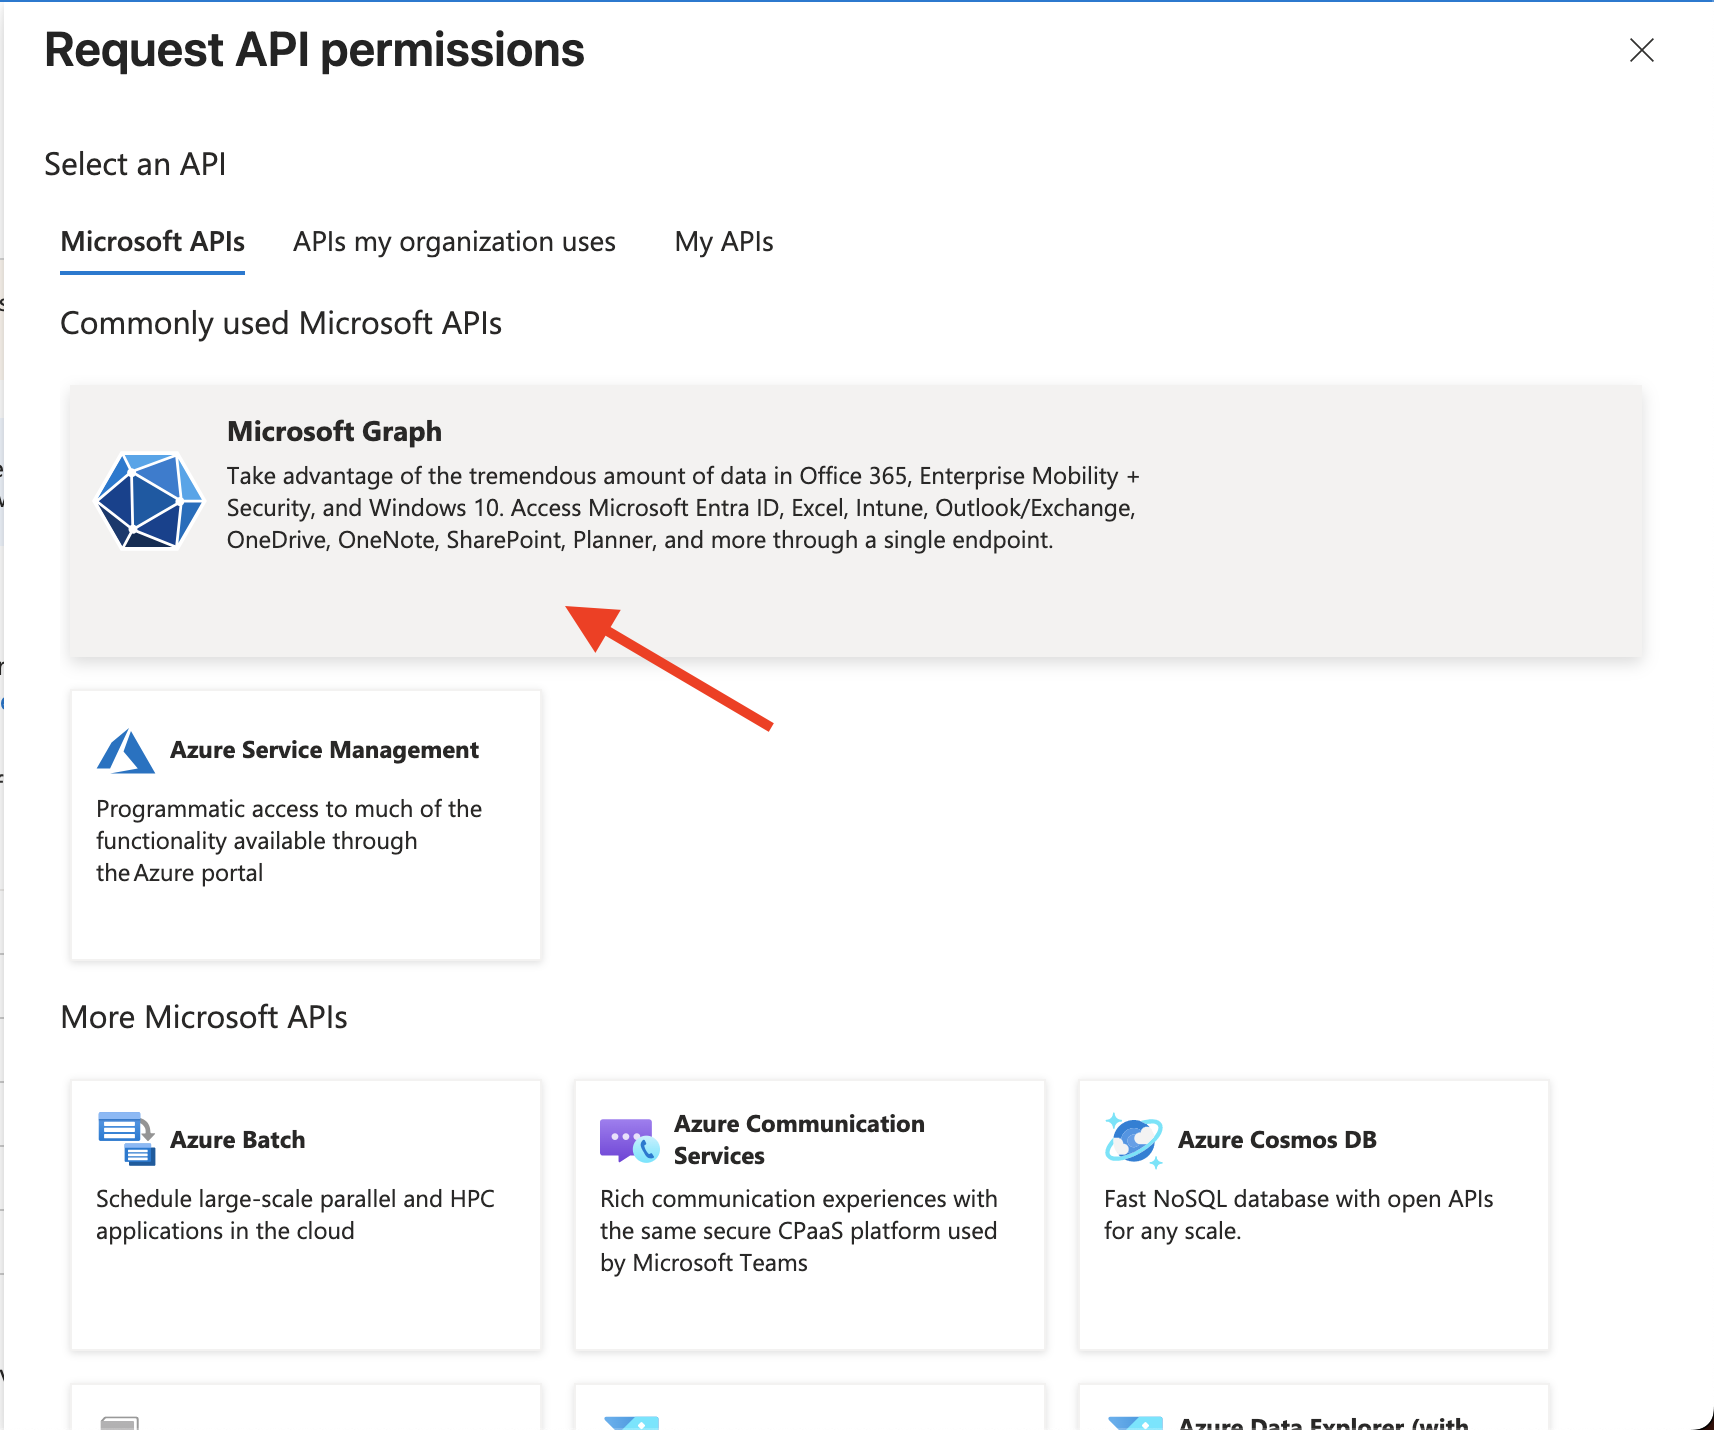
- Click on Add a permission.
- Click on Microsoft Graph.
- Click on Delegated permissions and then select
emailandprofilelike the example below and click Add Permission.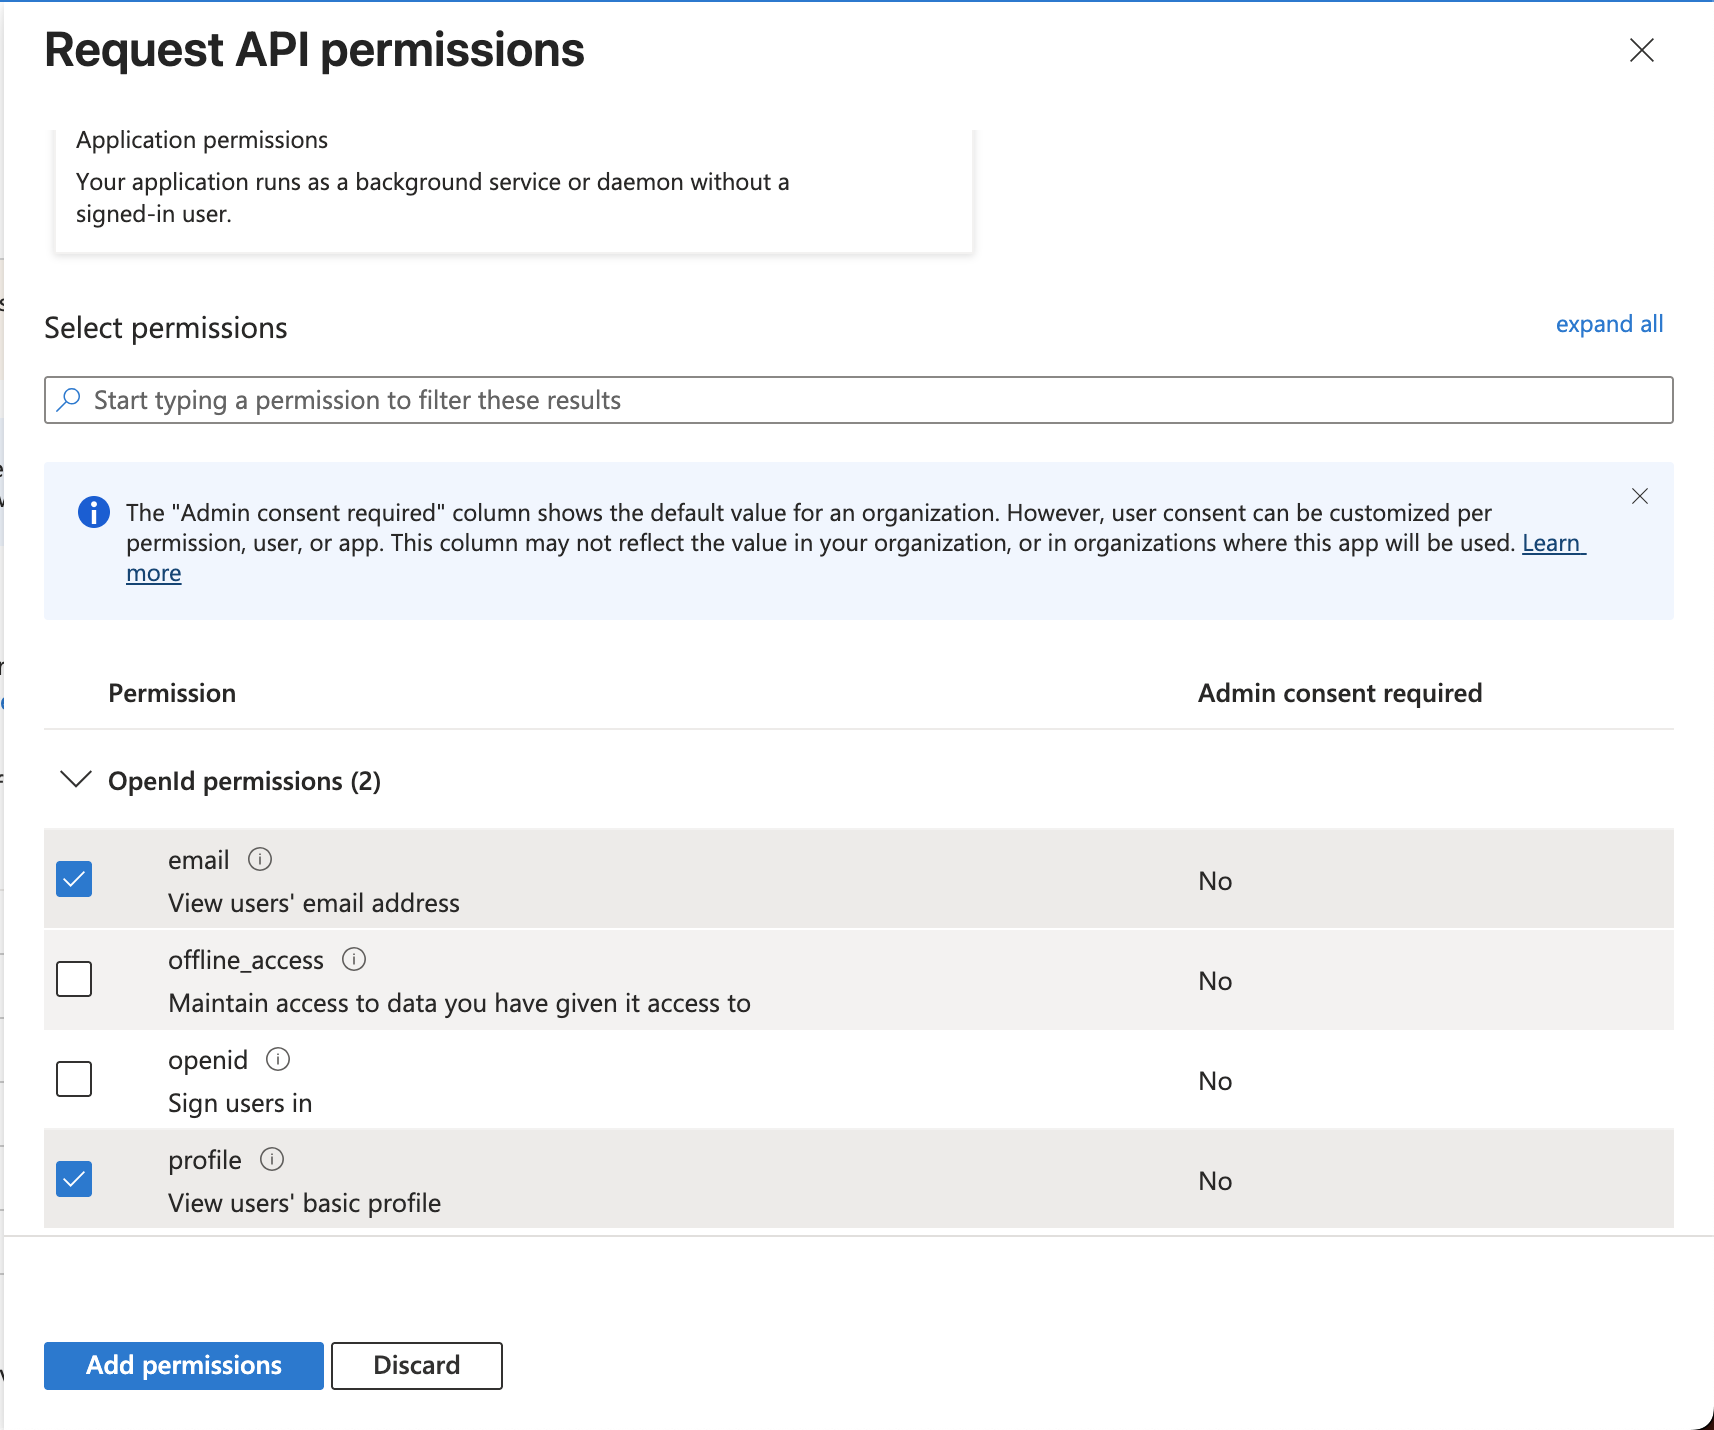
- Click on Add a permission again, but this time switch to the second tab on top APIs my organization uses and find the Zing Data API previously created.
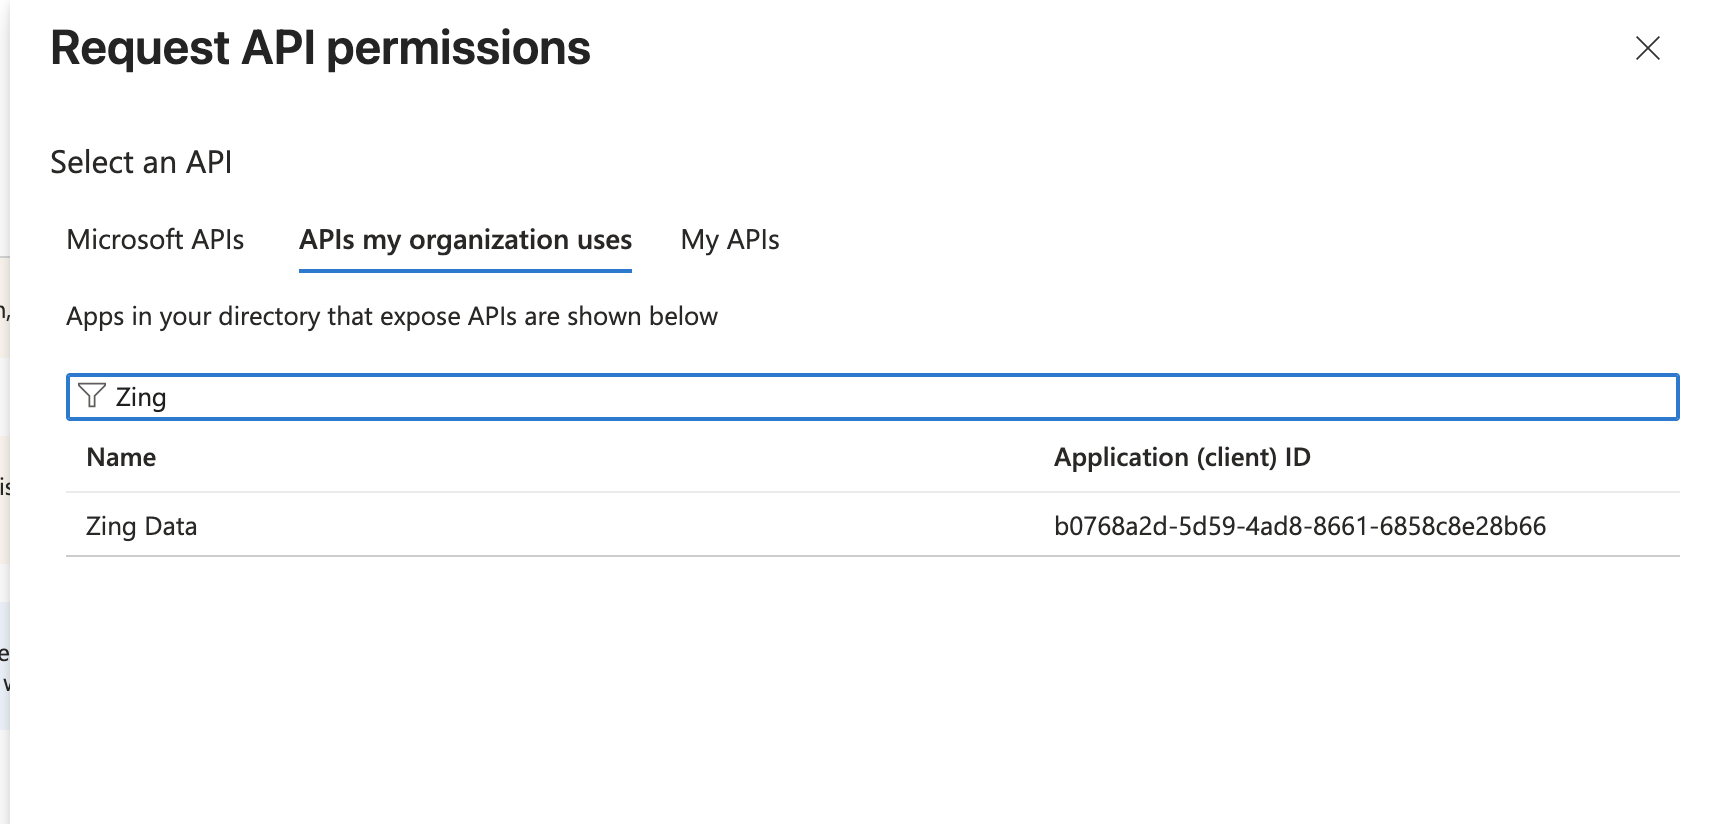
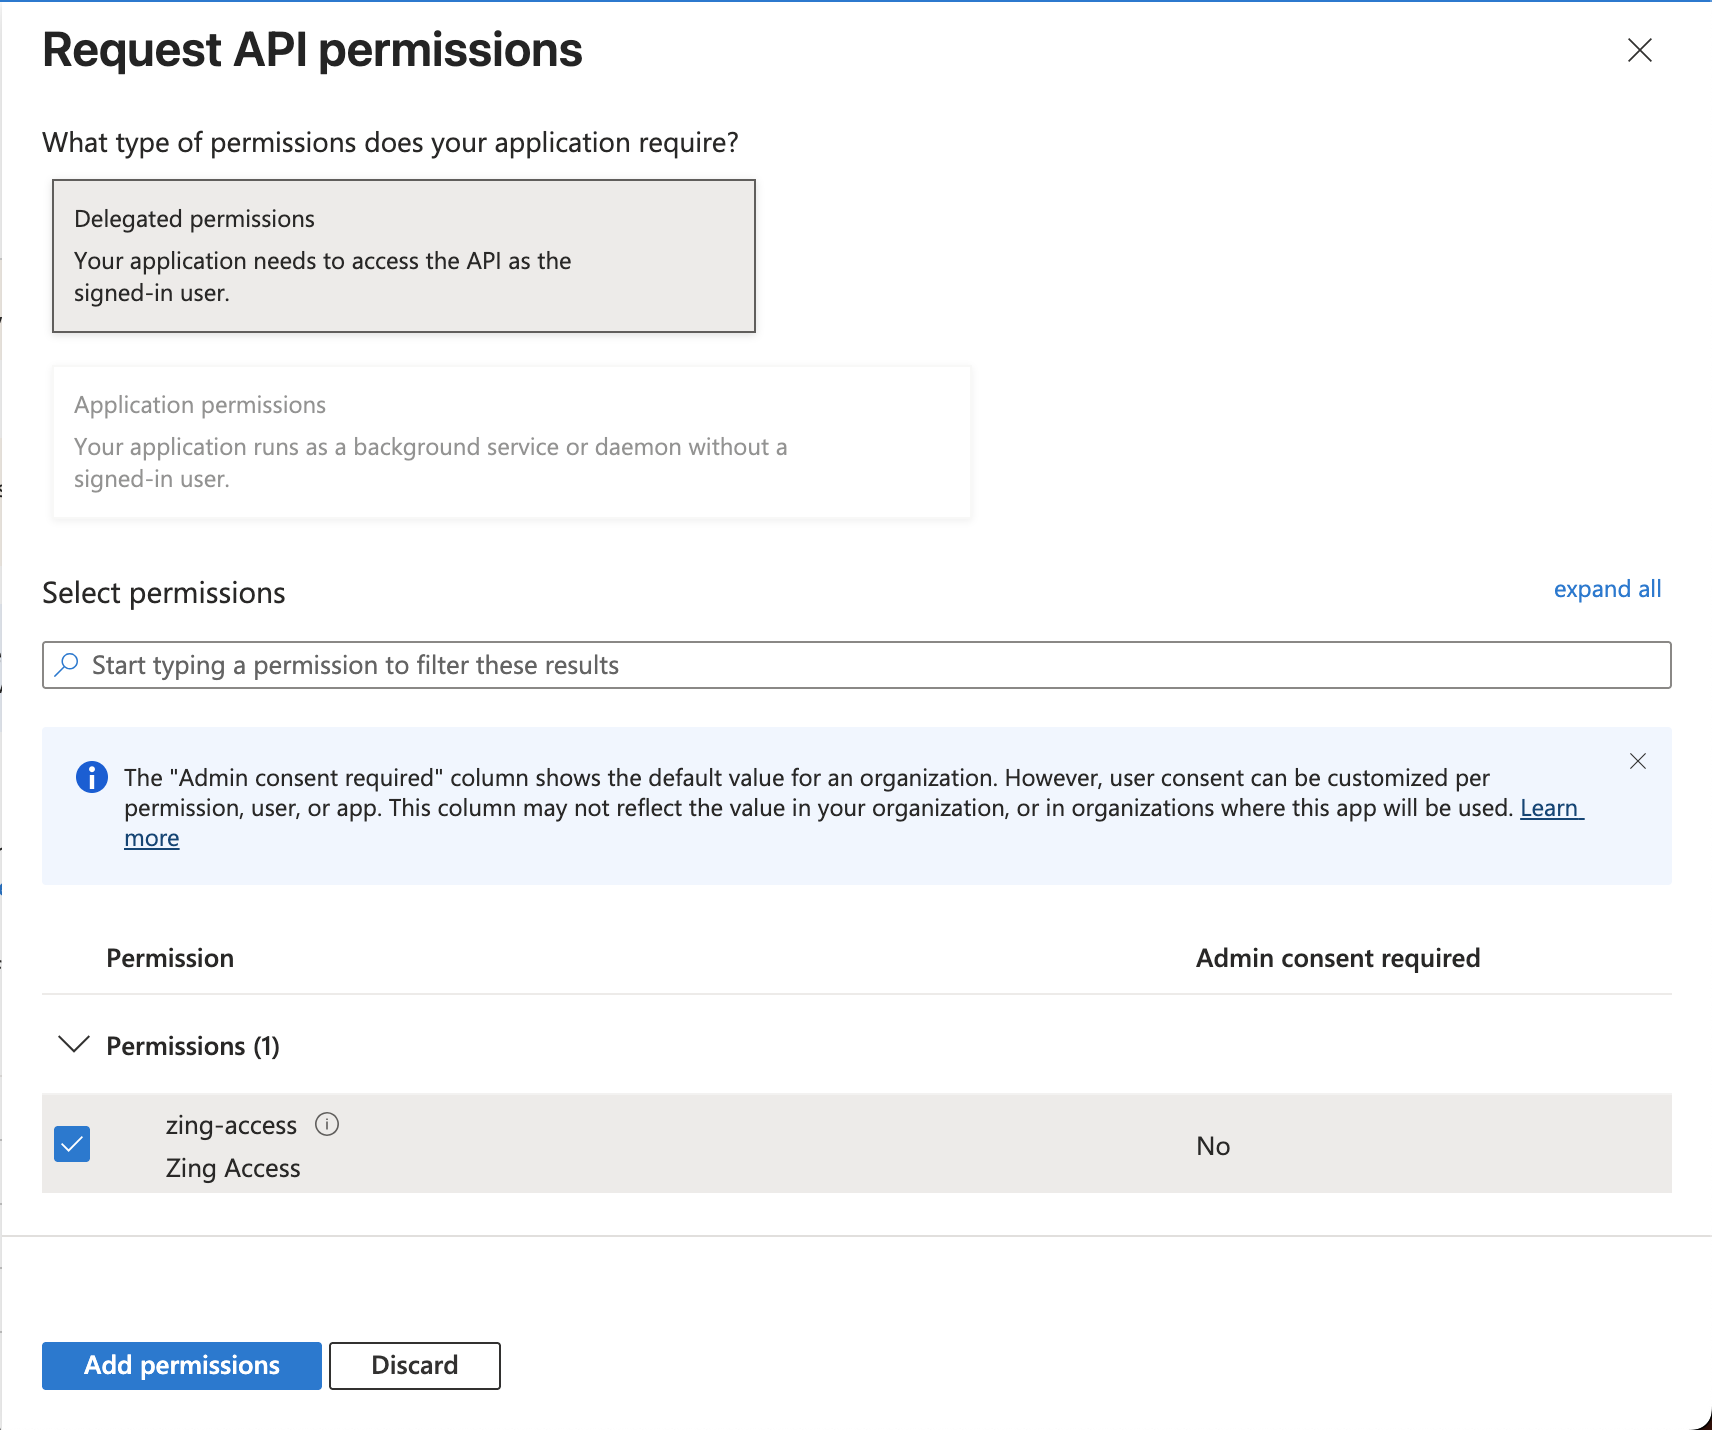
- Click again in Delegated permissions and select the Zing Access permission and then click Add permissions.
- On the left side menu, click on Token configuration and then click Add optional claim. You must choose Token Type: Access and then select
emailfamily_nameandgiven_nameclaims, then click Add on the bottom.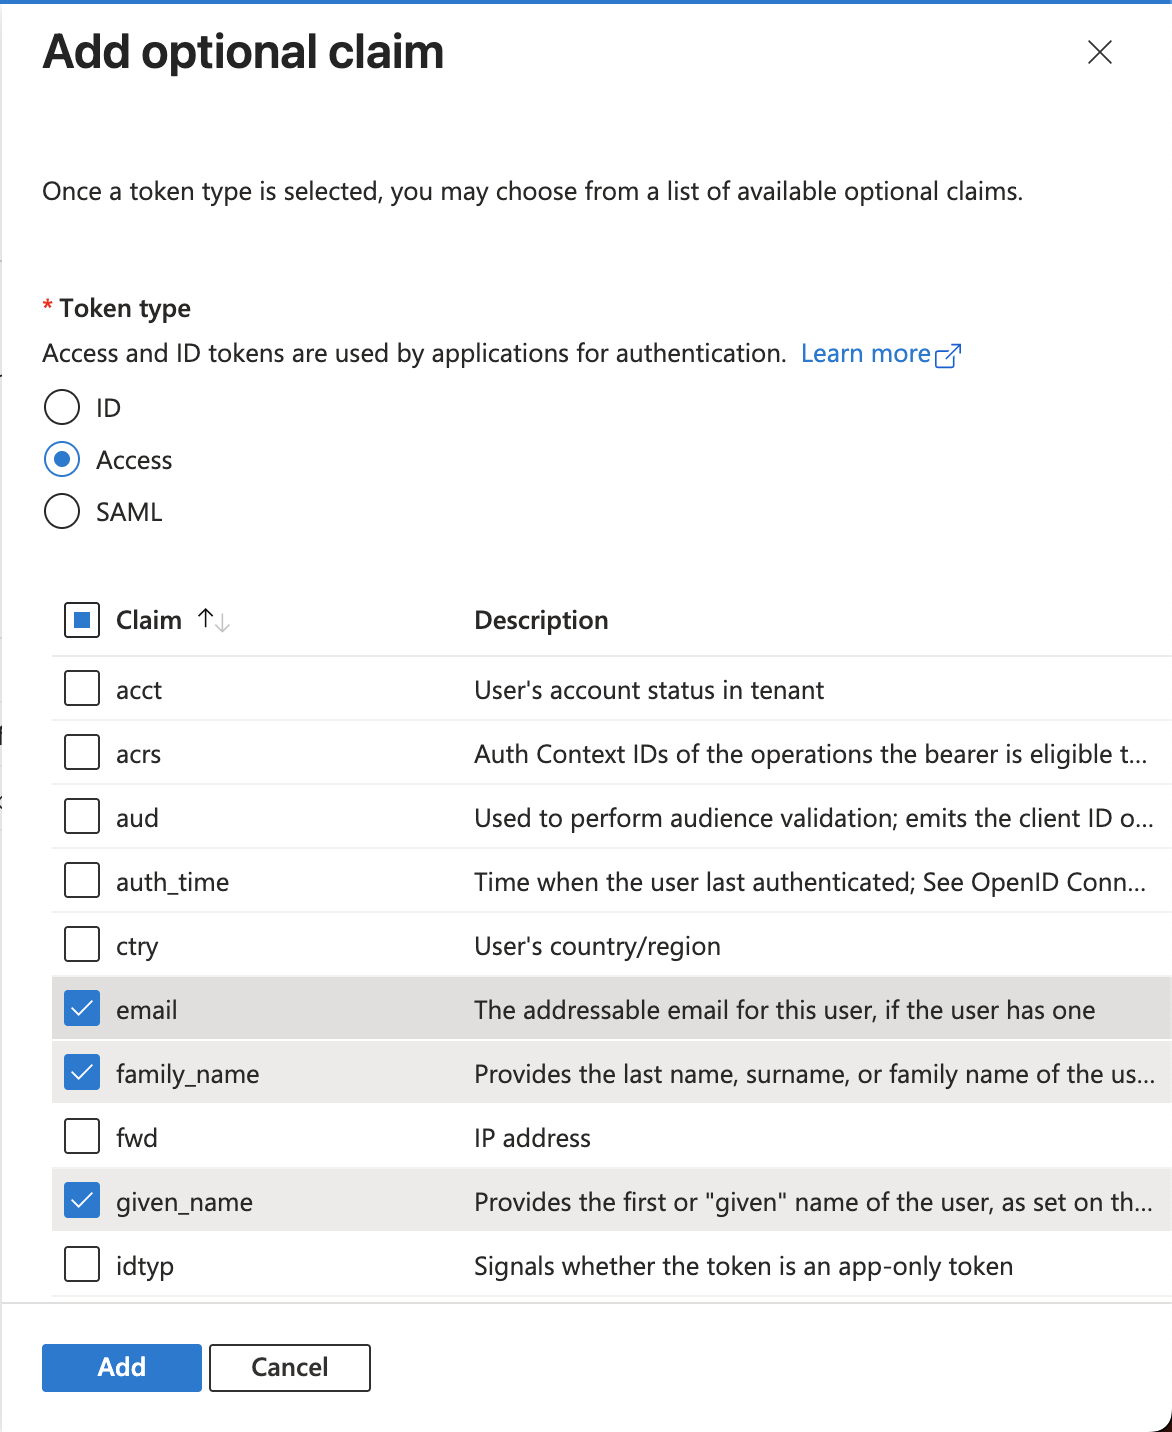
- Click on Manifest on the left side menu and click on tab AAD Graph App Manifest, then change the variable
accessTokenAcceptedVersionto 2 as in example below.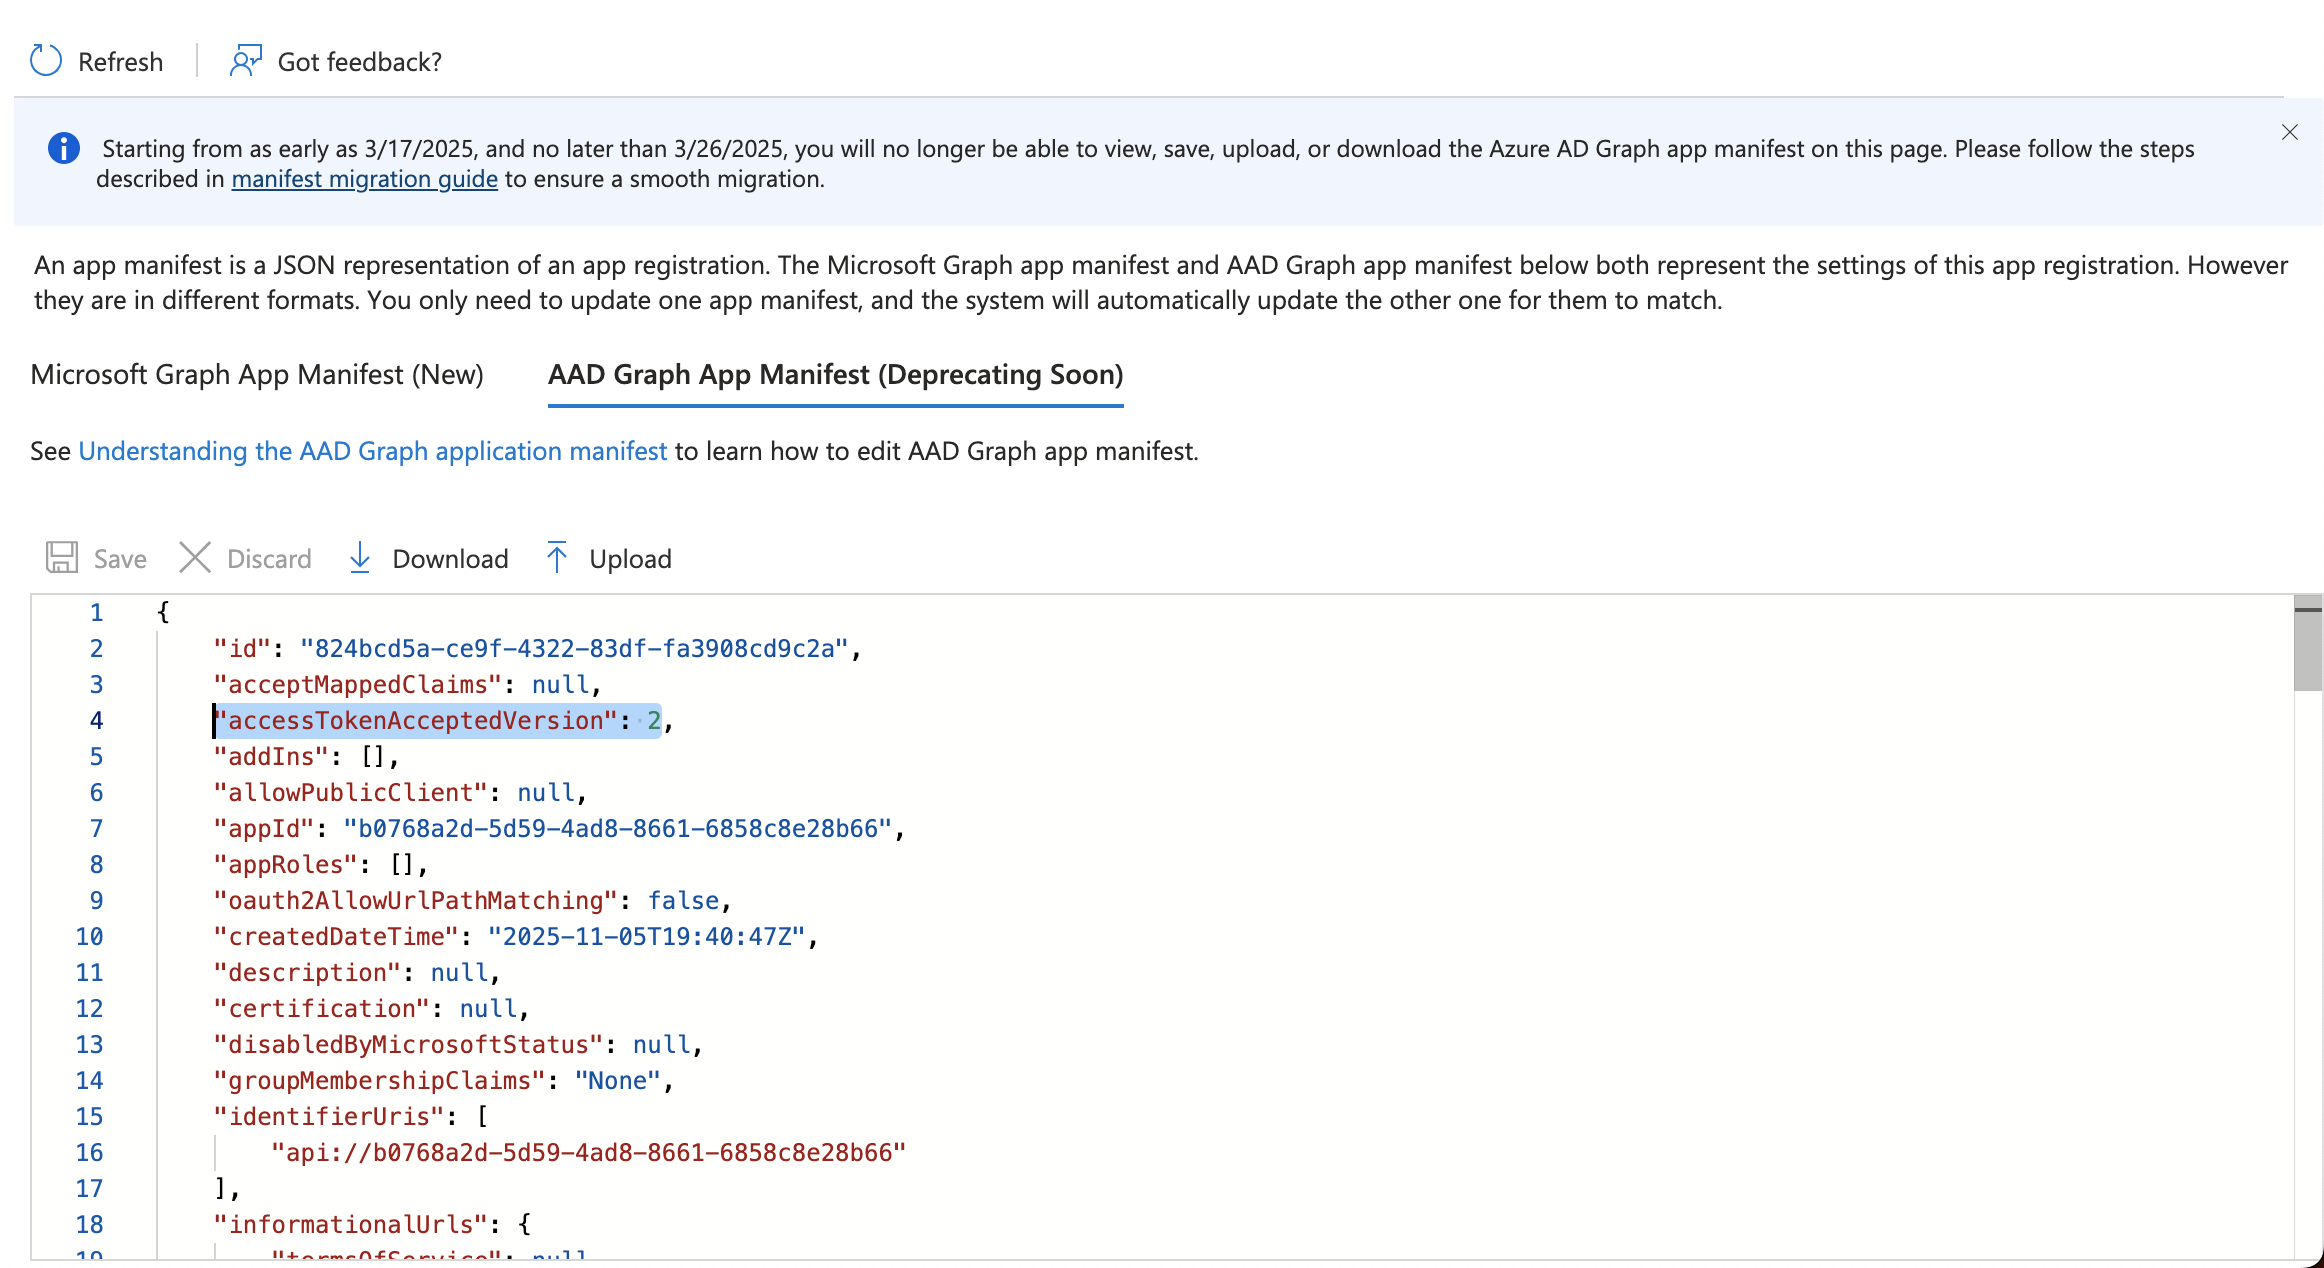
- Last step is to configure access to mobile applications. Click on Authentication on the left side menu and click on Add a platform (Single-page application with Redirect URIs should be already configured).
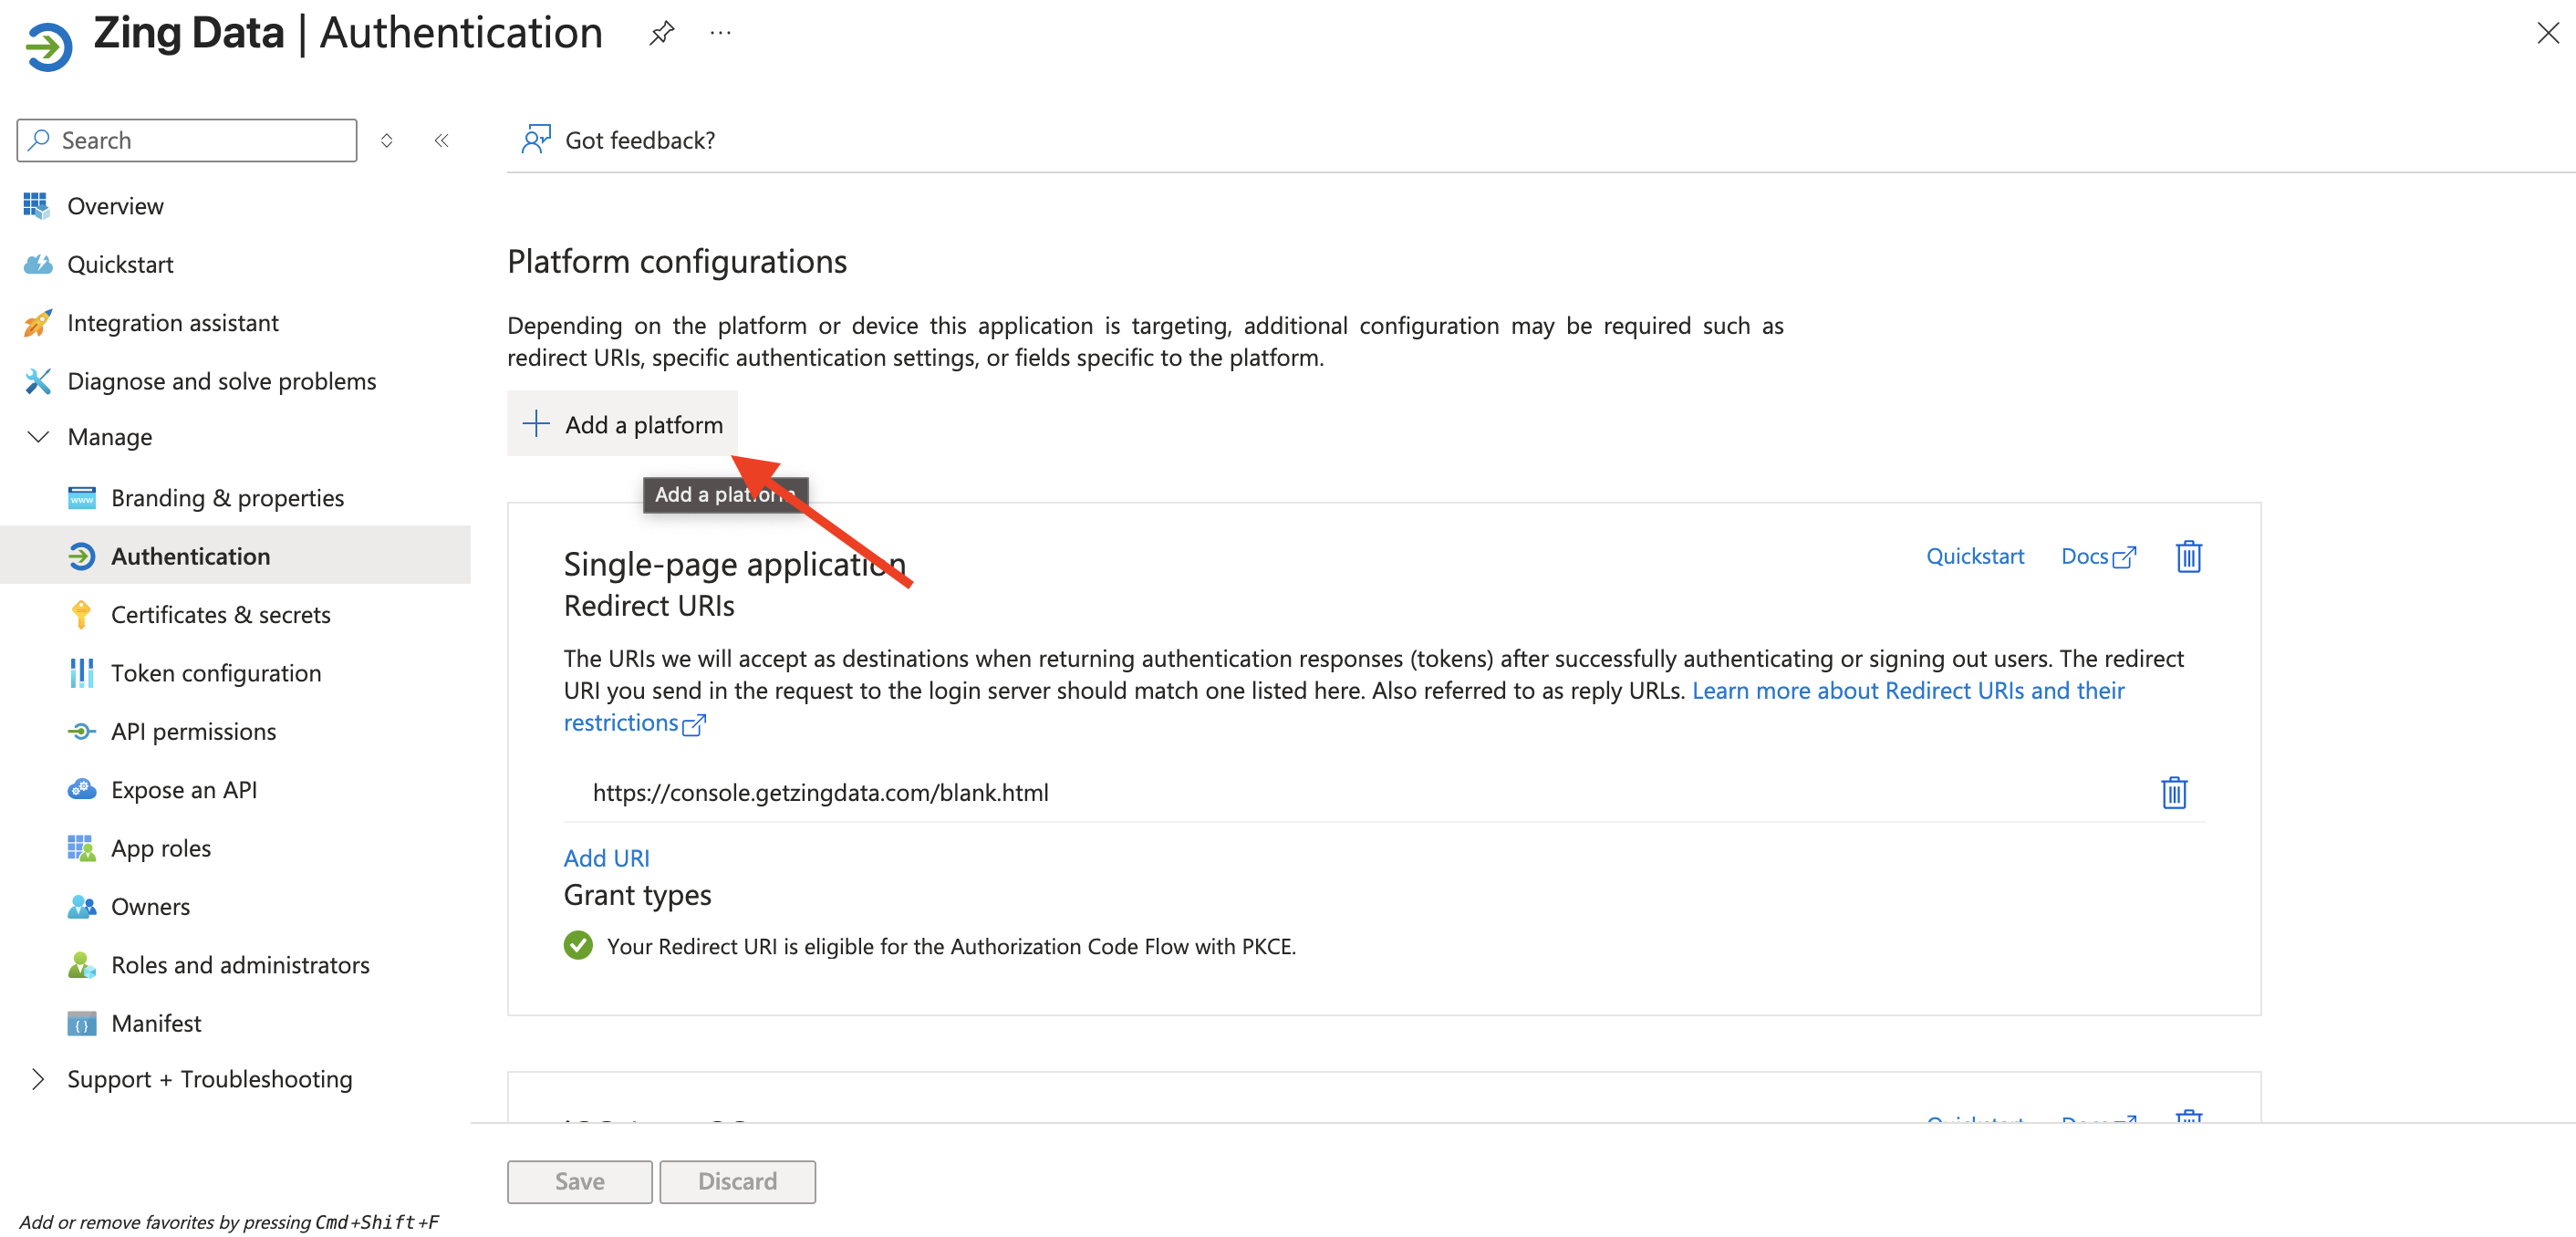
- Then fill it with the appropriate information for Android and iOS apps:
iOS:
Bundle ID: com.getzingdata.app
Android:
Package name: com.getzingdata.android
Signature hash: cnsx6OCEI/rJQqehq6baXX93c6w=
With all the steps above completed, everything should be in place for your SSO configuration in Microsoft Azure.
As a last step, please click on Overview in the left side menu and copy the Application (client) ID and Directory (tenant) ID values and send these values to the Zing Data enterprise support team to complete the integration.