Row Level Security allows you to control access to data in a database by row, so that a logged in user can only view the data they are authorized for. You will be able to control “Who sees what in the chart?” by including a RLS filter to the question.
For example, let’s consider the question “Performance statistics per employee”. With a RLS filter, you can control the resulting data for this question so that the logged in user would only see their performance statistics as opposed to seeing statistics for all employees.
With Zing Data, the user’s email, username, or ID can be used for dynamic user-specific filtering. Support for other user attributes can be provided based on your requirement. Reach out to our team to integrate other user attributes.
Row Level Security Use Cases
Employee based RLS - A user can only see information they own/responsible for or tied to (most common filters are email, user ID or username)
Department based RLS - A user can only see information for the company, department or unit they belong to.
Role based RLS - A user can only see information assigned to their role (E.g: Manager, Customer, Engineer, etc.)
Location based RLS - A user can only see information of their specific region or city
The lookup table in your datasource should have a email field (which is the lookup for logged in users in Zing), along with any other attributes you’d like in your lookup table.
Two RLS options
If you’re using question-level RLS
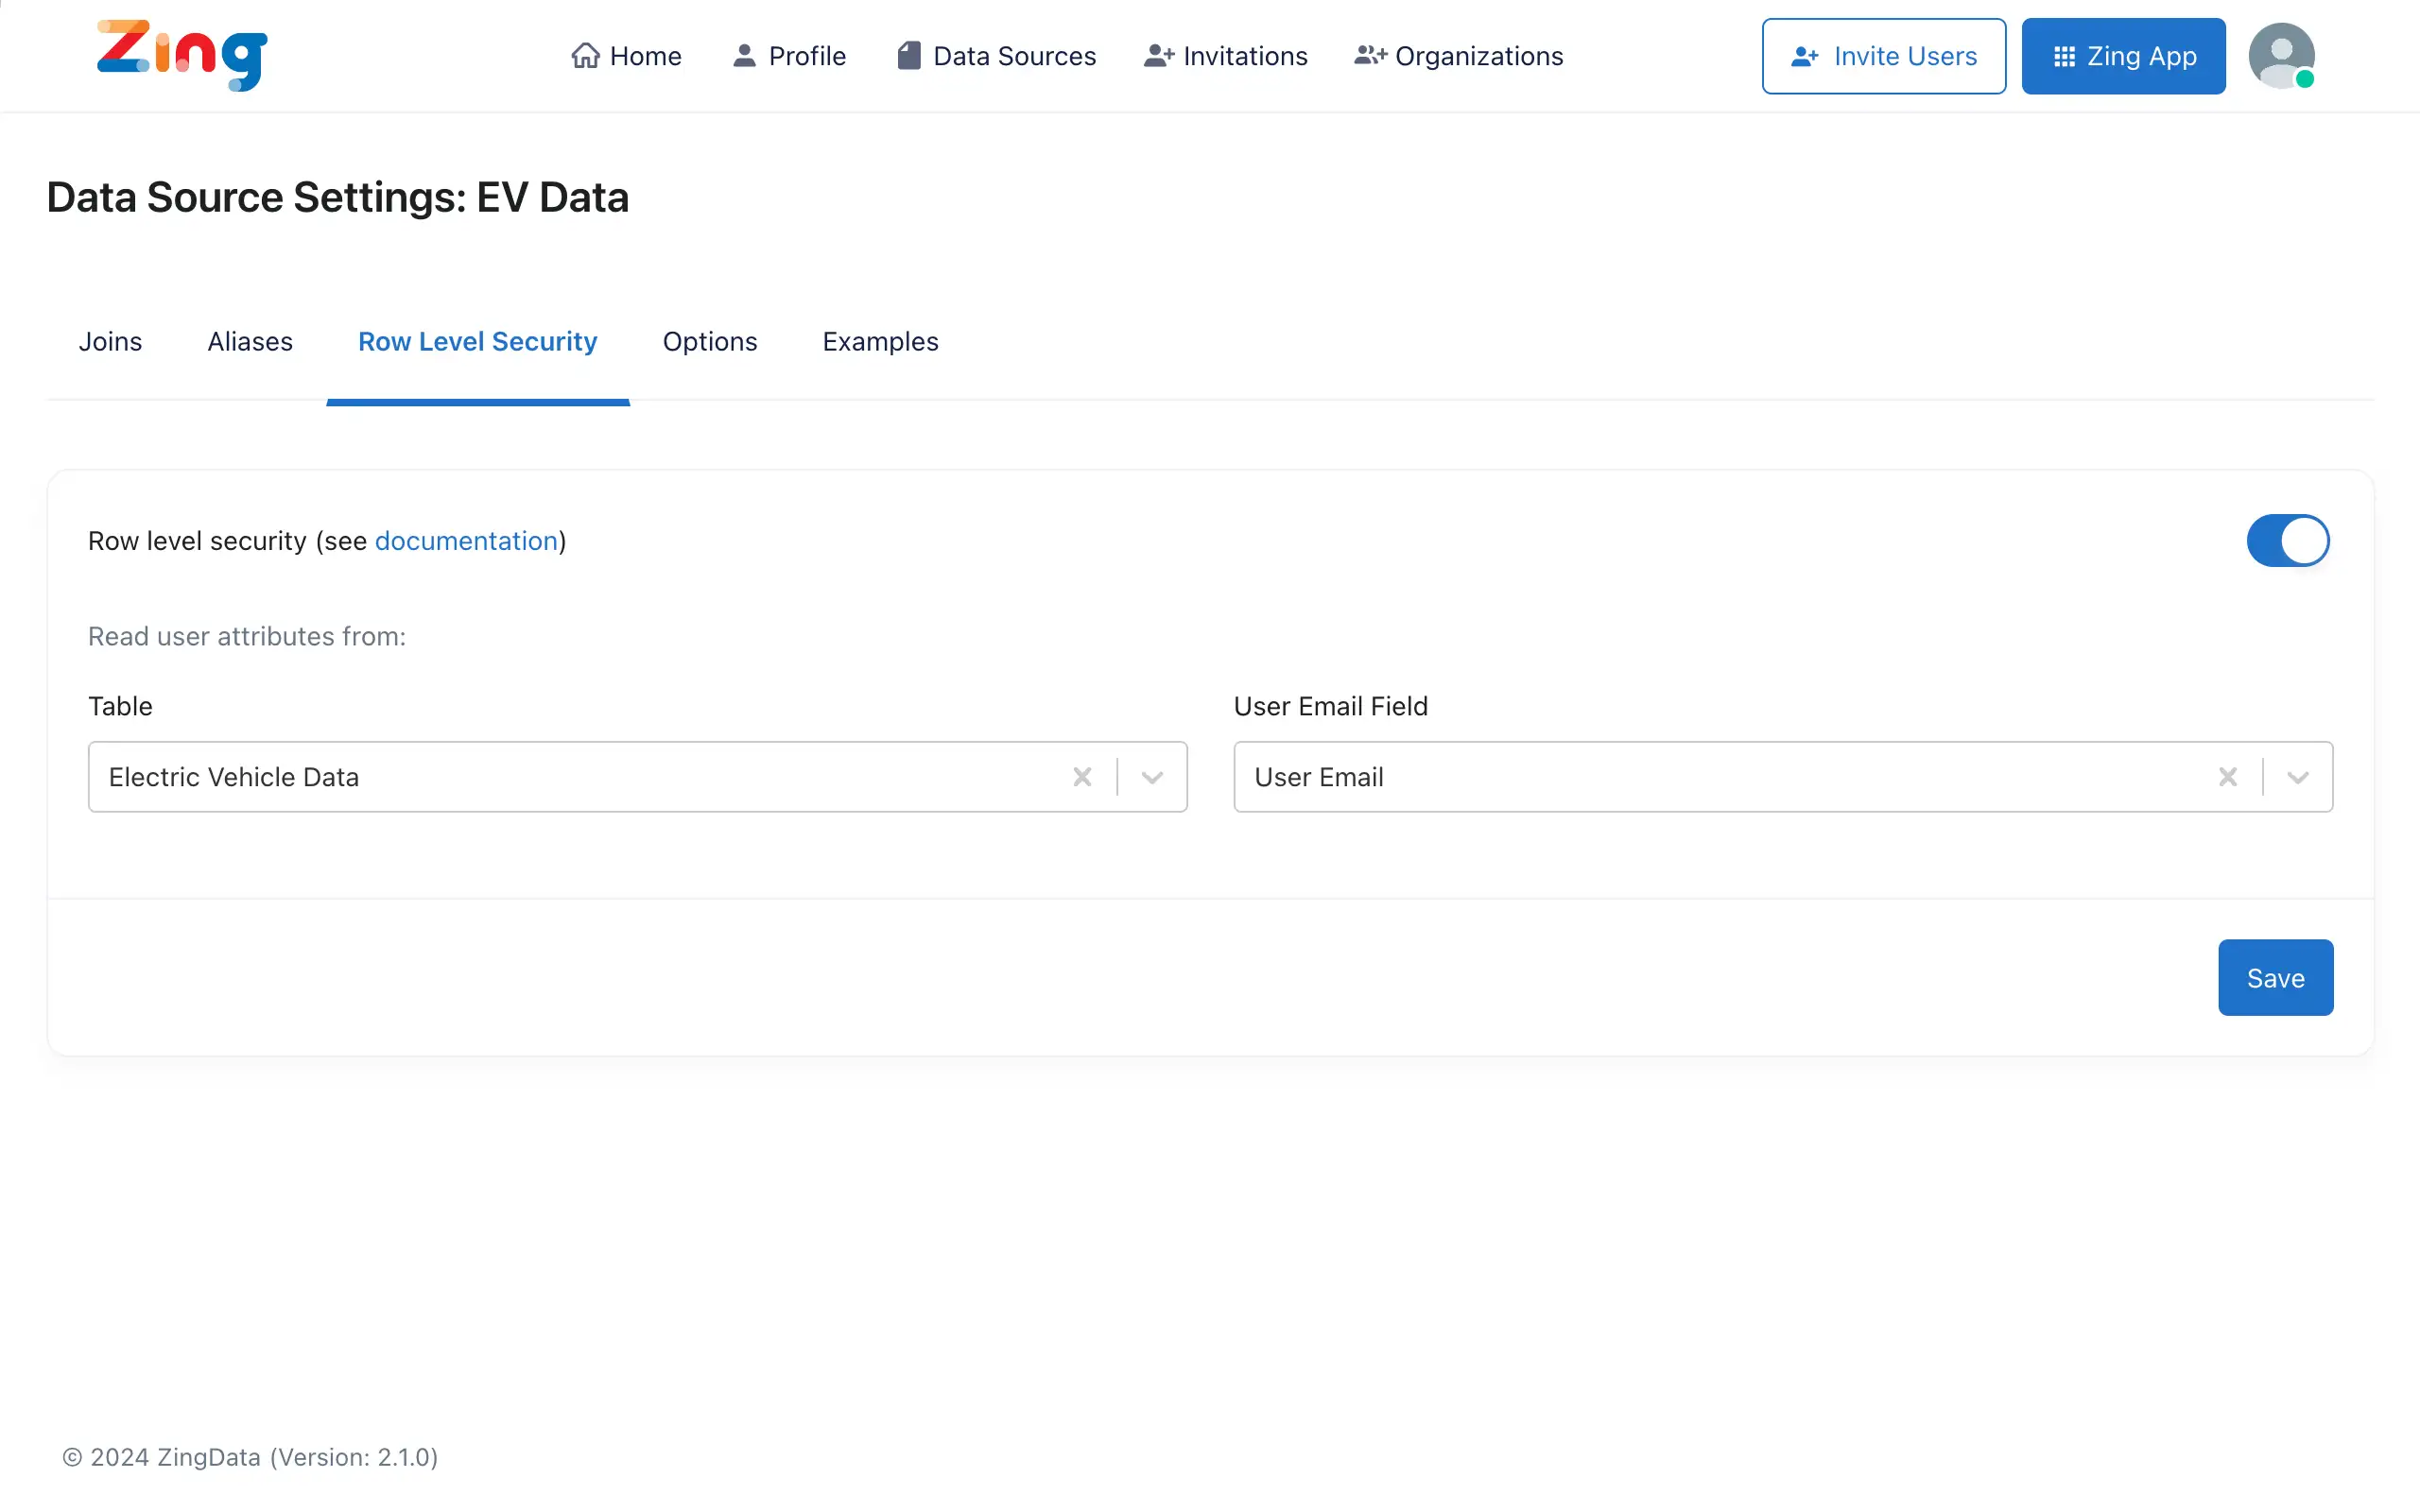
Go to your data source in Zing Console and select the ‘Row Level Security’ tab
Activate RLS with the toggle on the right
Select the lookup table and field
Create an additional filter for RLS on the field you require RLS filtering on. This can be done via the Visual Query Builder or via Custom SQL.
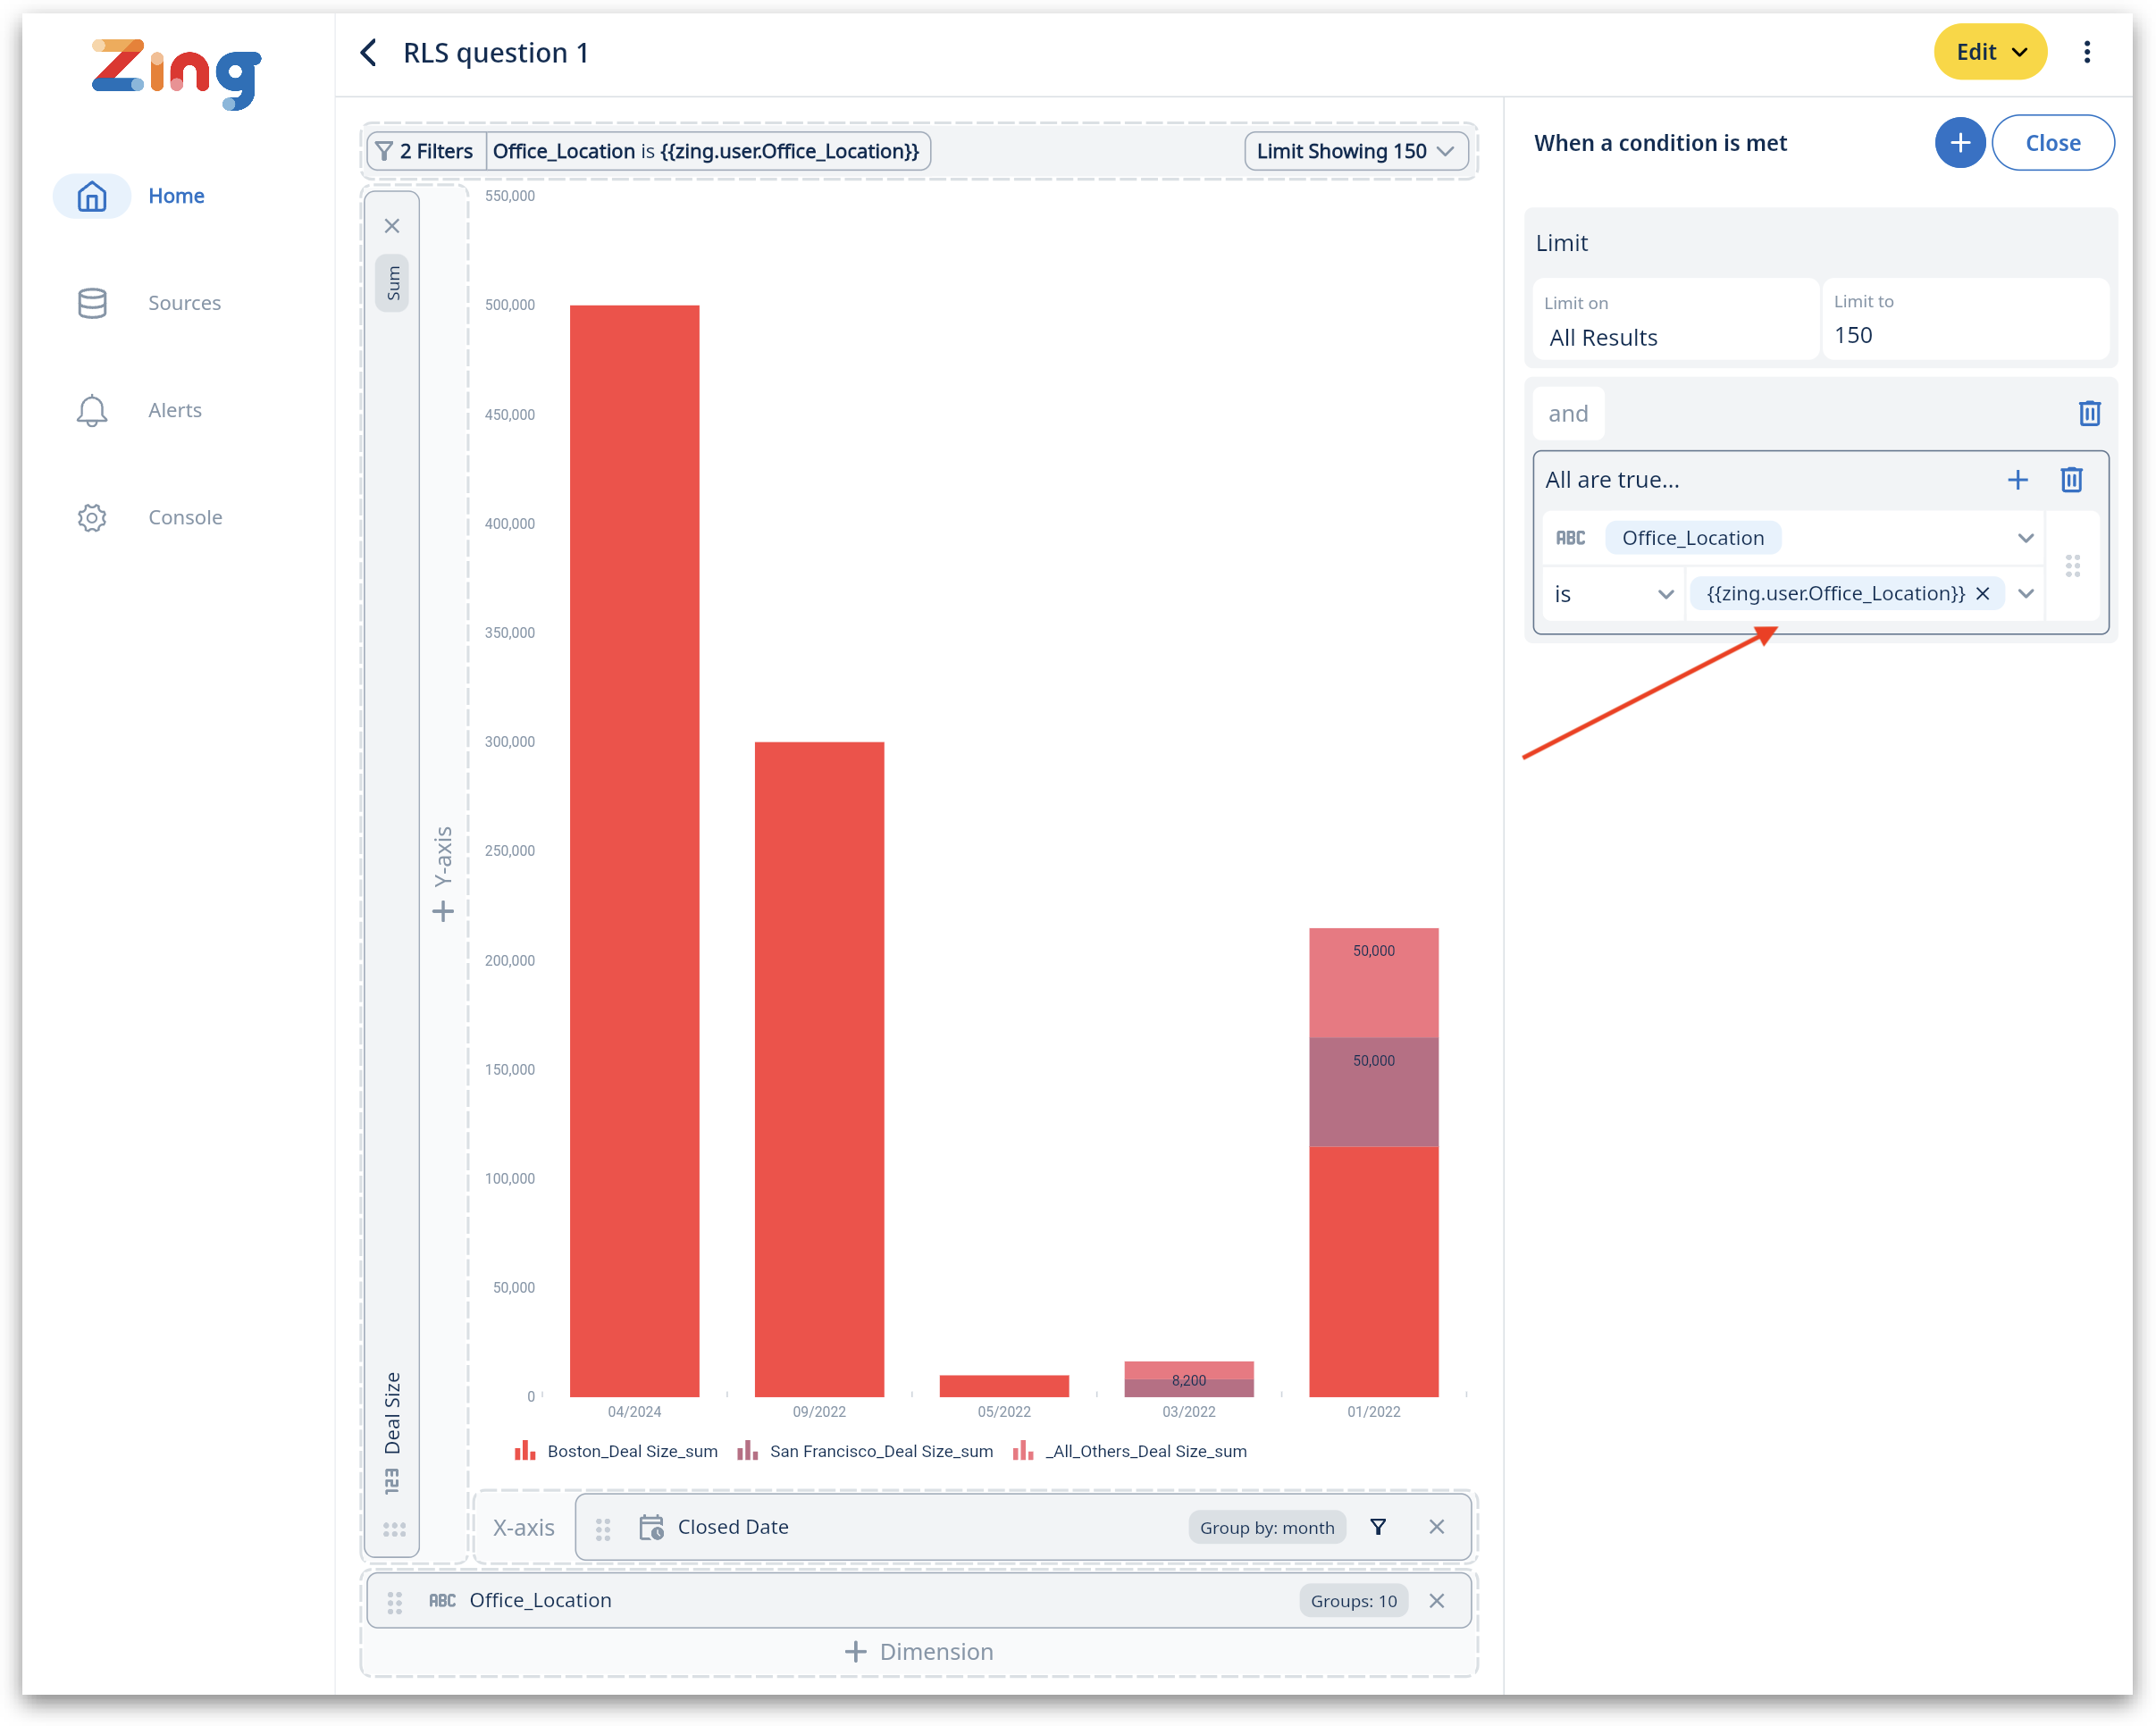
Query Builder
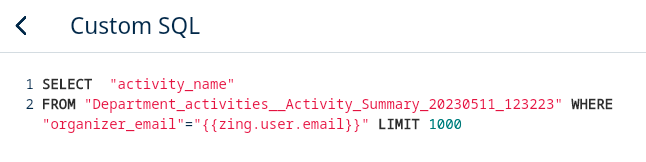
Custom SQL
The format of the filter should include zing.user before the name of the filter. For example, to filter by email, the RLS filter should be {{zing.user.email}}.
The resulting chart for a query with RLS filtering will have different results based on the logged in user.
If you’re using centralized RLS
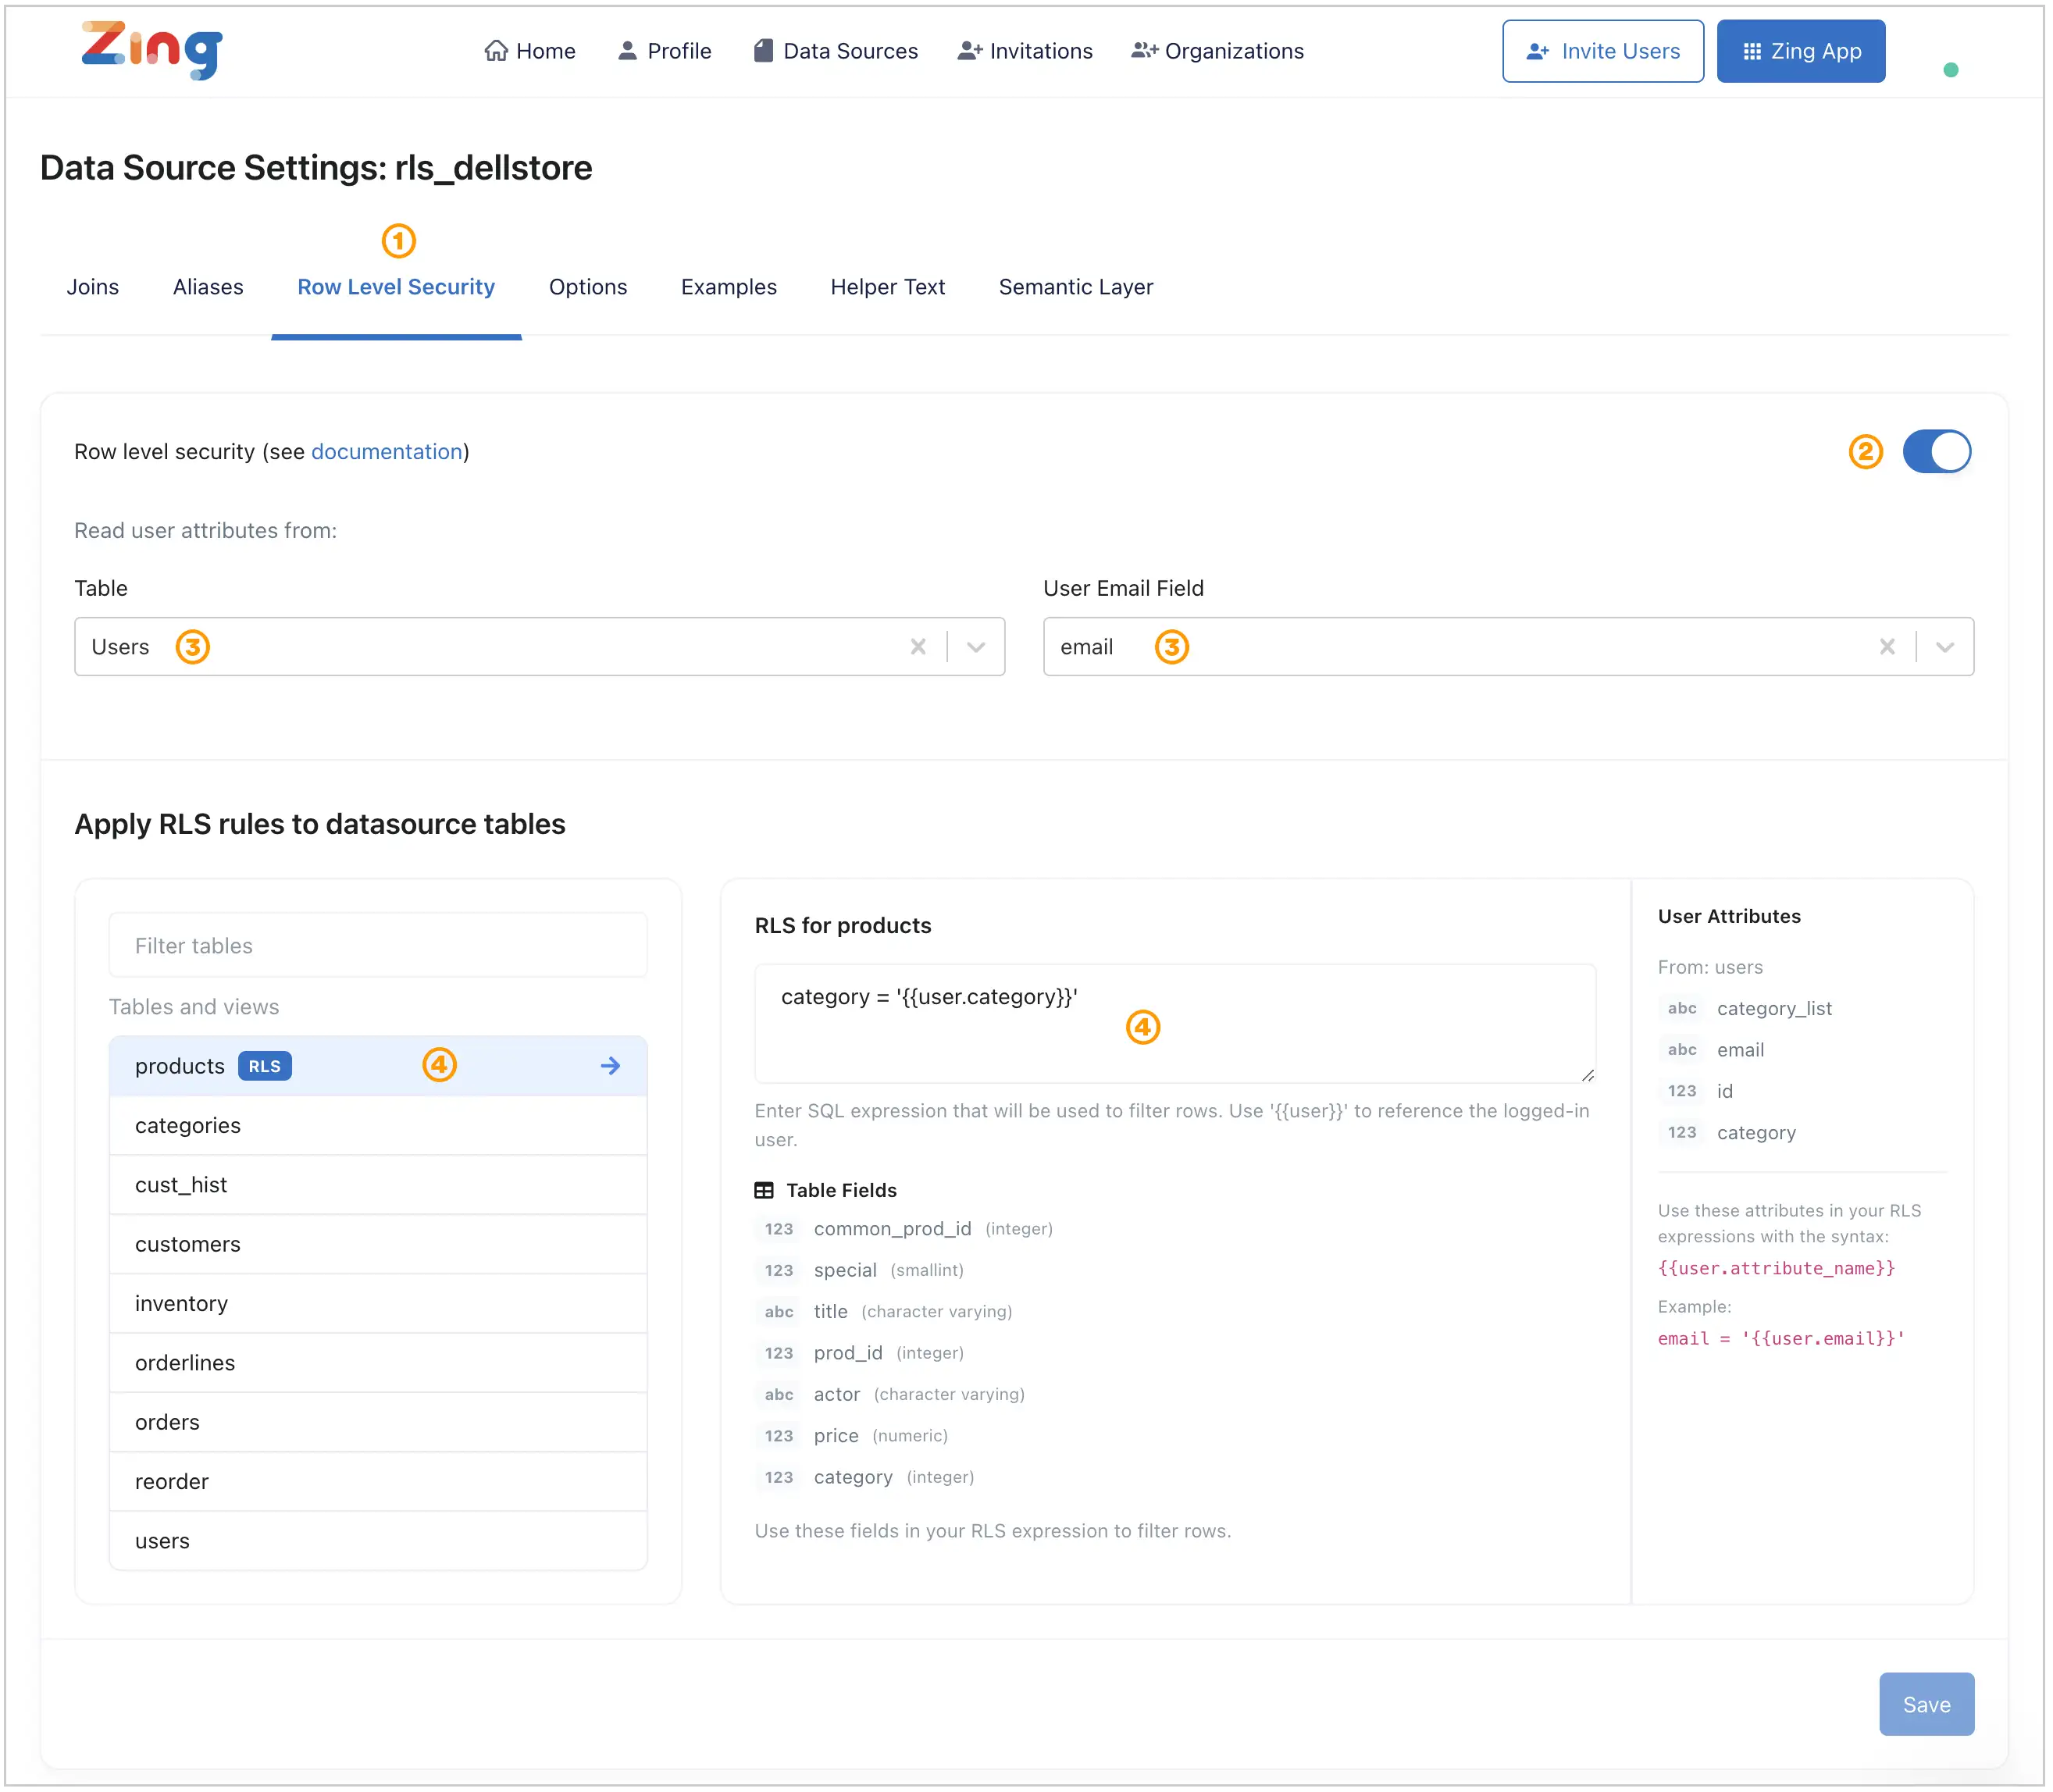
Go to your data source in Zing Console and select the ‘Row Level Security’ tab
Activate RLS with the toggle on the right
Select the lookup table and field
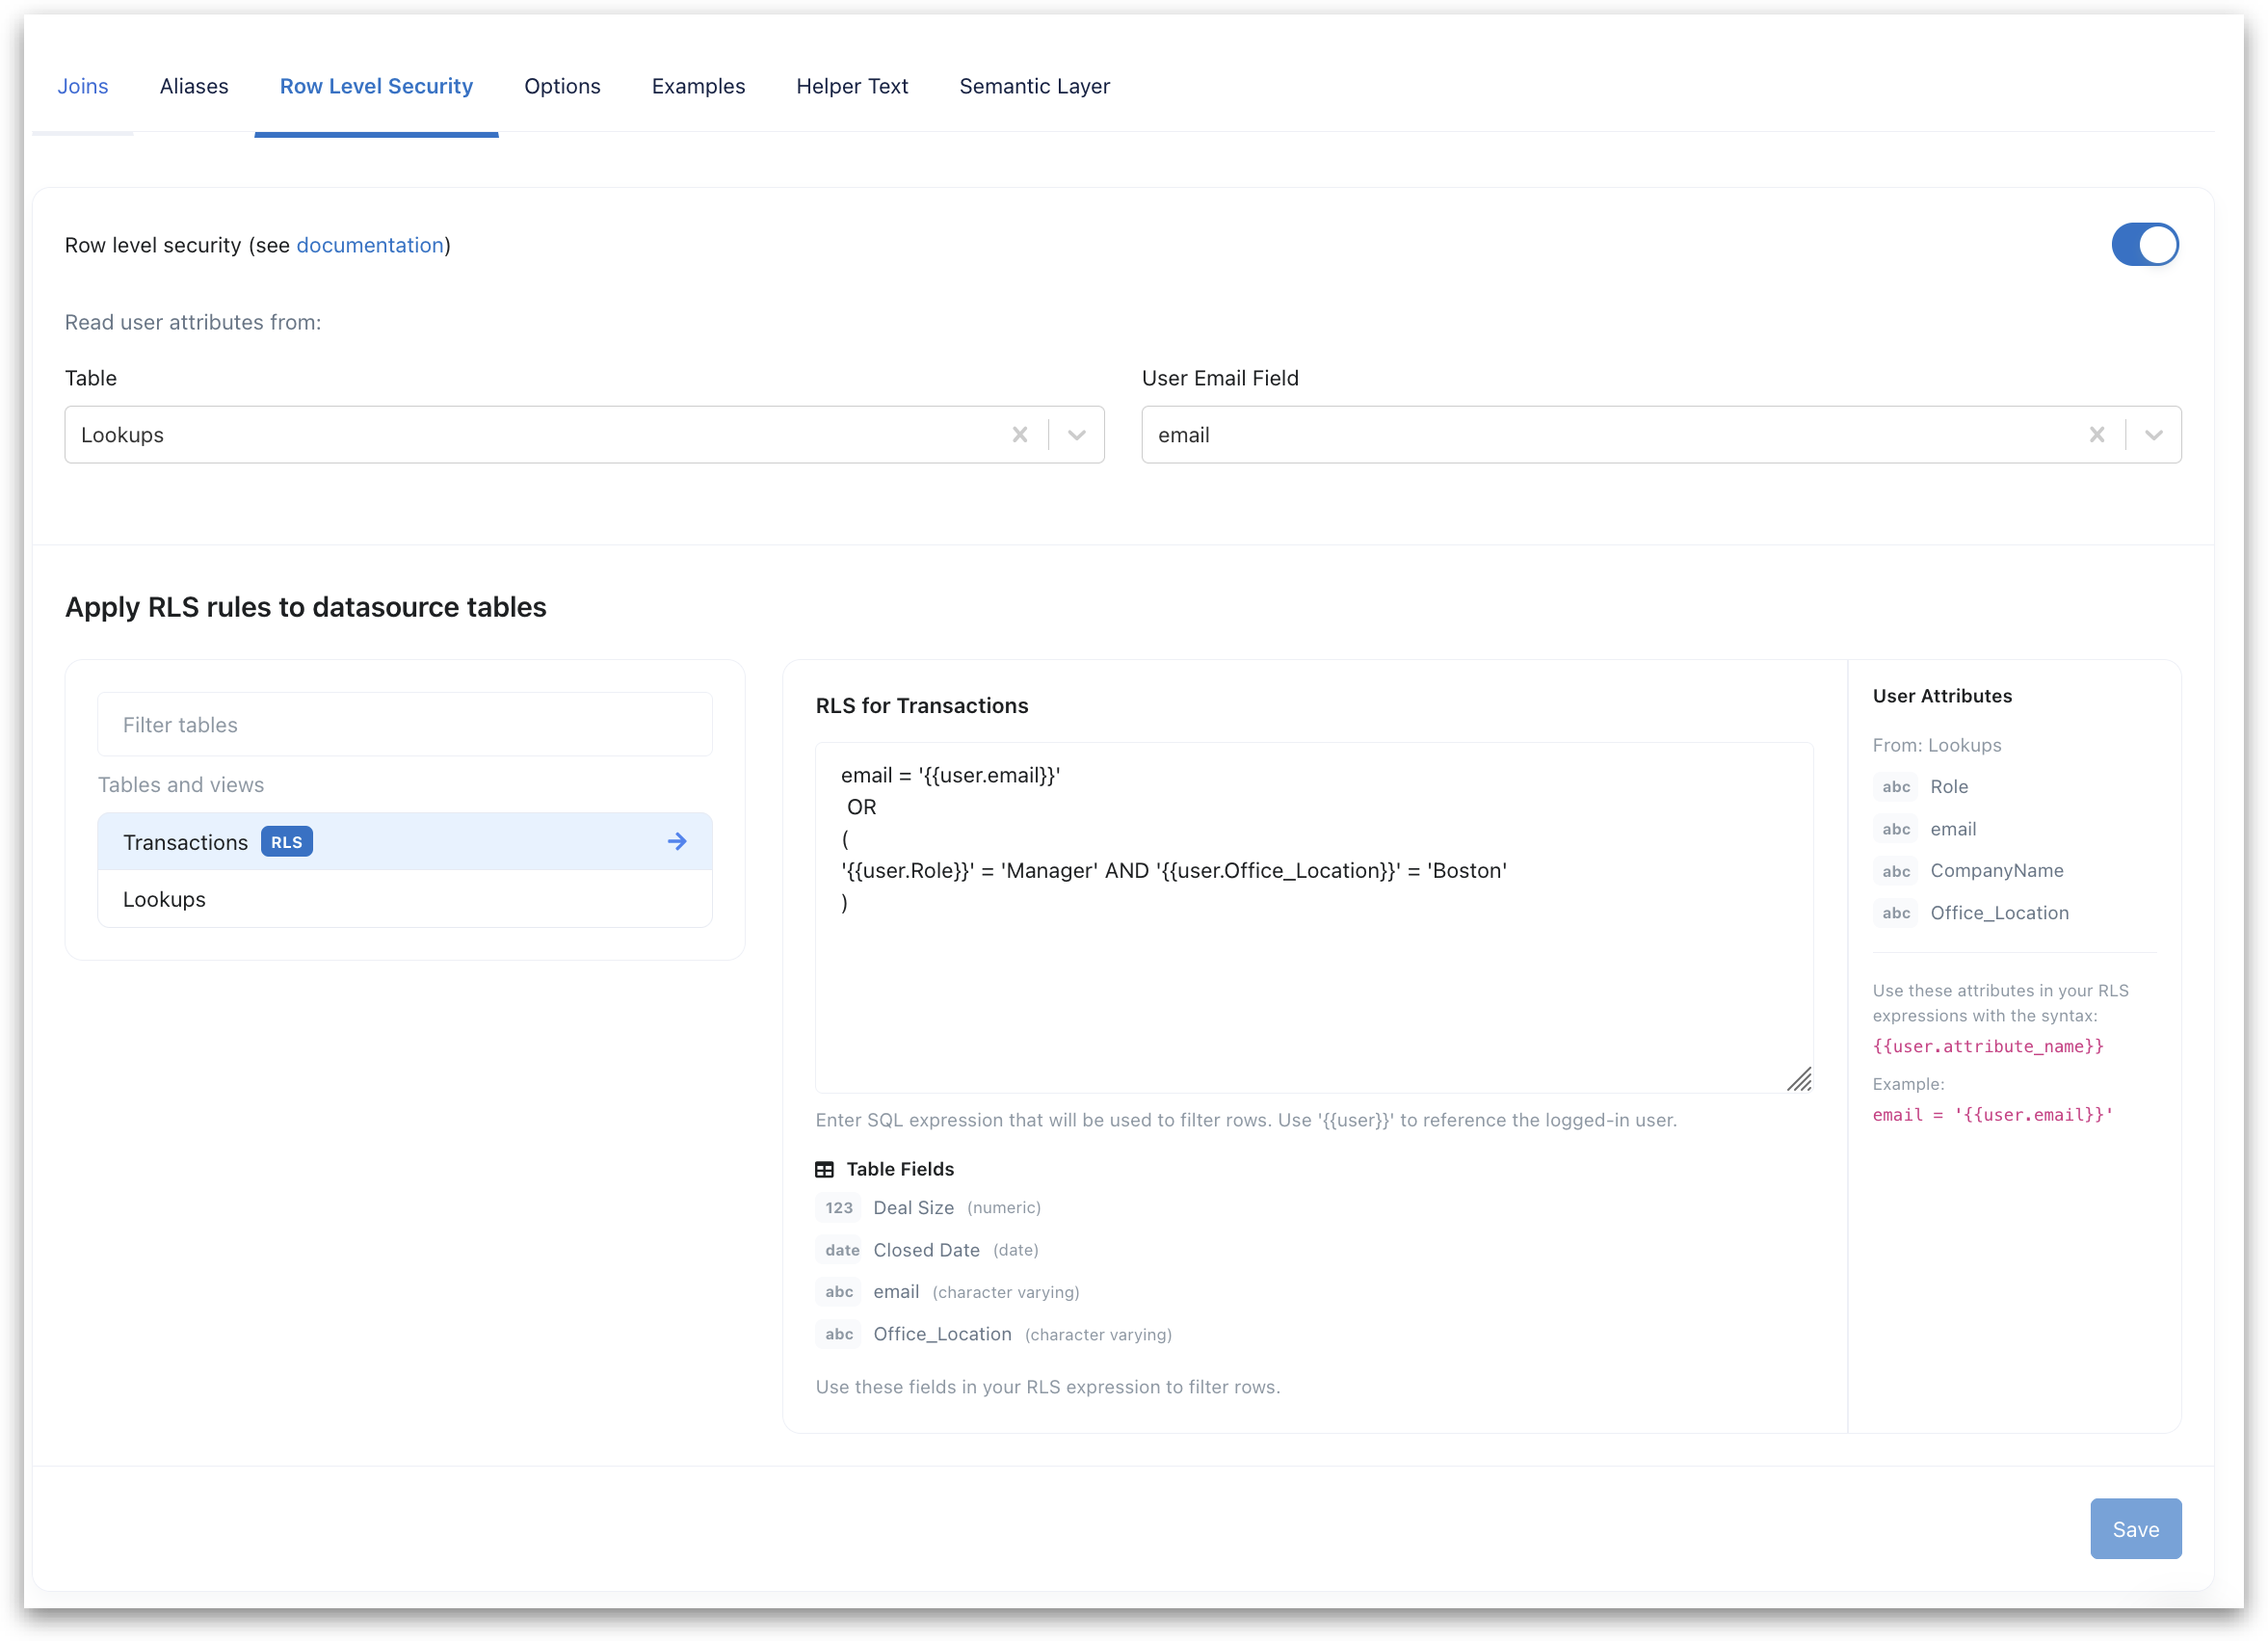
Select one of the available tables and enter a SQL expression into the input box that will be used to filter rows. It should evaluate to TRUE for a given row to be accessible to a user.
You can add RLS configurations at the table level using a mix of the lookup attributes or conditions.
An example RLS condition could be –> email = ‘{{user.email}}’ OR ( ‘{{user.Role}}’ = ‘Manager’ AND ‘{{user.Office_Location}}’ = ‘Boston’)
1 - Lookup Tables for RLS
Row level security filters with any user attribute.
A lookup table allows you to use more user attributes for row level security filtering. For example, without a lookup table you can only use an email field for row level security. By defining a lookup table with user information, you will be able to use any attribute in the table as the RLS filter.
A lookup table can be defined for each of your datasources. The email field is a must have on your lookup table.
Select the table you want to set as the lookup table for the datasource and the email field in that table.
Now you can specify any filter on your charts/tables as mentioned here using the attributes in your lookup table. For example, if you want to apply the RLS filter on the user’s ID, the filter on the WHERE condition should be {{zing.user.user_id}}. Filtering by the region would be possible by specifying the filter as {{zing.user.region}}.
2 - Centralized RLS Setup
Centralized Row Level Security in Zing lets you control what data each user can see based on that user’s attributes and conditions you specify.
Centralized Row Level Security in Zing lets you control what data each user can see based on that user’s attributes and conditions you specify.
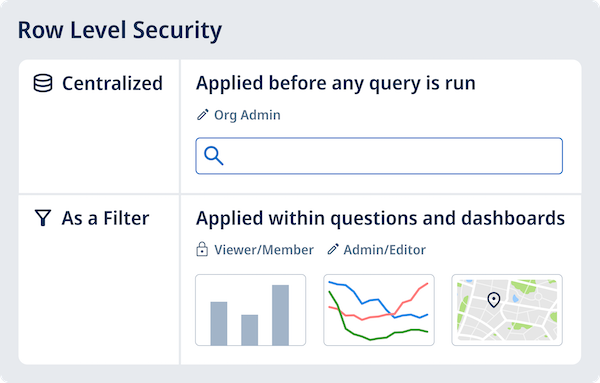
Once set up, centralized RLS applies forall user roles(viewer, member, editor, admin),andall query modes(natural language querying, visual querying, SQL IDE).
Centralized RLS differs from simply specifying a user-specific filter when you’re creating question, because it applies the row level filtering as a pre-step, before any query is run.
With centralized RLS, the RLS conditions are always enforced and a user cannot remove the RLS filters like they could if you used lookup tables and user-aware filtering alone. This means even users with an editor role, or those who copy a question and edit it wouldn’t be able to remove the centralized RLS.
When a user is logged in to Zing (or is authenticated in embedded mode), they have an identifier. That identifier and other attributes of that identifier (as specified in a lookup table) are used dynamically at runtime to compare against the conditions you specify.
Note:
RLS conditions are applied at a table/view level by specifying a SQL condition which would evaluate to TRUE for the rows a user will be able to see.
Tables/views without any condition specified will have all rows visible to all users.
Only administrators of an organization can set up or modify centralized RLS.
Centralized Row Level Security conditions apply to all new and existing questions and dashboards.
You should verify with a sample question that your RLS conditions are set correctly and working as you expect.
RLS is compatible with all Zing functionality.
Setting Up Centralized Row Level Security
Create a data source then click ‘Settings’ and ‘Row Level Security’
Turn on RLS and define a lookup table for user attributes. You’ll have one column indicating the user’s identifier (email), and other columns which will be used as dynamic lookups for that user’s attributes.
Note: this is a live check so updating this table will update the user’s attributes and resulting rows shown on queries that rely on RLS.
Click on a table or view from the list on the left, and then specify the condition which should evaluate to TRUE if a user is to be shown that row, and FALSE if they shouldn’t see that row based on the condition you specify. For instance:
4. Click ‘save’ and your RLS conditions are immediately applied.
5. Check that the RLS conditions you’ve set are working as you expect and modify them if needed.
 An example RLS condition could be –> email = ‘{{user.email}}’ OR ( ‘{{user.Role}}’ = ‘Manager’ AND ‘{{user.Office_Location}}’ = ‘Boston’)