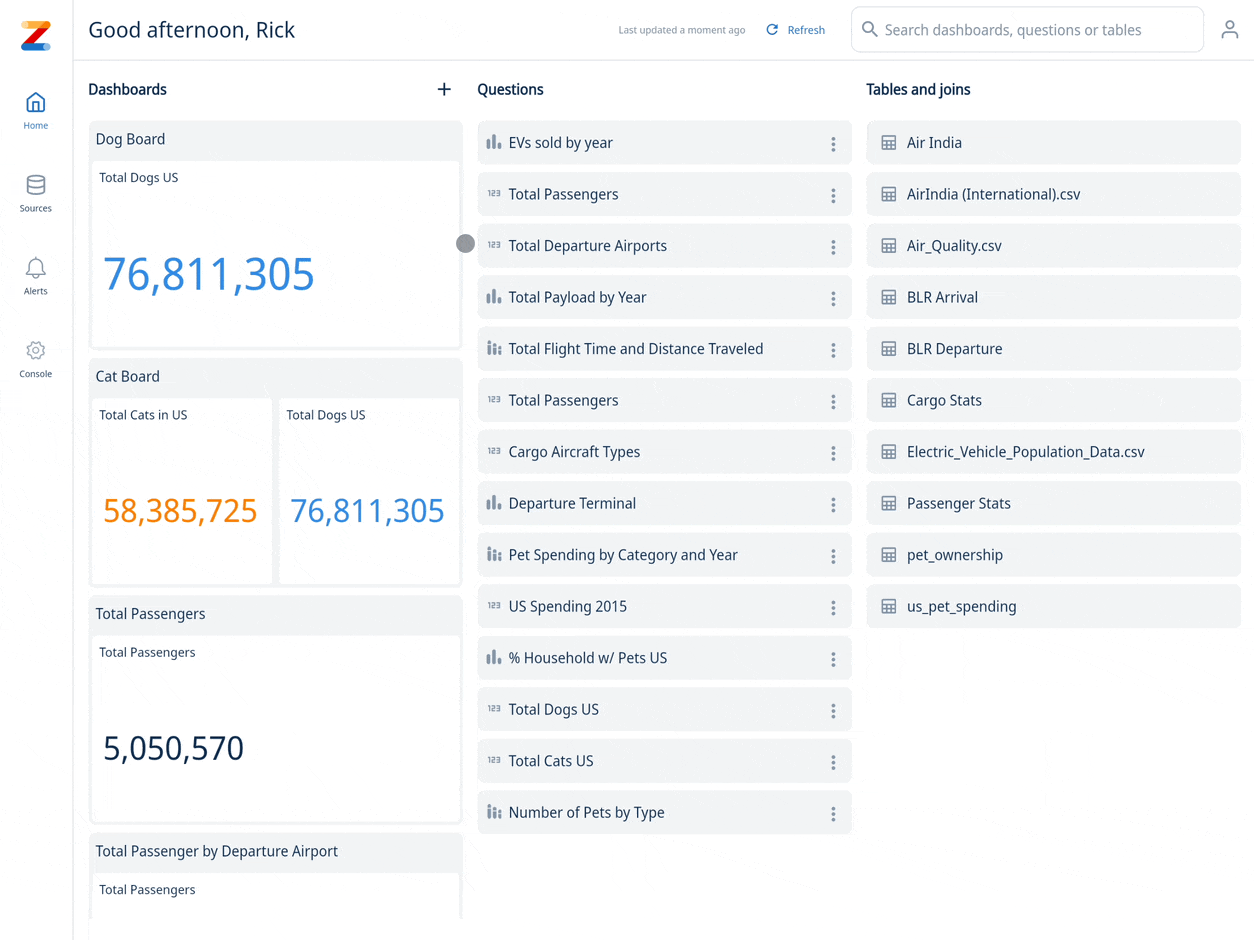
Controls
Create interactive filters on dashboards so people can apply filters to one or multiple questions in a dashboard quickly. This works for all questions in Zing created with natural language, or with the visual query builder.
Quick summary:
- Have control widgets that apply to one, multiple, or all questions on a dashboard
- Include control widgets:
- Controls can be simple selections from a list, can be numerical comparisons, open text inputs, or specific dates
- Allow/disallow:
- Search of values within a filter
- Default values for a filter
- Showing Null values in a filter
- Multi-select of values
Add a new control to a dashboard
Controls are basically filters, customized for dashboard purposes. With Zing’s dashboard controls you can navigate your data with
Create a linked dashboard control
This allows a single dashboard widget to control multiple tables, views, and charts. This works even with nested fields (E.g. city field nested under state field), and you designate one table.field as the primary which is used for showing values from that field in the drop-down to a user.
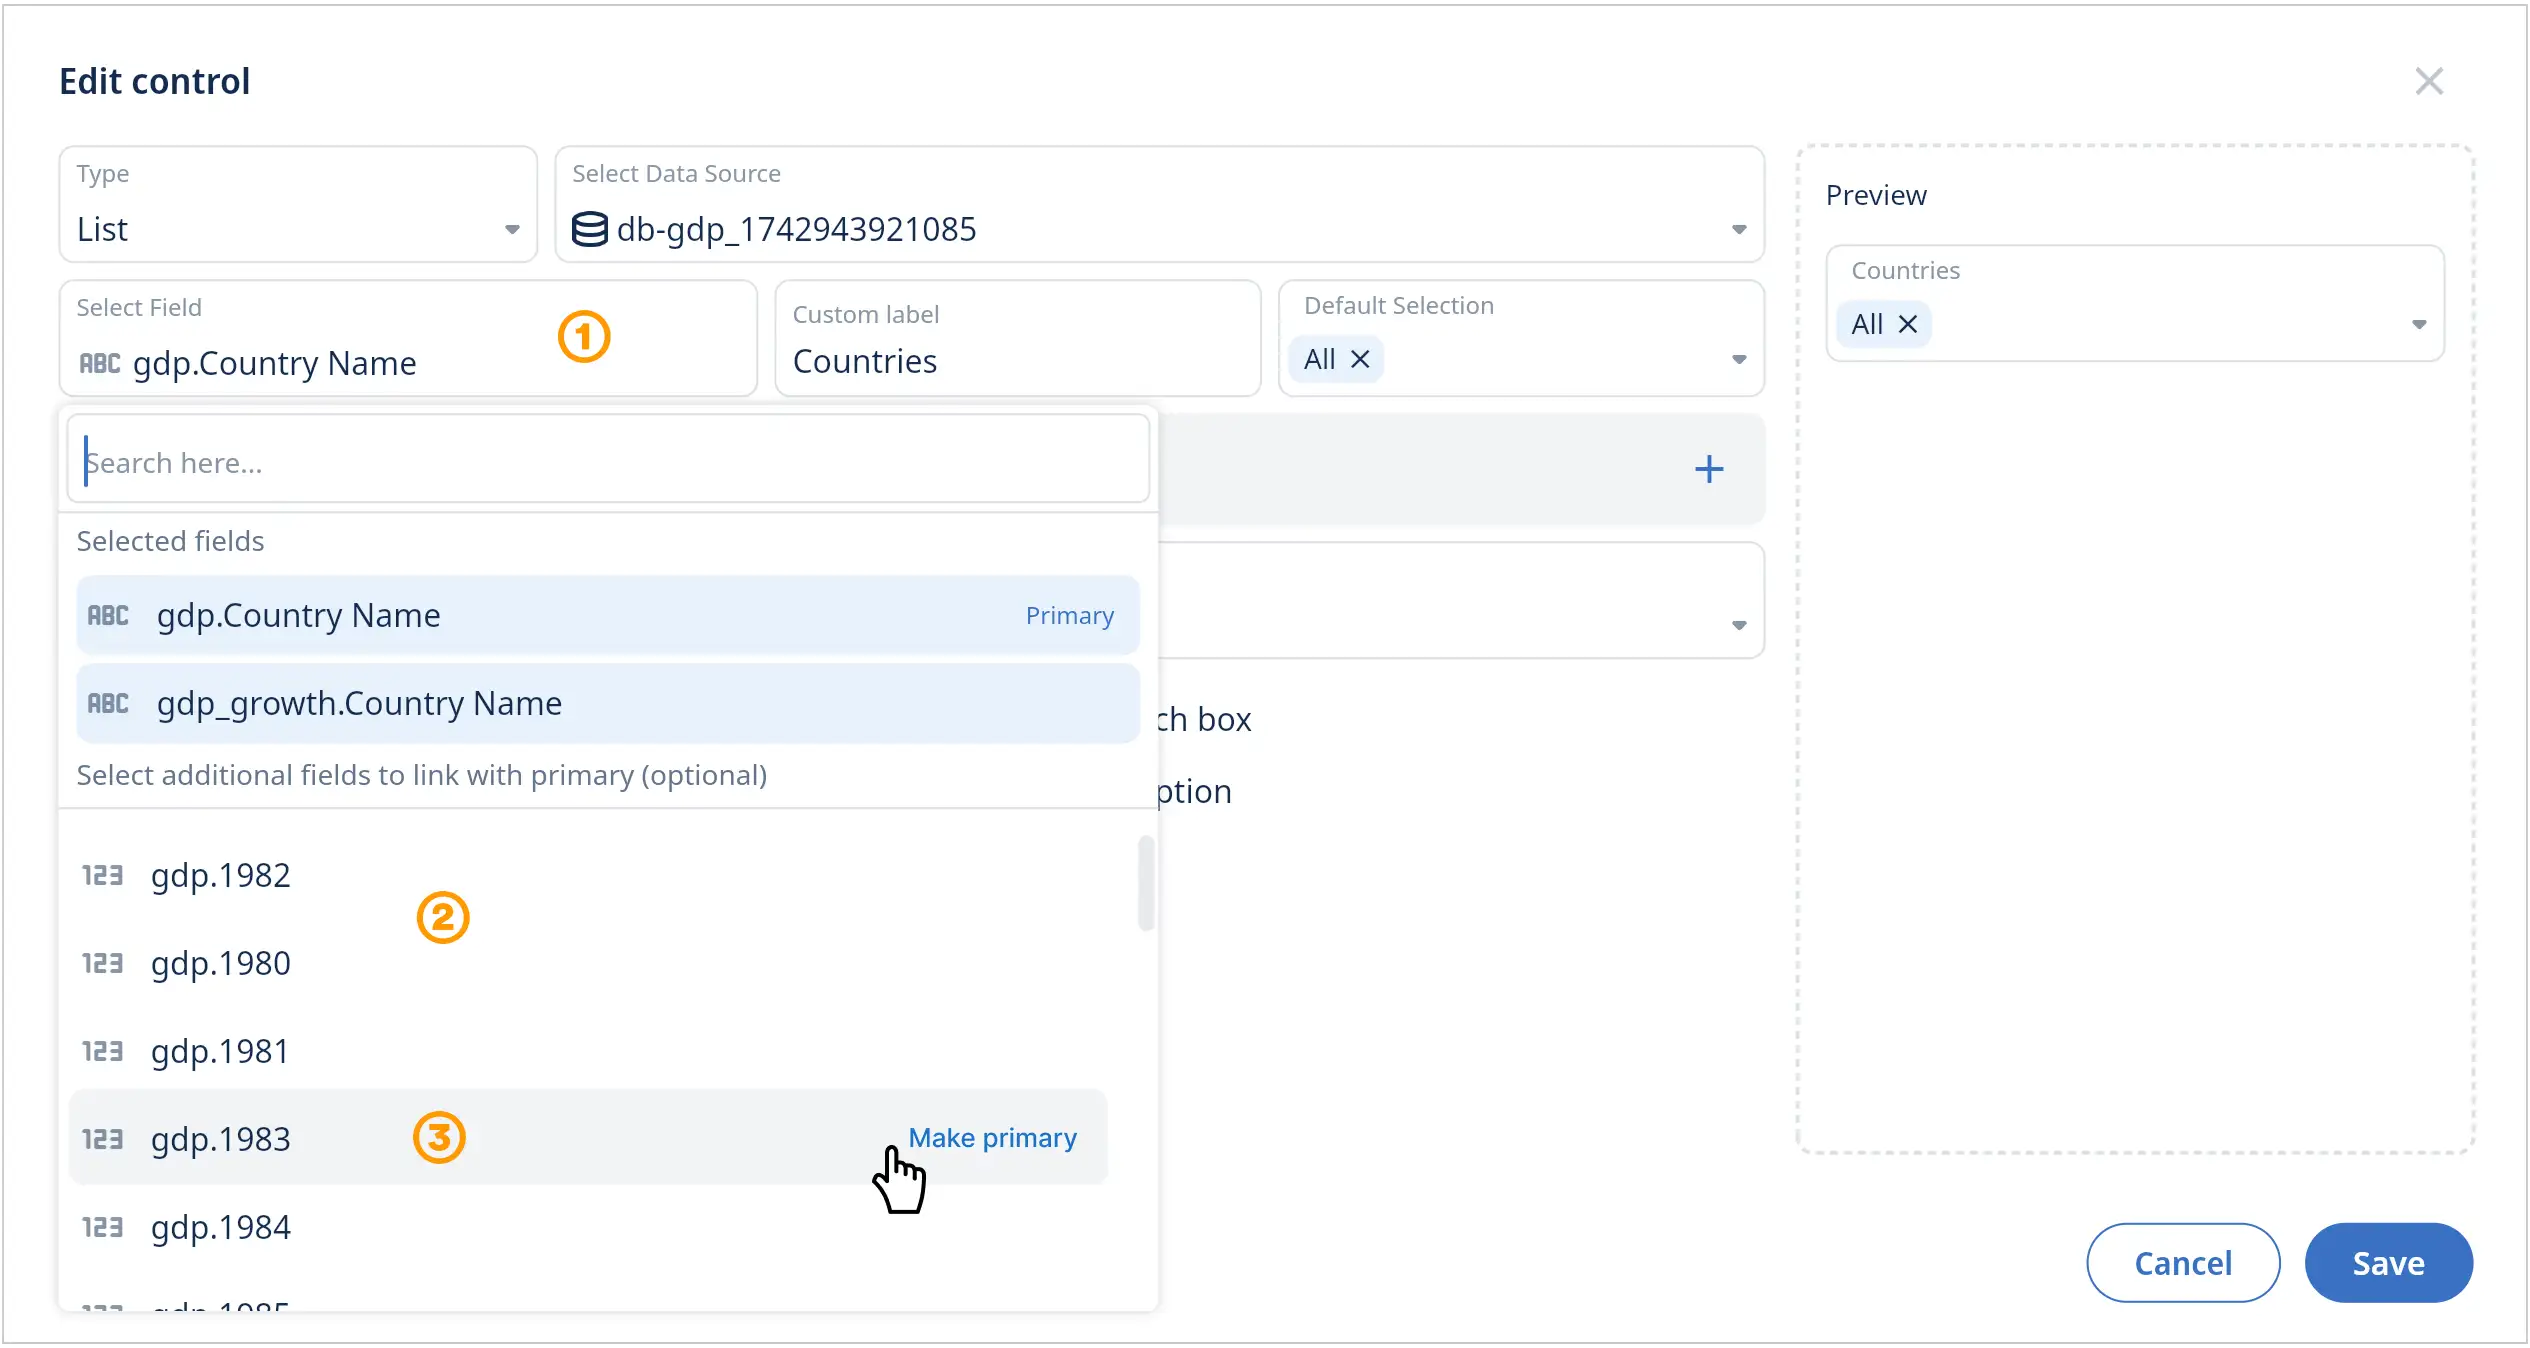
- Add a new control widget to your dashboard or edit an existing one and select the field menu.
- Select your first field from the menu (this will be the primary field).
- Optional: Select additional fields from different tables to link to the primary field.
You can easily edit or select another field in the menu and make it the new primary field. Click ‘Save’ to update the control widget. - Now, one control widget can update multiple charts in your dashboard that use the linked fields.
- Verify the filters are working as expected for all linked fields and charts.
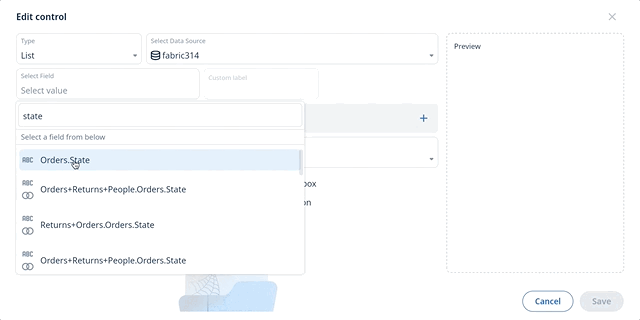
List
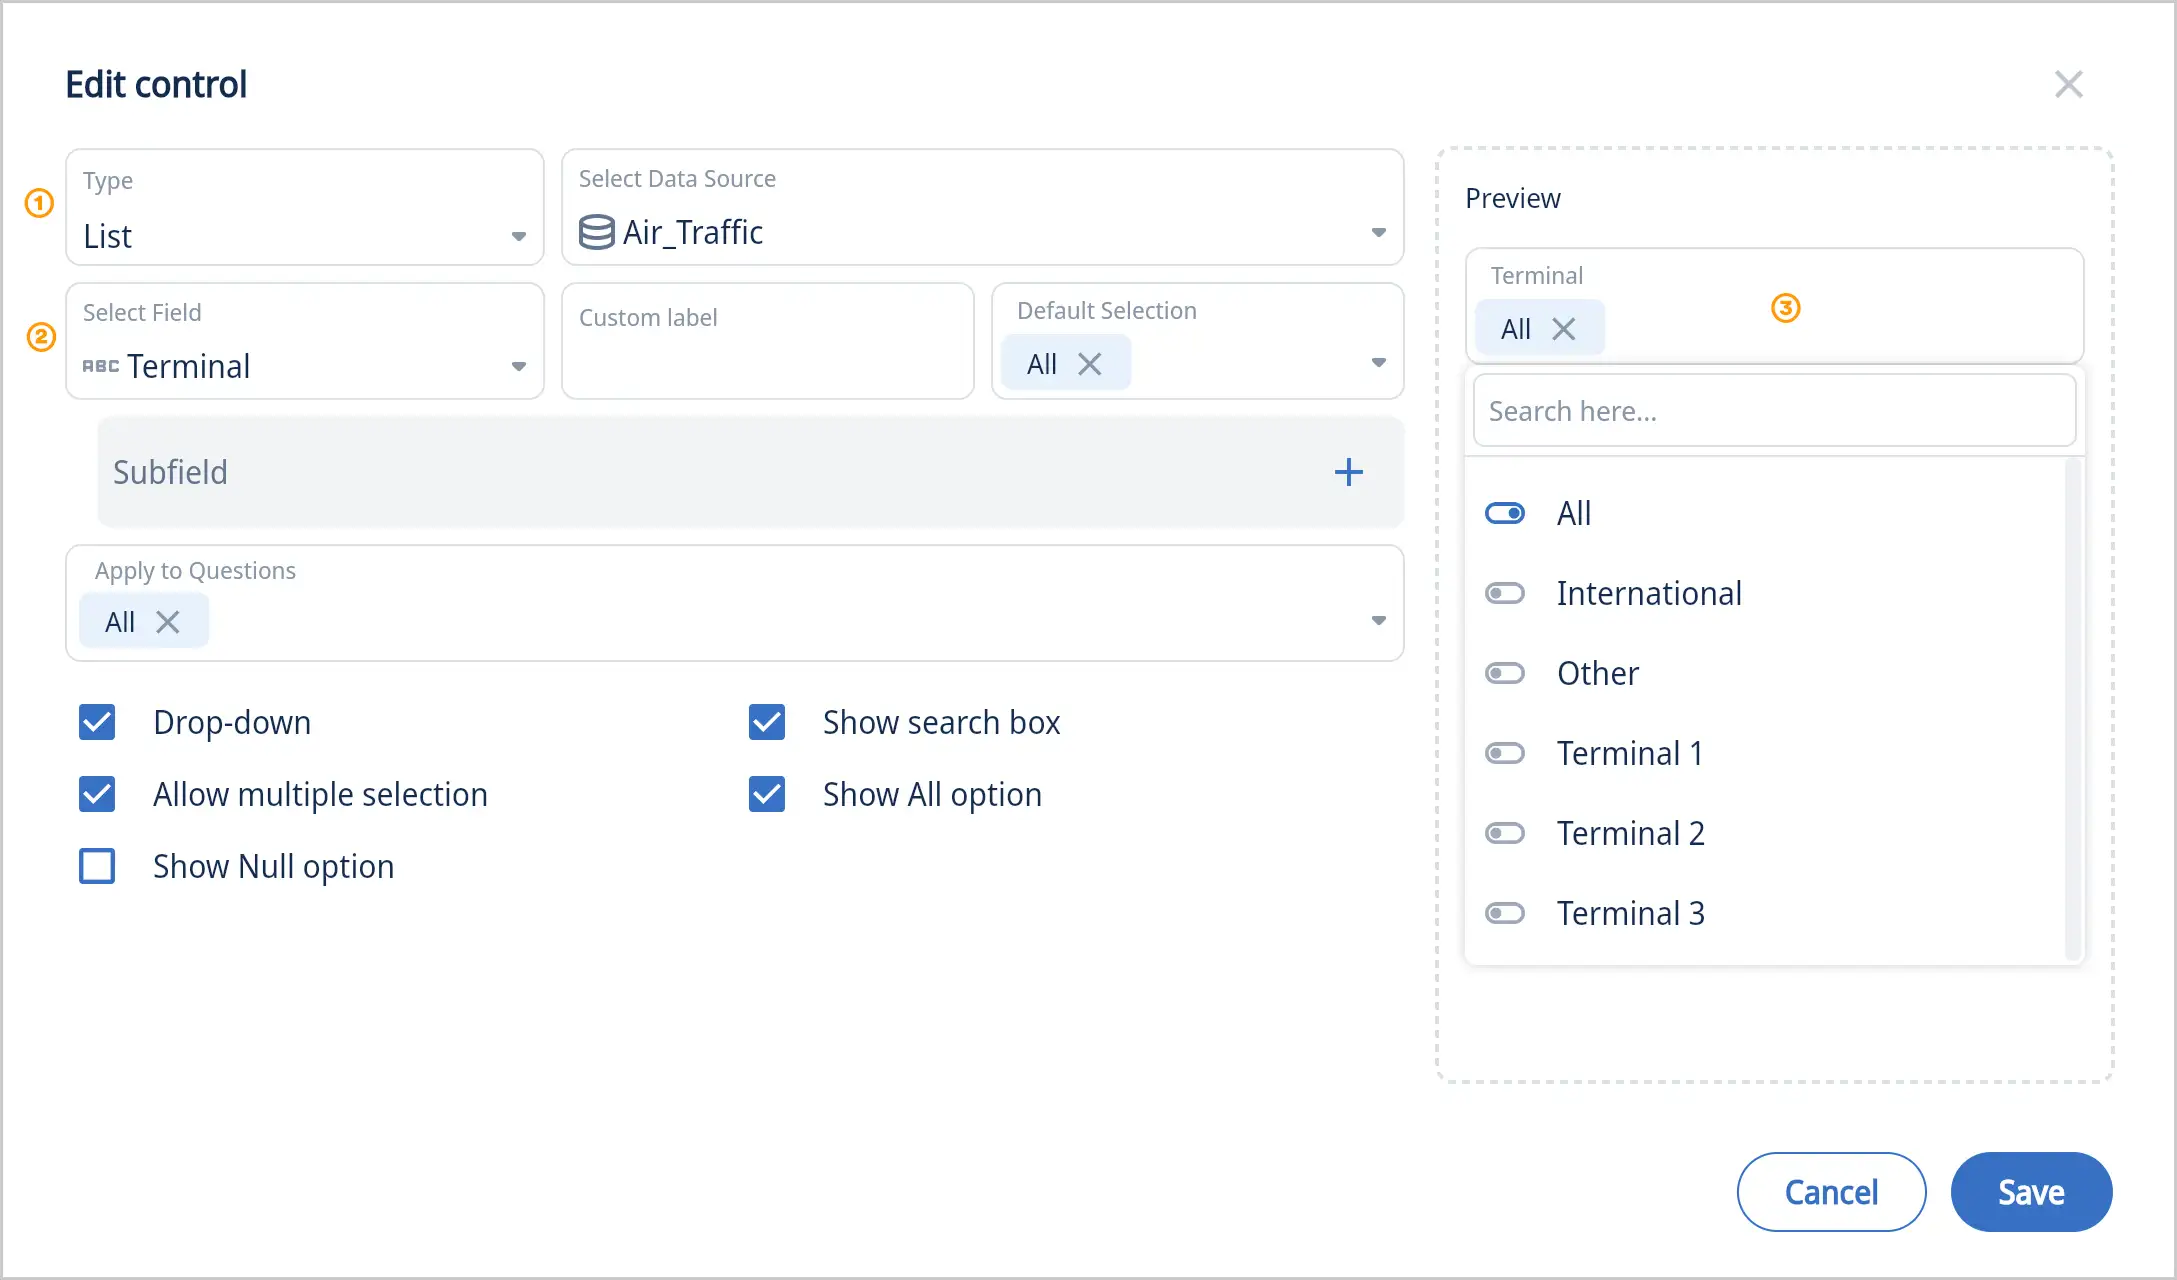
- Select the control type “List”
- Select a field
- Preview the new control with your data
Extra options:
- Uncheck “Drop-Down” to get a simple list vs a drop down menu
- Uncheck “Allow multiple selection” so a user can only select one item
- Check “Show Null option” if the data includes null and you want to make it available
- Uncheck “Show search box” if your list is really short and search is not really needed
- Uncheck “Show all option” if you don’t want that all items can be selected all at once
List with a second list (subfield)
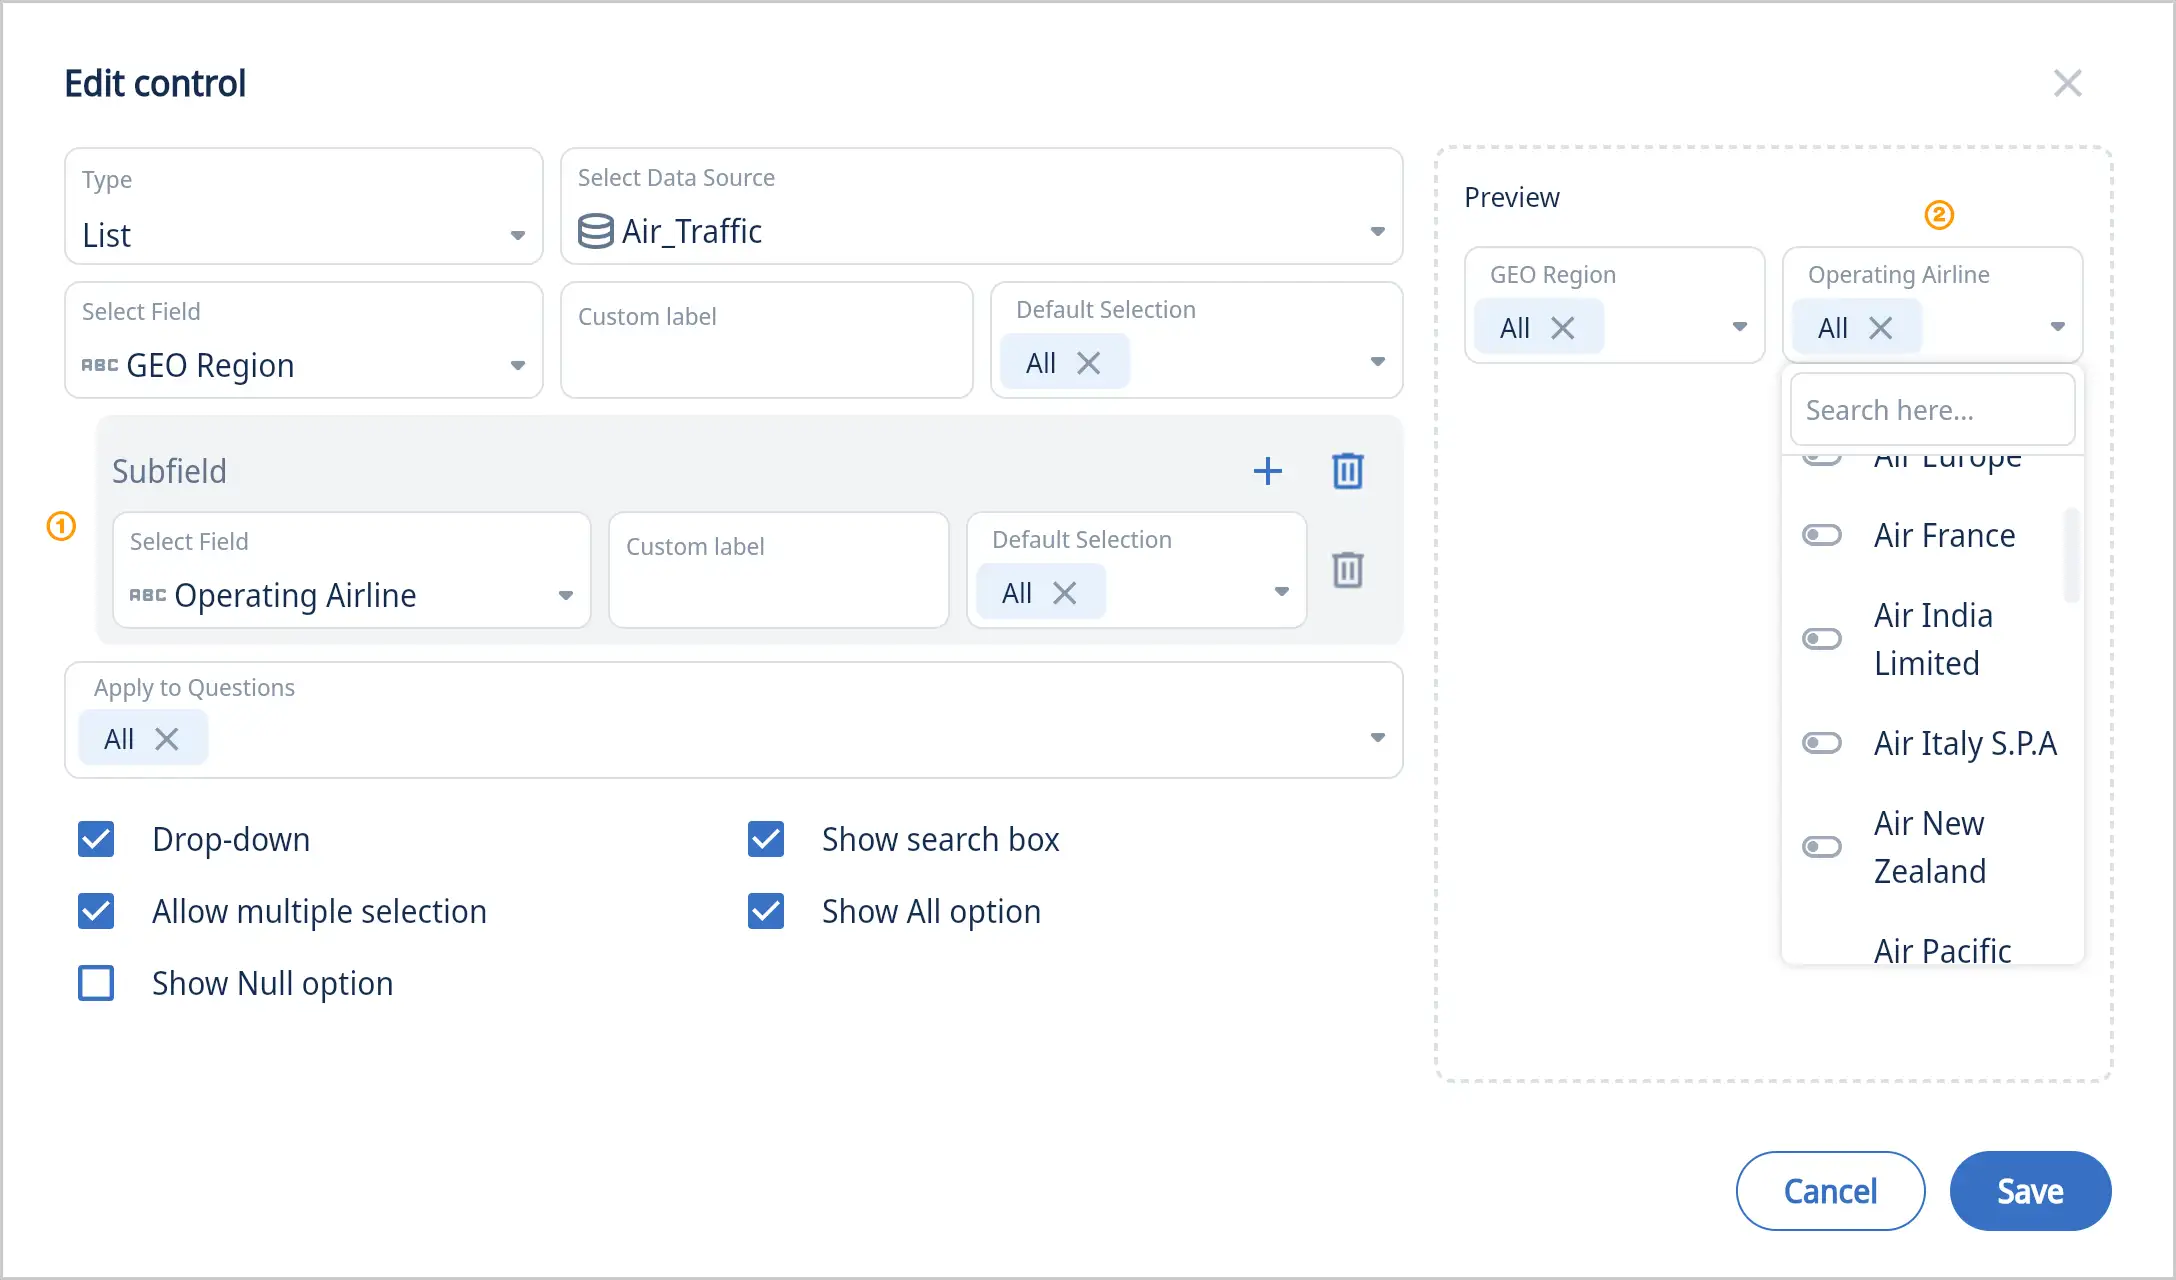
Add a subfield if you want a second list in your dashboard. Example as shown above with Regions in first drop-down menu and Airlines in second drop-down menu
List with no drop-down
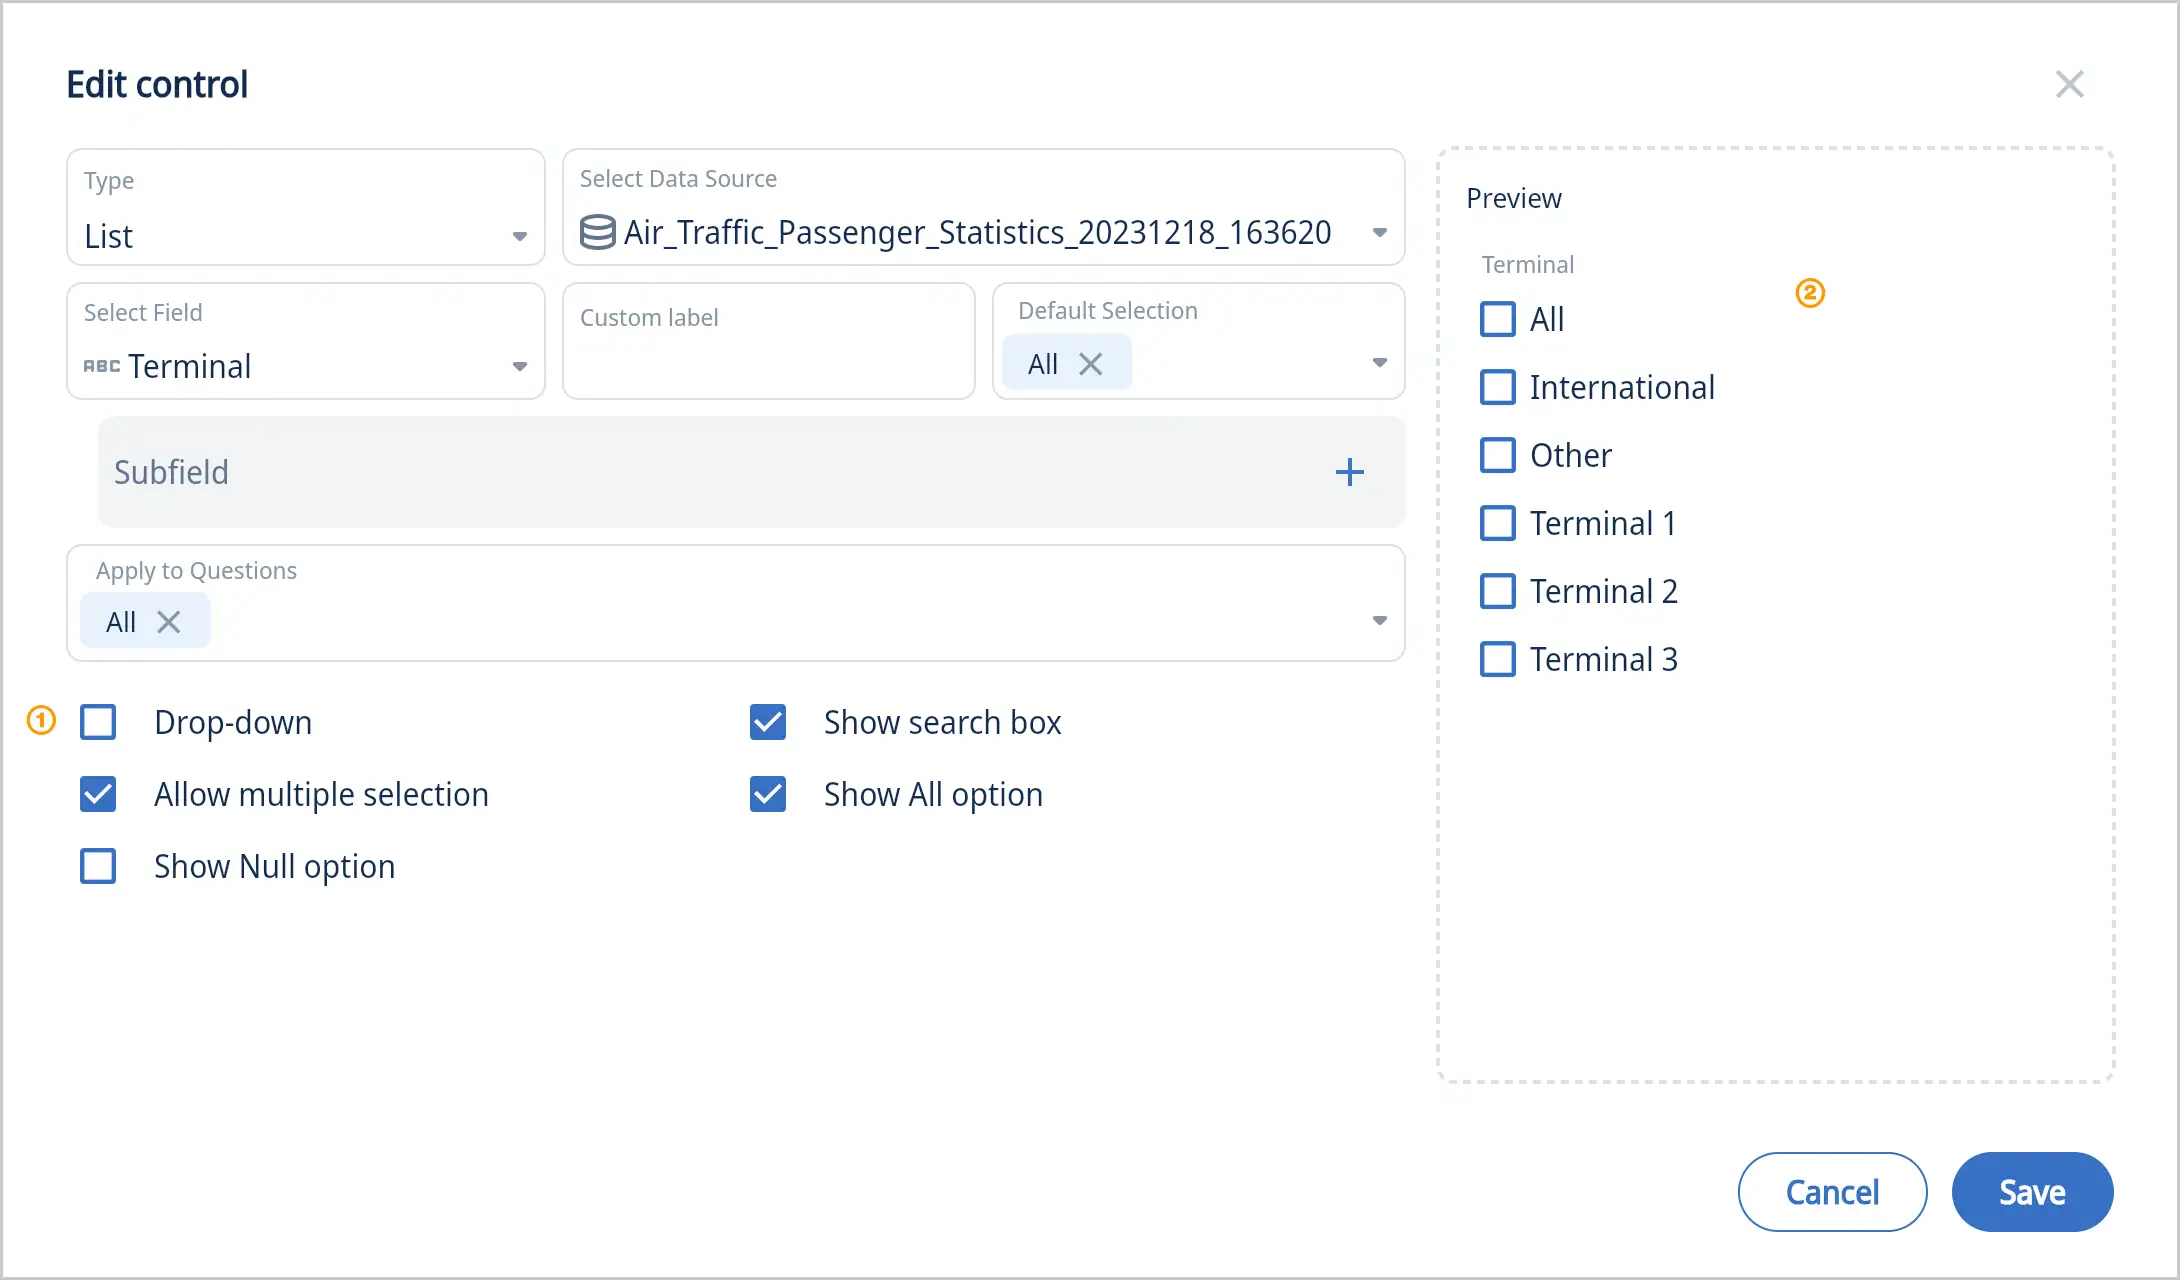
Example above is showing a list with “Drop-Down” unchecked. Great for short lists and quick access.
Text
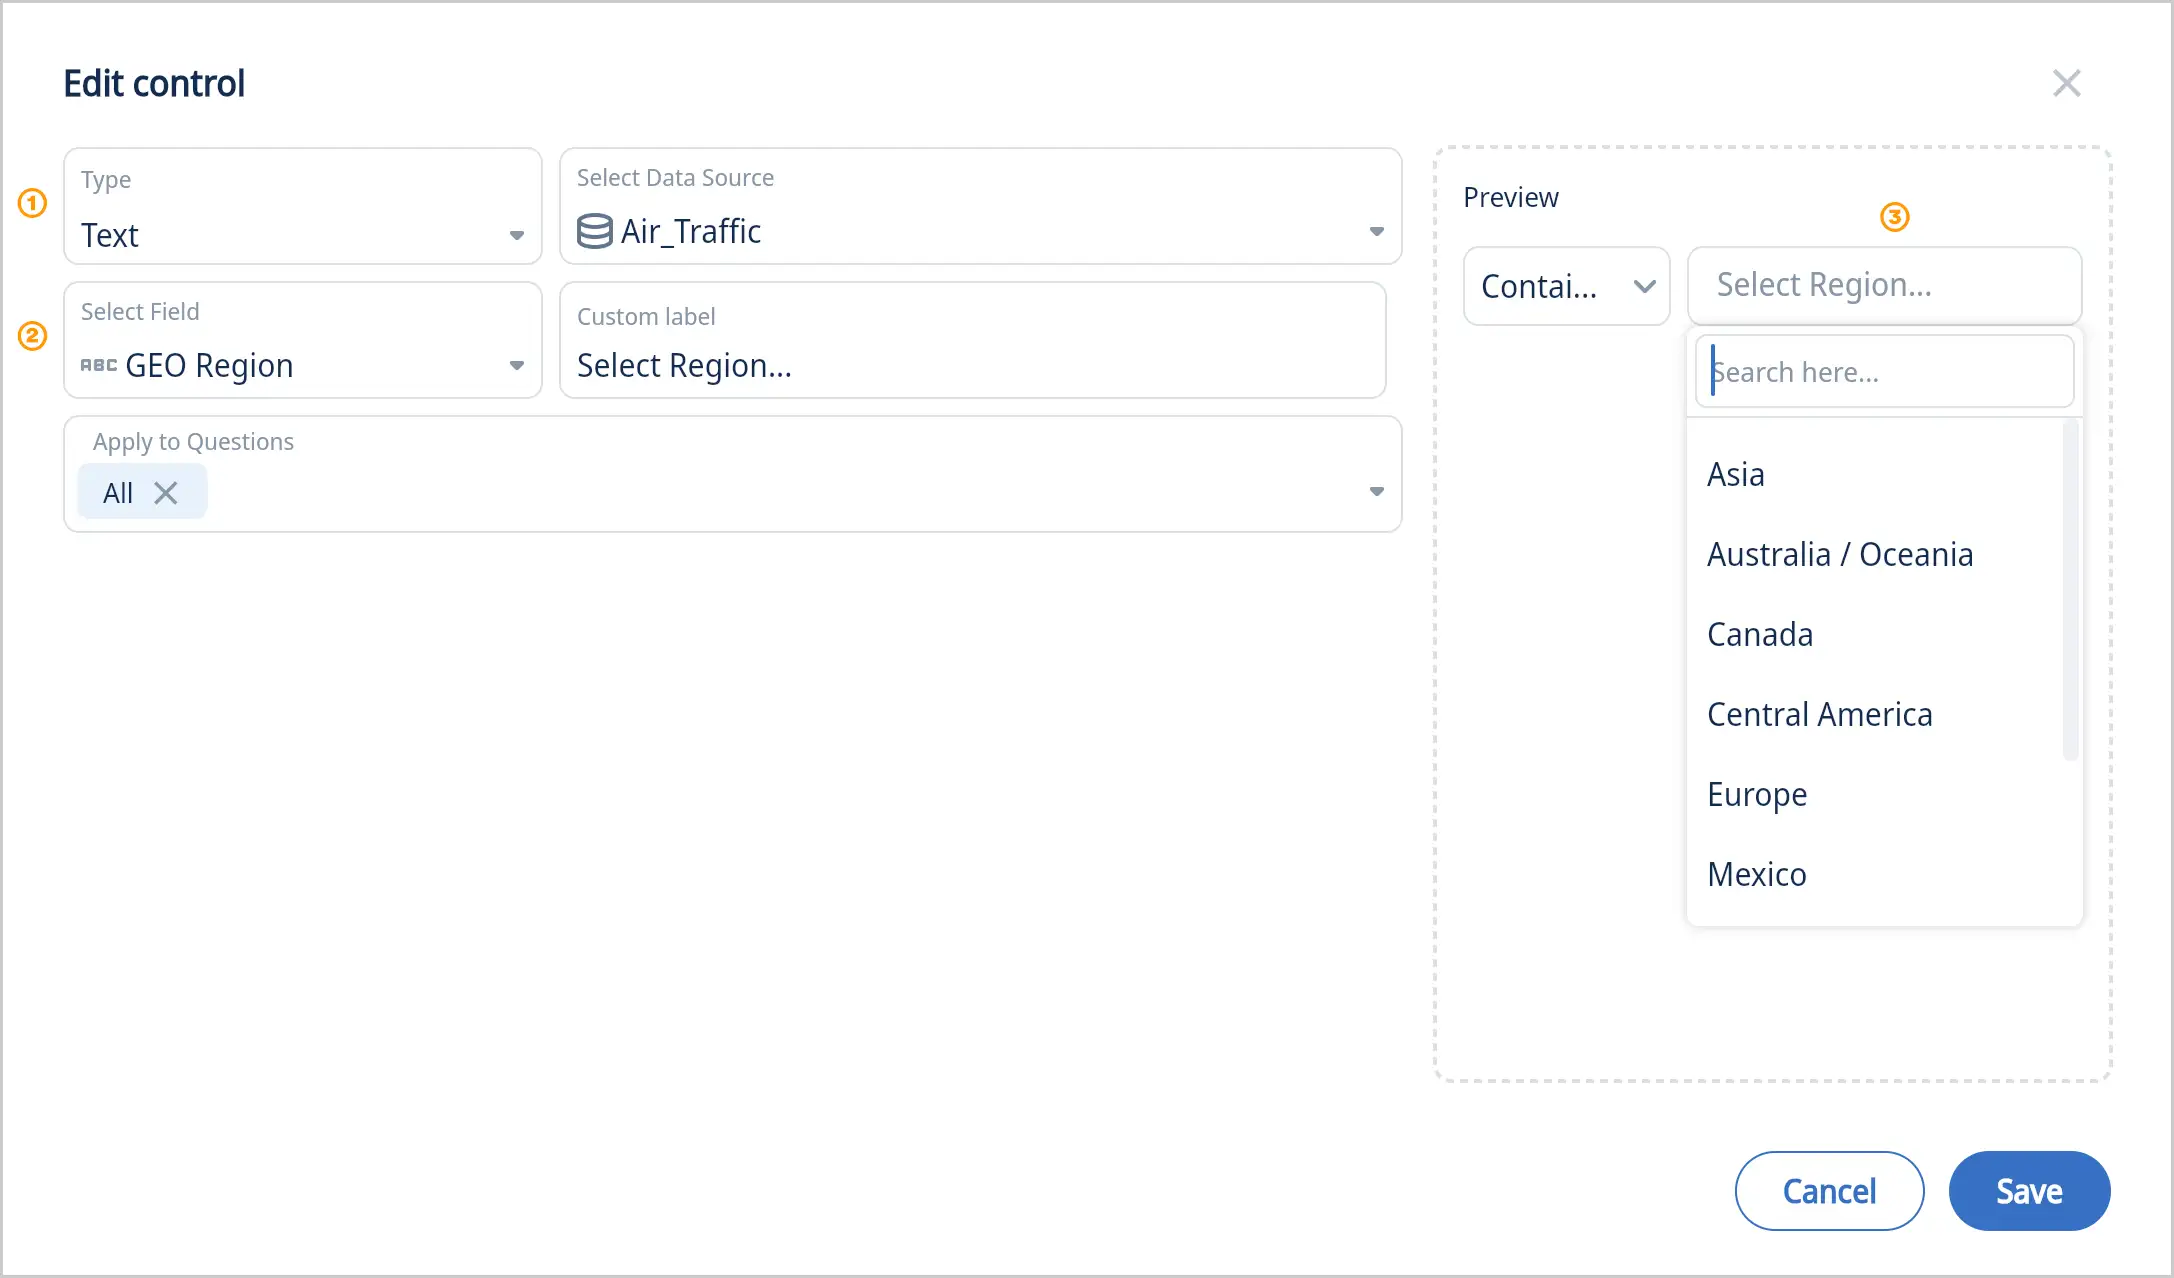
- Select the control type “Text”
- Select a field
- Preview the new control with your data
Number
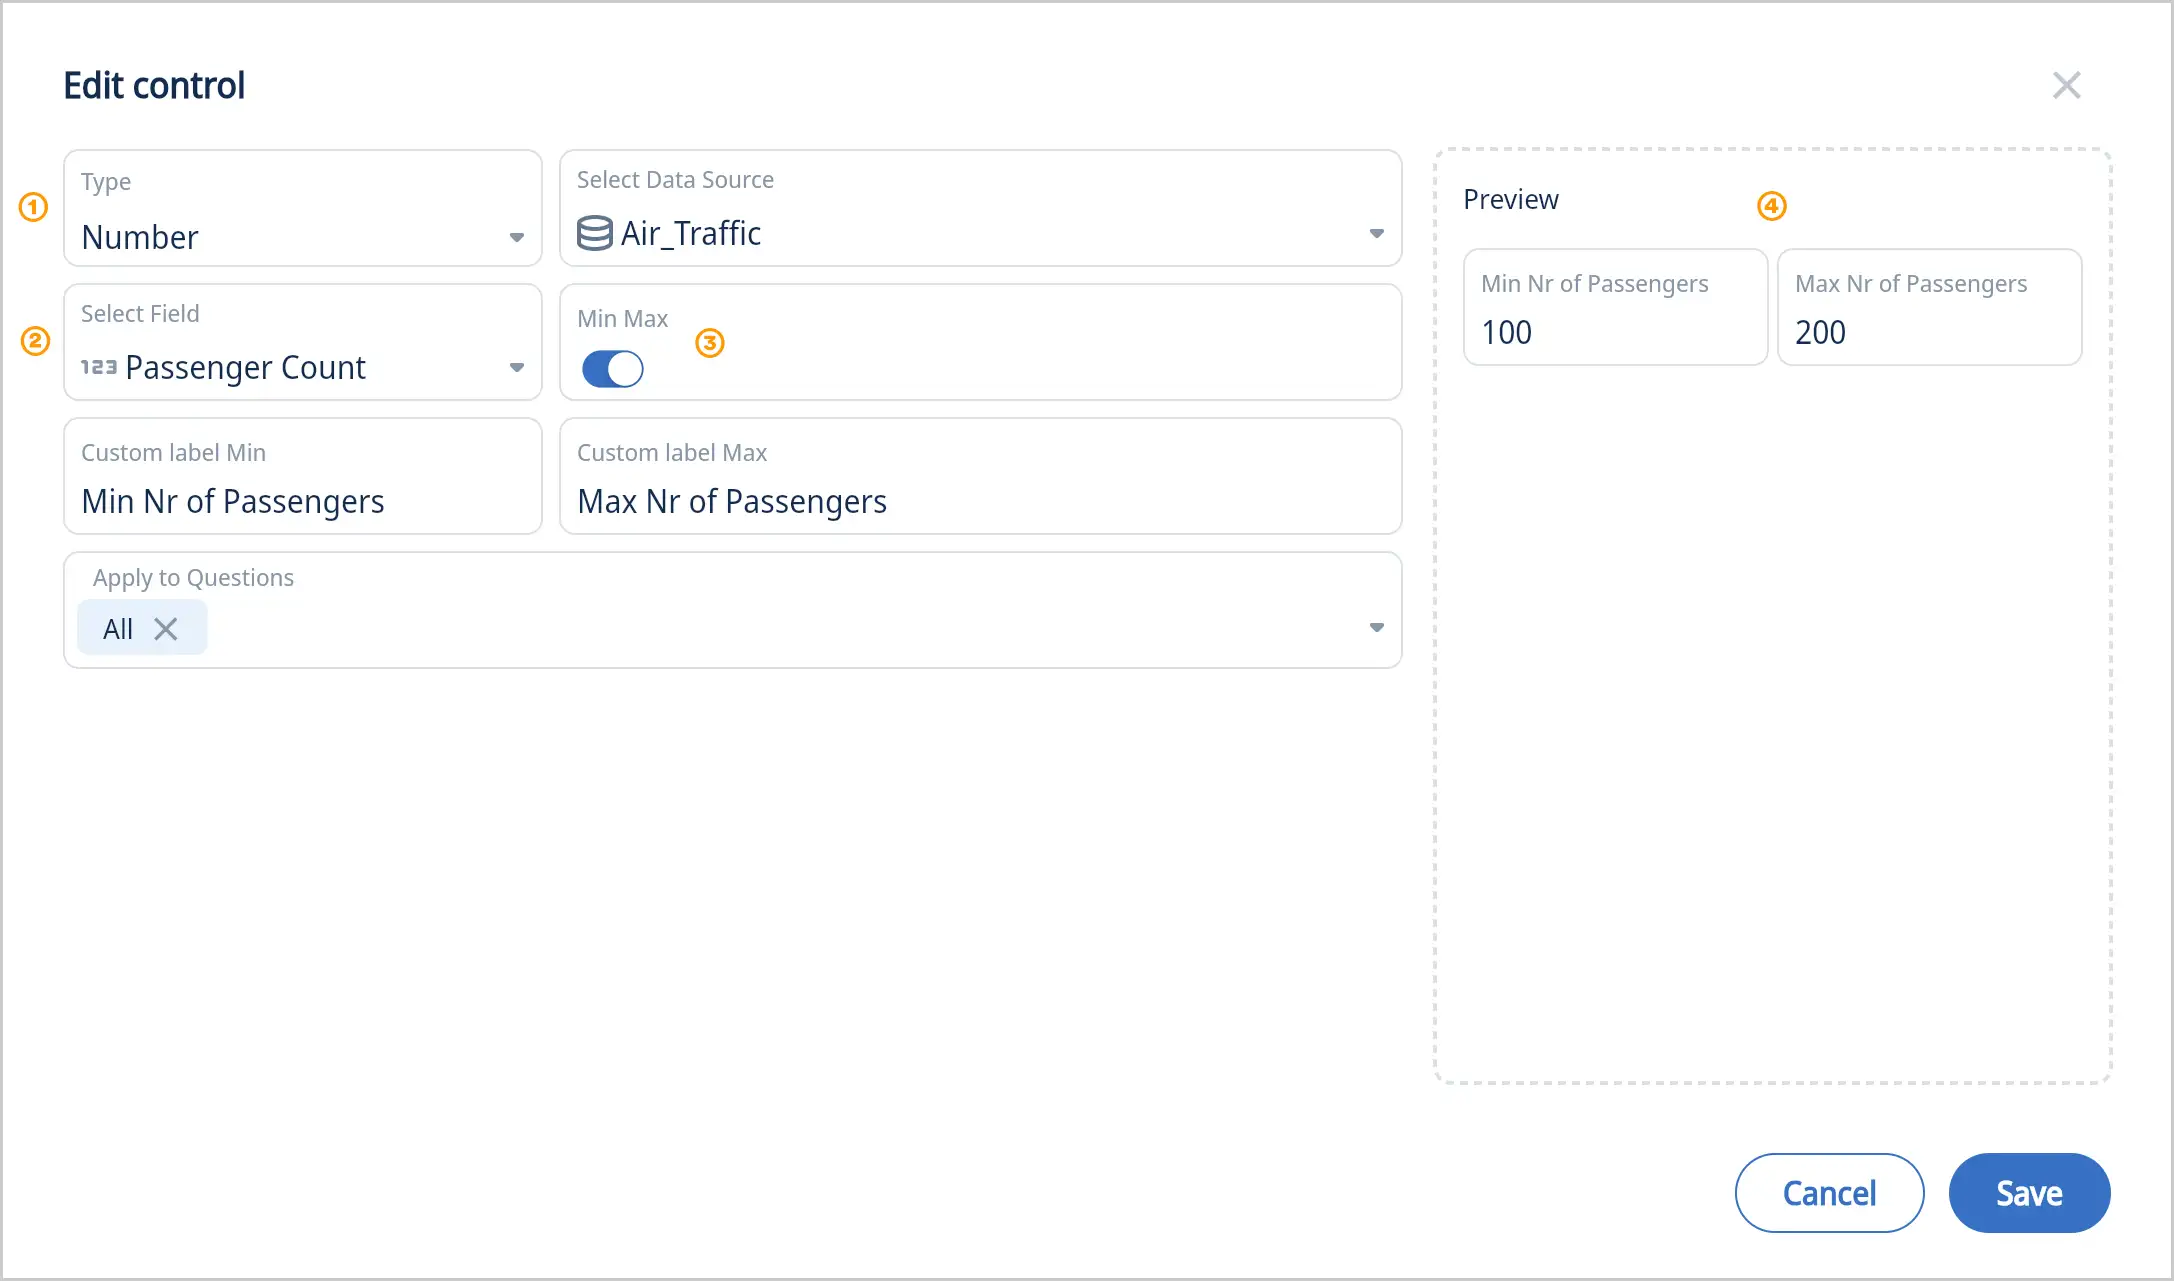
- Select the control type “Number”
- Select a field
- By default the number control is for a single value. Select “Min Max” to limit results in the selected range.
- Preview the new control with your data
Date Range
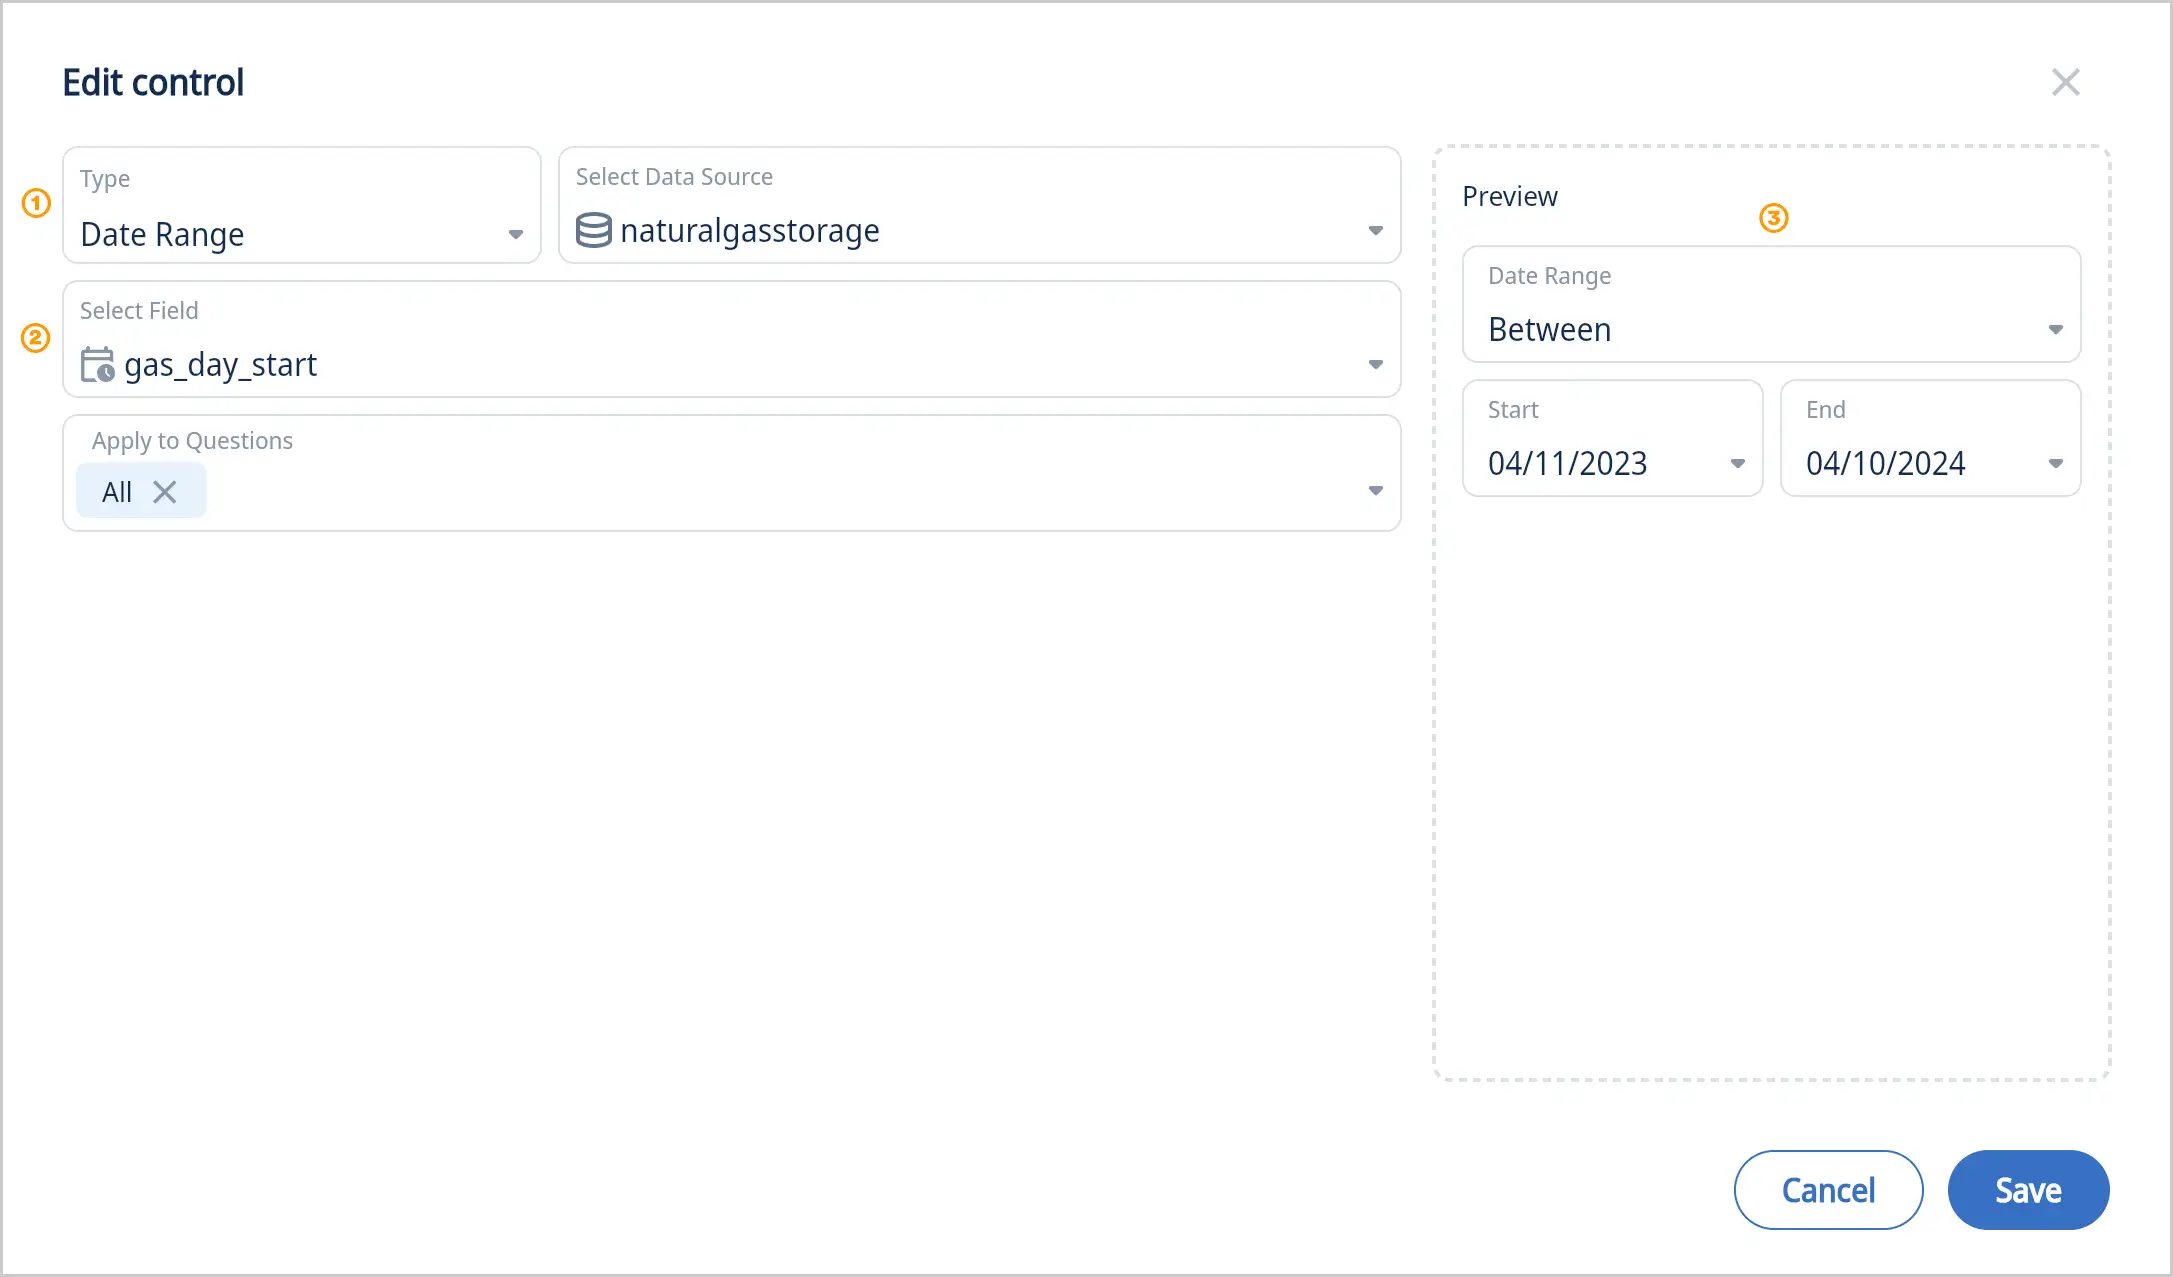
- Select the control type “Date Range”
- Select a field
- Preview the new control with your data
Please note: with date range people can select from “is, is not, after, greater than or equal, before less than or equal, is empty, is not empty, between, not between, relative date”
Date
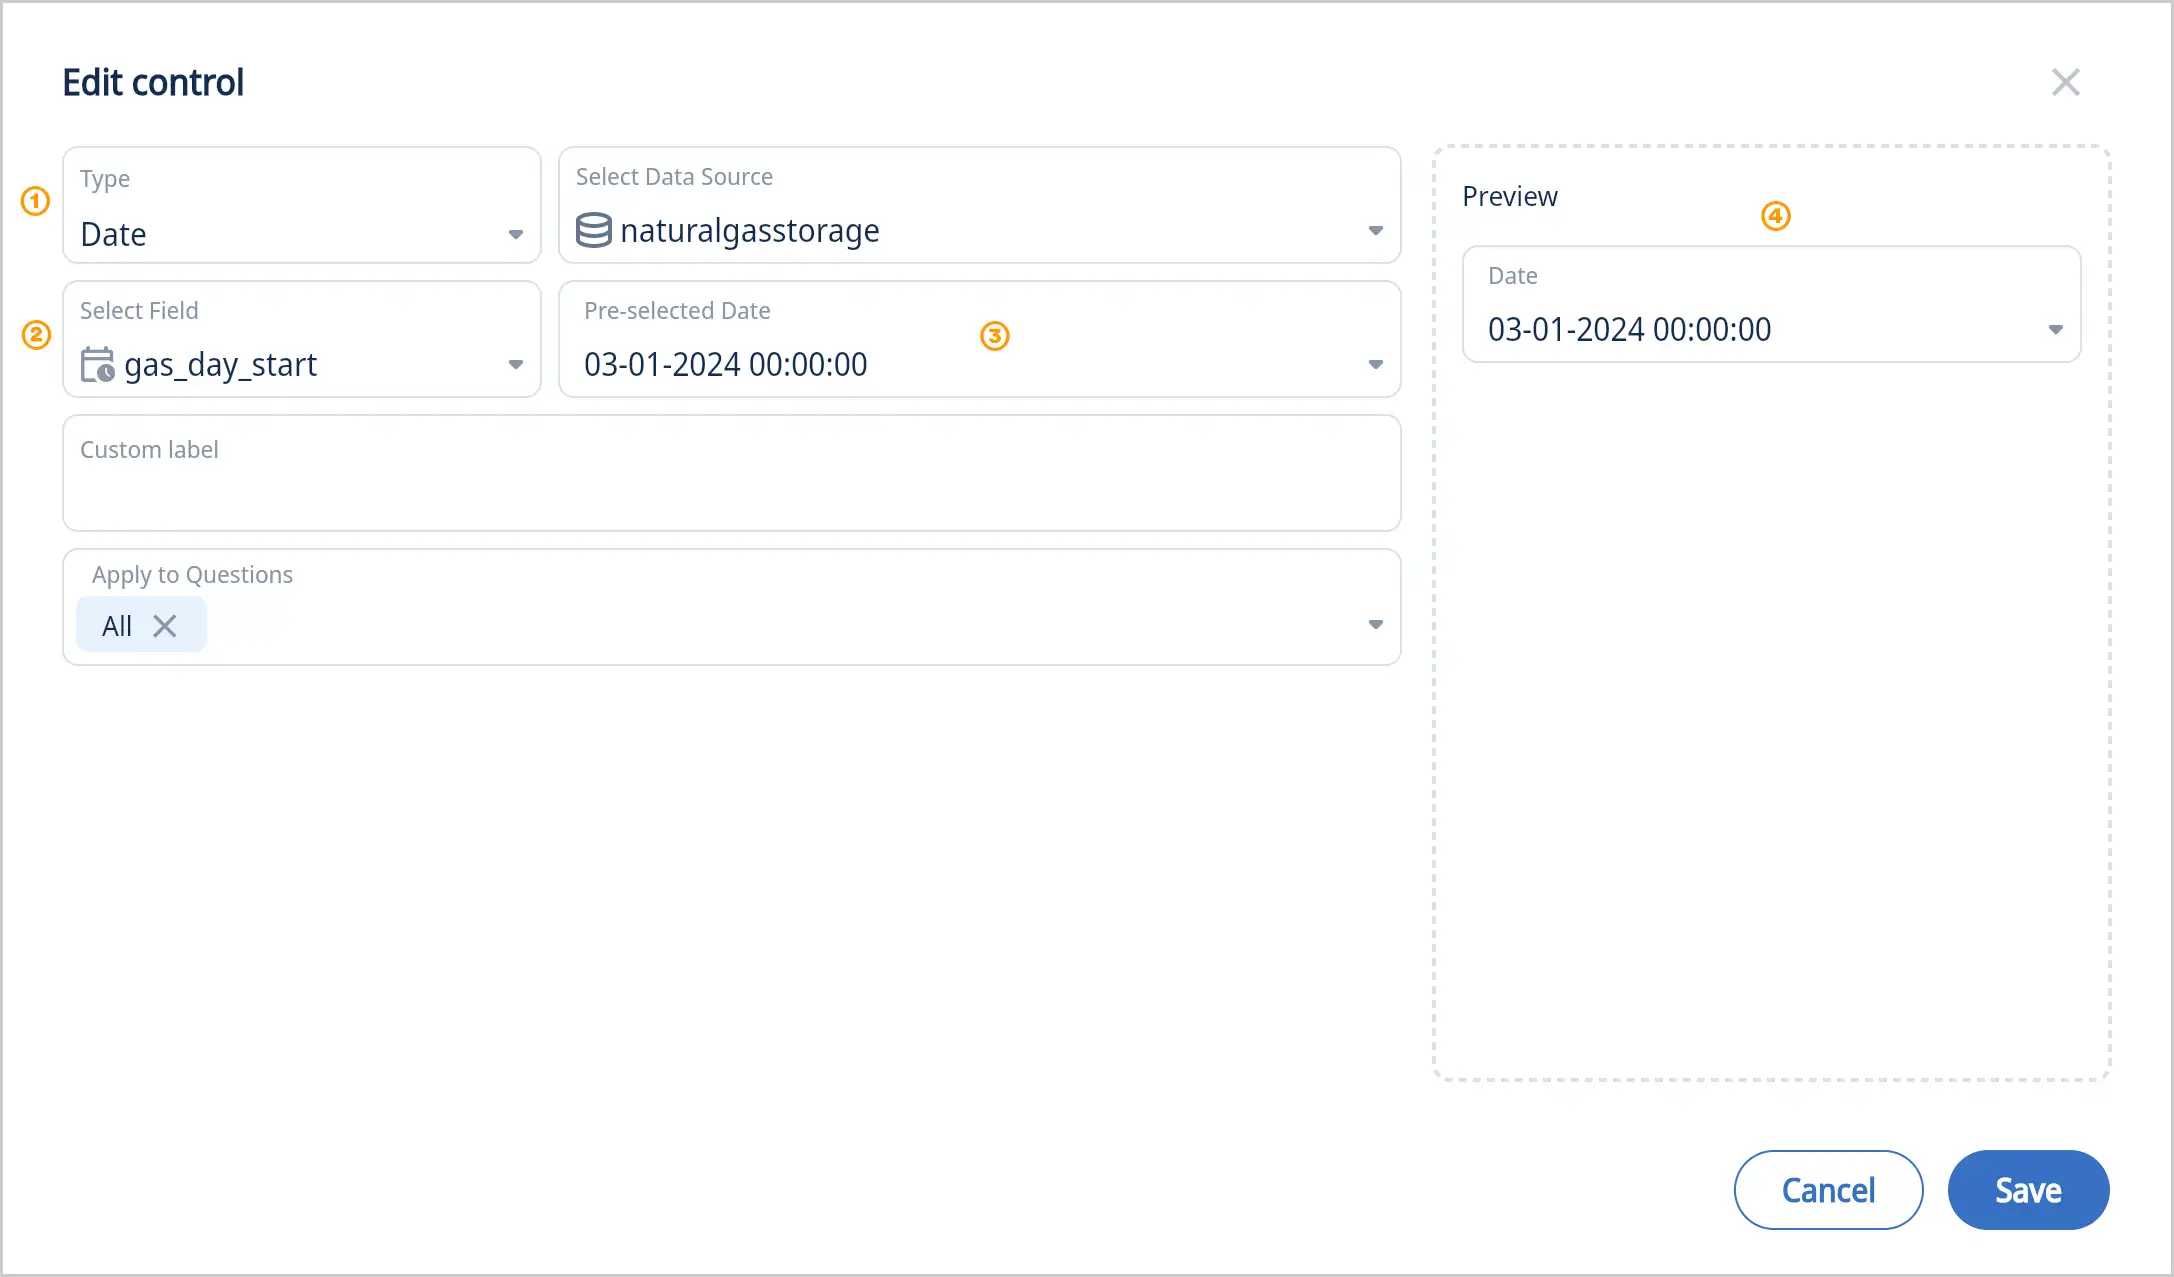
- Select the control type “Date”
- Select a field
- Pre-select a date that will show up in the dashboard
- Preview the new control with your data
Enhanced Dashboard Controls:
Sticky Filters when Opening Questions
 When you click into a question from a dashboard:
- The dashboard’s filter values now appear at the top as editable drop-downs
- You can modify these without returning to the dashboard
- The question auto-refreshes with the new filter values
This avoids the back-and-forth between dashboards and questions, saving time and clicks. This upgraded dashboard controls make filtering smoother and more intuitive.
Integration with Other Capabilities
Your filters remain consistent even when using:
- Drill down to explore subgroups
- See values for a breakdown
- Exclude to remove a data point
You’ll keep your filter context throughout your exploration.
Scrollable Dashboard Cards
You can now scroll dashboard cards horizontally. This is especially helpful when viewing tables with many columns or wide visualizations.

