User Roles
Assigning user roles within an organization and on questions
When you create a Zing account, you’ll want to use an email at the same domain as your colleagues. By default Zing will limit invites to people at the same domain name to ensure that you don’t accidentally share outside your organization (unless you want to, in which case turn on external sharing ) in settings.
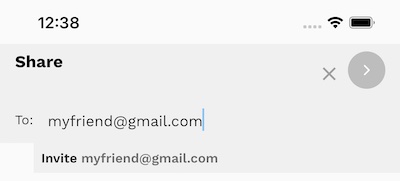
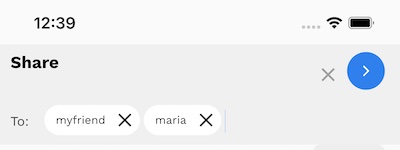
You can invite people to your data sources using their e-mail address. Once they accept your invite, they’ll be able to access your organization’s data sources and shared questions.
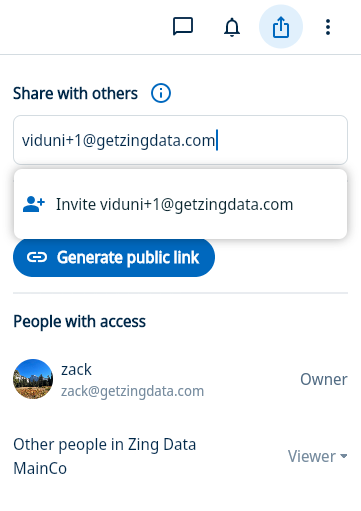
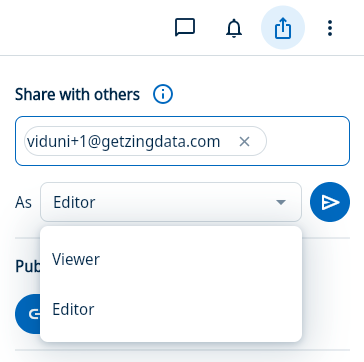
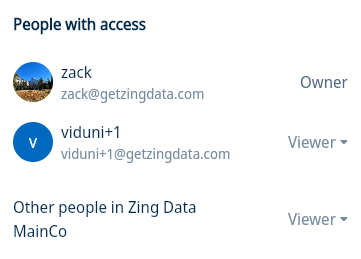
If you want to invite a user to view a single question, click the ‘Share’ icon on that question (the up arrow in a box in the top right) and add them to the list of people with access. You can specify a viewer or editor role, and you can optionally make a question visible or editable to your organization.
Note that sharing an individual question without inviting a user to the organization will make the question visible to them, but the underlying data source will not appear in their sources tab. If you want a user to have the data source listed in their ‘sources’ tab, share the data source with them using the Zing web console.
From the web console:
You can resend an invite, cancel an invitation, or view if an invitation has been accepted by tapping on the ‘Invitations’ tab.
From the mobile app on iOS and Android, or the Zing Web app (login to Zing then click the ‘Zing Web App’ tab):
Tap ‘Invite
Note that by default you can only invite people to your data sources and questions if they are part of the same domain (the portion following the @ in the email address). This is to ensure that data from your organization is only shared with people who are part of your organization.
If you want to allow invites to email addresses outside your domain (and are an administrator of the organization), you can turn on external dashboard sharing in the Zing Web Console under ‘settings’ and then ‘Allow invites outside my domain’.
It is strongly suggested that you sign up for Zing using your company email address and not a personal email address (such as gmail or that of your ISP). This is because the default of restricting invites to only your domain is applied on the domain level (the portion after the @ sign in your email).
Add comments to a question or dashboard using the comment box in the mobile app answer screen, or the right hand pane in the web app from the answer screen. If a question isn’t saved yet and you add a comment, Zing will automatically save the question (you may wish to rename it by tapping the three dots in the upper right of the answer screen).
You can comment on a question or a dashboard. Your comments will be visible to anybody who has access to that question or dashboard.
Mention colleagues within the chat function to send them an email which links to your comment. Much like Google Docs or Slack, using mentions in Zing informs your mentioned colleague so they can look at your comment and respond if needed. If they have enabled push notifications, they’ll receive a push notification instead of an email.
To use mentions, just type the @ symbol in the comment box from the question view and you’ll see a list of colleagues who are already part of the organization. After the @ start typing their name (first or last name) and Zing will display a list of the colleagues who match your input. Tap the colleague you want to mention. You may mention multiple colleagues within a comment.
On the Zing Data web and mobile apps, you’ll see a Questions section and a Tables section.
The Questions section shows questions that you have asked on your own, as well as questions which have been asked by your colleagues recently or which have been shared with you.
You’ll see at a glance when somebody most recently commented, who commented, and the total number of comments. Simply tap on a question to see the visualization for that question and the full comment thread. The questions with the most recent comments, and questions most recently asked will appear at the top. Older questions will appear below that.
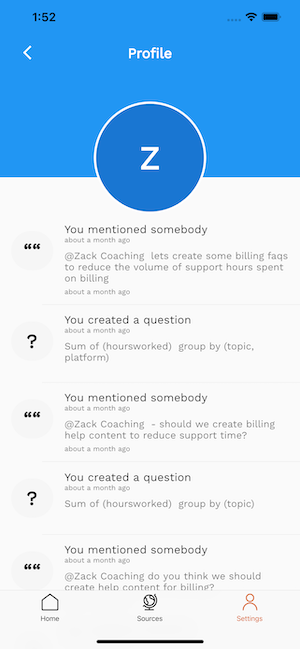
You can see a list of all the questions you have created, the mentions you have made of others in comments, and the mentions of you in other people’s comments by viewing your activity feed.
To access your activity feed in the app, tap ‘Settings’ then ‘Profile’. You can click on any question or comment to be taken to that specific question.
Zing supports two factor authentication, and is highly suggested for sensitive data sources. 2FA is supported via Google SSO. To turn on 2FA, create your Zing account with Google Single Sign On (SSO), and turn on SSO for your organization in settings as outlined below:

Now, all users who are part of your organization will be required to authenticate their credentials with two factor authentication to login to Zing.
Zing allows anybody in your orgnaization to run custom SQL.
Settings –> Options for each datasource on the datasource page.This is powerful because it lets you do more complex queries, including joining tables or using functions not supported in the visual query builder but which your underlying database supports – for instance regex commands or parsing JSON fields.
An administrator of an organization can turn off the ability to run custom SQL queries (instead limiting users in the organization to the visual query builder only) by going to settings and then toggling on/off Enable Custom SQL IDE.
Assigning user roles within an organization and on questions
Available on iOS, Android, and the web


Learn how Zing can help you and your organization collaborate with data