Snowflake
Snowflake is one of the most commonly used cloud data warehouses, capable of ingesting data from a variety of sources, supporting robust permissioning, and allowing seamless scaling to large data sets.
You can connect Zing to Snowflake as a data source from the Zing web console or from the Zing Data mobile / web apps.
You’ll need:
- An active Snowflake account
- An active Zing Data account
Setup Steps
-
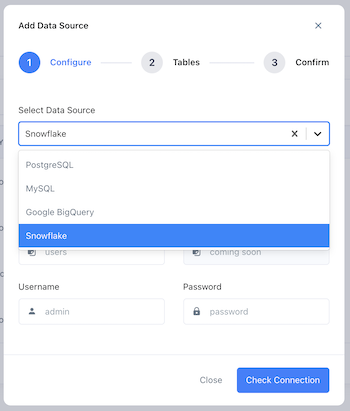
Login to the Zing web console, and click on the ‘data sources’ tab

-
Click ‘New source’
-
Select ‘Snowflake’ as the data source.
-
Enter your Snowflake credentials:
- Hostname is required. If your snowflake URL is https://aa11111.us-central1.gcp.snowflakecomputing.com, enter the portion following https:// but before .snowflakecomputing.com. So in this example the hostname to enter would be: aa11111.us-central1.gcp
- Database is required
- Username is required
- Password is required unless you are using a private key
- Schema is optional
- Private Key is optional. This is the contents of your .p8 downloaded from Snowflake if you have key-pair authentication turned on for this username.
-
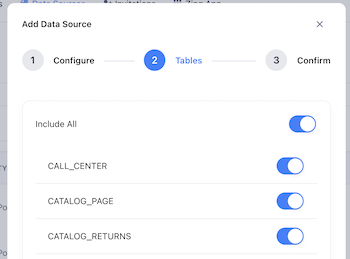
Tap ‘Save’, and Zing will confirm that a connection to the database can be established. A list of all tables in that database will then be shown.
-
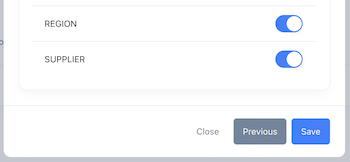
By default, all the tables in your database will be made visible, but you can optionally turn off certain tables from being displayed by turning the switch for an individual table off, then hitting ‘save’.
-
The data source you just added will be available to everybody in your organization.
Note: Setting up Snowflake with Zing can be done both via the Zing Web Console (as outlined above), or from the Zing Data app, by clicking on the ‘sources’ tab then ‘add a new source’.

