Joins
Querying more than one table in a datasource is a common use case when analyzing data. This can usually be done by using custom SQL statements. However, this requires the knowledge of SQL syntax. With JOINS in Zing Data, you can easily create JOINS between tables or views using our web console, or while asking a question.
Zing also supports joins on multiple fields at once.
This feature is available for all datasource types on Zing Data except Live Google Sheets. It is available for imported files such as Excel and CSV files.
Features
- Create
JOINSbetween two or more tables. You can create a singleJOINor a set ofJOINS. - Pick from different
JOINtypes such asLEFT JOIN,RIGHT JOIN,INNER JOINandFULL JOINto logically connect your tables and views. - Query the joined tables/views directly without having to write any SQL statements.
- Save storage costs and reduce administration overhead as Zing Data creates an internal representation of the
JOINyou create.
Let’s look at how to create a JOIN on Zing Data.
Create a Datasource
- Login to the Zing Data console and create a datasource.
- Click on the “Settings” button for the datasource on the Data Sources page.
Create a Join using Web Console
- Click on the “Add New Join” button which will take you to a canvas where you can create your
JOIN.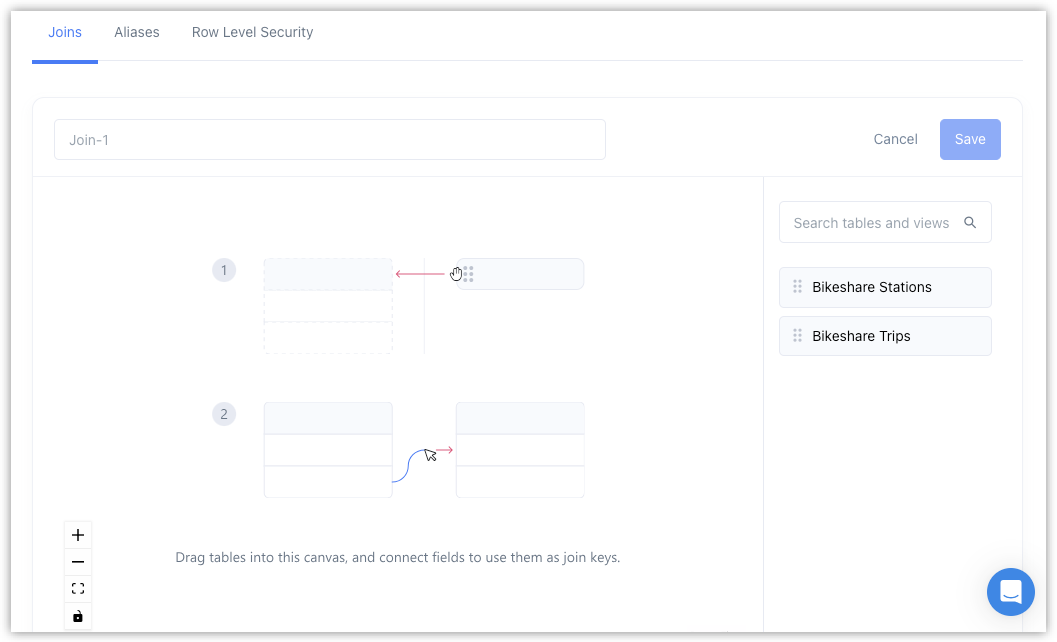
- The tables in your datasource will be displayed on the sidebar. Drag a table to the canvas to start creating your
JOIN. The first table you drag will be considered as the root table for theJOIN. The header of this table will be highlighted in blue. - Drag another table to the canvas.
- You can create a connection between these two tables by placing the cursor on the right hand side of a field (the cursor will turn to a
plussign) on the first table and dragging a line towards the left side of one of the fields from the second table. - You can change the type of the
JOINby clicking on theJOINicon and selecting aJOINtype from the dropdown menu. - You can also have joins between tables that use multiple fields. Simply draw multiple lines between table fields.
- If you need to connect another table in this
JOIN, you can drag another table and follow the same steps as above. - Give the
JOINa name and click “Save”.
Create a Join using Natural Language (Magic Model)
1. Ask a question using natural language in Zing via the the search bar.
- If there is an existing join you’ve created using the UI that is appropriate to answer the question asked, Zing will use that.
- If no join exists which would allow the question to be answered, Zing will create a join using AI between multiple tables on the fly based on the field names and attributes. More detail about this feature is available here.
- If there is no relevant existing join and the AI cannot determine an appropriate join to answer the question, Zing will notify you that it could not determine the necessary tables / views to answer the question. You can then manually create a join by scrolling down to the bottom of the field list and tapping ’edit join’ or ‘add new join’
2. You will see if a join was pre-existing or was created with AI on the fly as indicated by a star icon. You can create or modify a join by tapping ’edit join’ which will display the full join relationship and will let you define:
- Left Join
- Right Join
- Outer Join
- Inner Join
Note that you can define as many join relationships within a join as you’d like. Any table / view present in the join must connect to others in the join.
Create a Join with the SwiftQuery interactive builder
1. Click a table using the SwiftQuery interactive builder
2. You’ll see a list of fields and tables on the right hand side. At the bottom of the list of fields, click the ‘add new join’ button

3. Choose the join type (inner, outer, left, right) you’d like and the ’left’ table and ‘right’ table along with the join fields
4. Hit ‘save’ and the list of all fields from all joined tables / views will be visible
Note that you can create as many join relationships as you’d like. Just click ‘add relationship’ in the join creation screen within SwiftQuery to add another join.
Create a Join using SQL
1. Ask a question using custom SQL. Access custom SQL from the Zing App by clicking on the three dots next to ‘run’ in the visual query builder.
2. You’ll see a list of fields and tables on the right hand side. Write the joins you’d like to create in SQL.
Editing a Join in Web Console
- Once you’ve created a
JOIN, it will appear under the “Joins” tab in your datasource settings. - Click on the “Edit” button to update your
JOIN, or click on the “Delete” button to remove theJOIN. - You can create/edit/delete
JOINSfrom this page.
The features of the JOINS canvas are shown below.
Editing a Join in Zing App
- From SwiftQuery builder, you can edit an existing join that has been created by clicking ’edit join’
- You can add additional join relationships here, edit join relationships, or delete joins from this page.
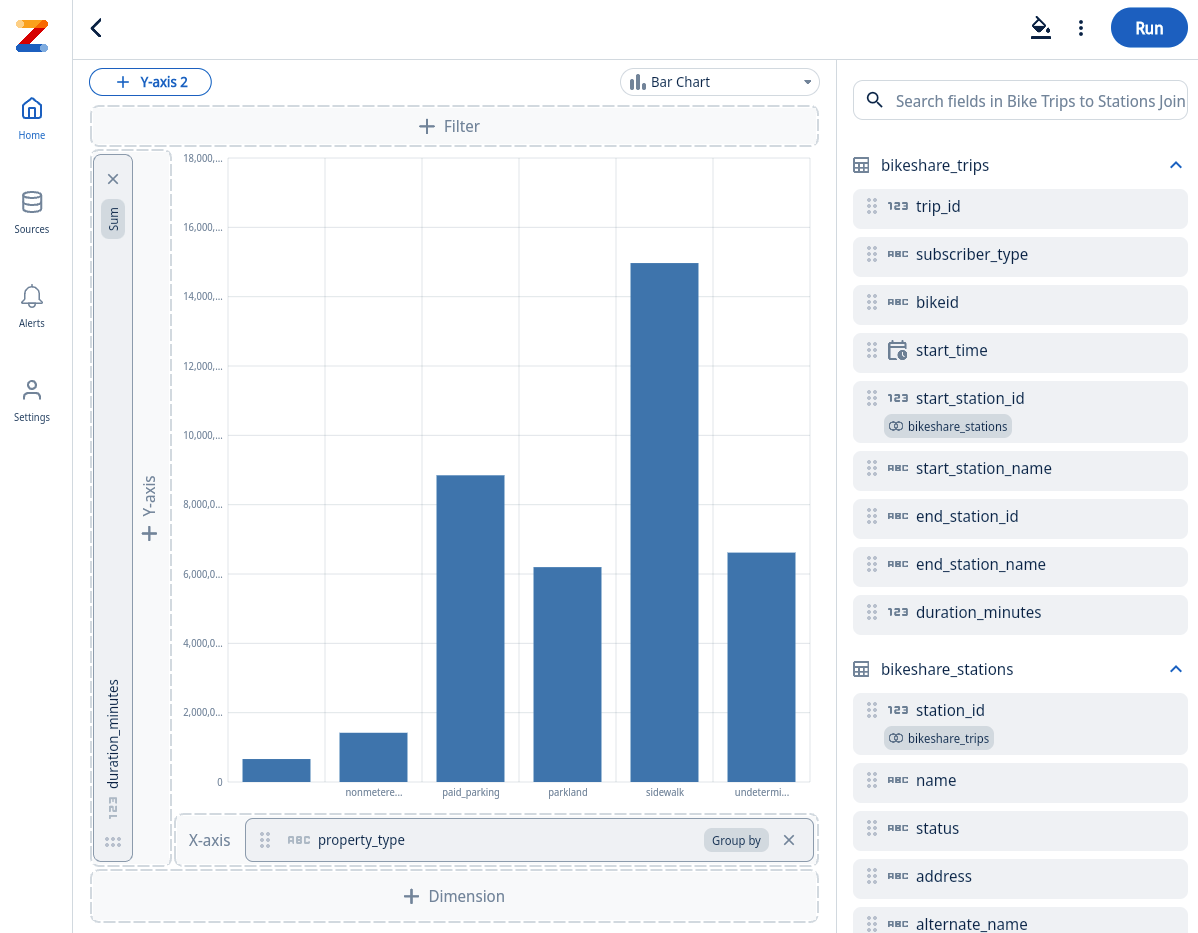
Querying an existing Join
- Click on the “Zing App” button to navigate to the Zing Data Web App.
- Querying a
JOINcan be done on the Web App as well the Mobile App. - You will see the created
JOINunder “Tables and Joins” on the home page. - Click on the
JOIN. You will be navigated to the Swift Query builder where you can ask a question. - Fields from all tables in the
JOINwill be available for you to start querying.
More information about how to ask a question can be found here.

