Lookup Tables for RLS
Row level security filters with any user attribute.
Row Level Security allows you to control access to data in a database by row, so that a logged in user can only view the data they are authorized for. You will be able to control “Who sees what in the chart?” by including a RLS filter to the question.
For example, let’s consider the question “Performance statistics per employee”. With a RLS filter, you can control the resulting data for this question so that the logged in user would only see their performance statistics as opposed to seeing statistics for all employees.
With Zing Data, the user’s email, username, or ID can be used for dynamic user-specific filtering. Support for other user attributes can be provided based on your requirement. Reach out to our team to integrate other user attributes.
Create a data source with a lookup table.
The lookup table in your datasource should have a email field (which is the lookup for logged in users in Zing), along with any other attributes you’d like in your lookup table.

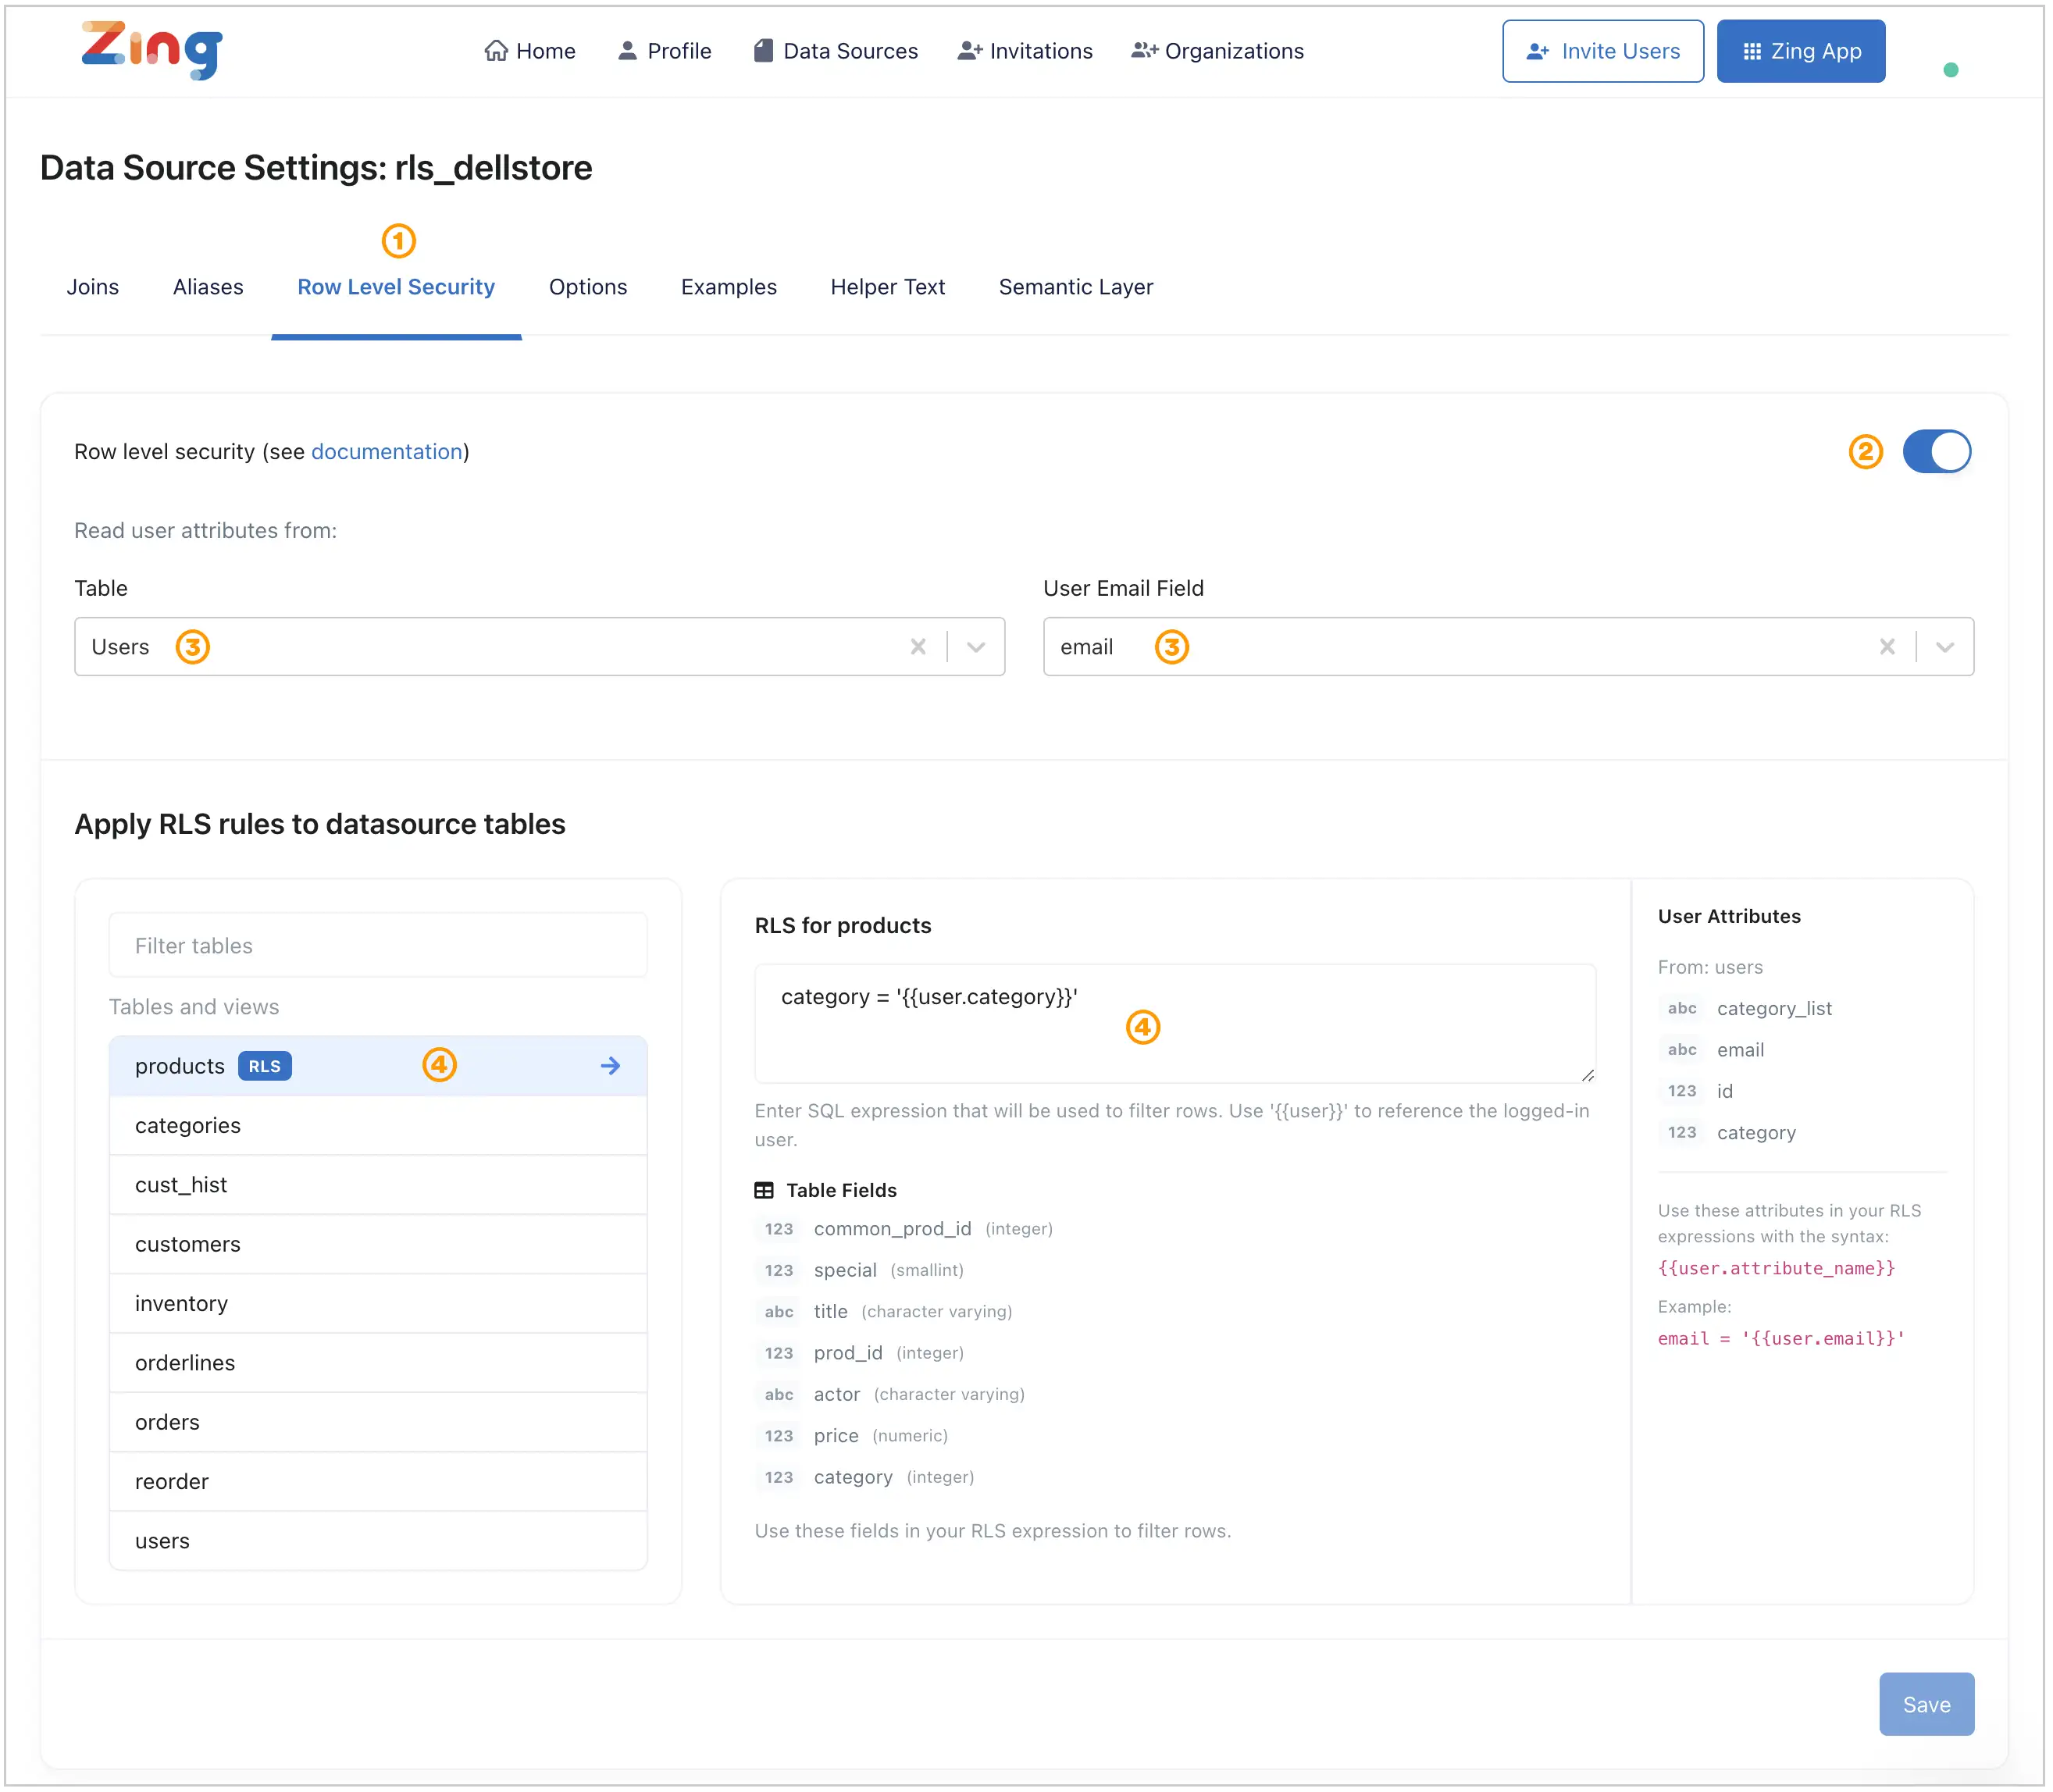
Go to your data source in Zing Console and select the ‘Row Level Security’ tab
Activate RLS with the toggle on the right
Select the lookup table and field
Create an additional filter for RLS on the field you require RLS filtering on. This can be done via the Visual Query Builder or via Custom SQL.


Go to your data source in Zing Console and select the ‘Row Level Security’ tab
Activate RLS with the toggle on the right
Select the lookup table and field
Select one of the available tables and enter a SQL expression into the input box that will be used to filter rows. It should evaluate to TRUE for a given row to be accessible to a user.
You can add RLS configurations at the table level using a mix of the lookup attributes or conditions.
 An example RLS condition could be –> email = ‘{{user.email}}’ OR ( ‘{{user.Role}}’ = ‘Manager’ AND ‘{{user.Office_Location}}’ = ‘Boston’)
Row level security filters with any user attribute.
Centralized Row Level Security in Zing lets you control what data each user can see based on that user’s attributes and conditions you specify.
Available on iOS, Android, and the web


Learn how Zing can help you and your organization collaborate with data